
Search Wild Foods Home Garden & Nature's Restaurant Websites:
Dandelion
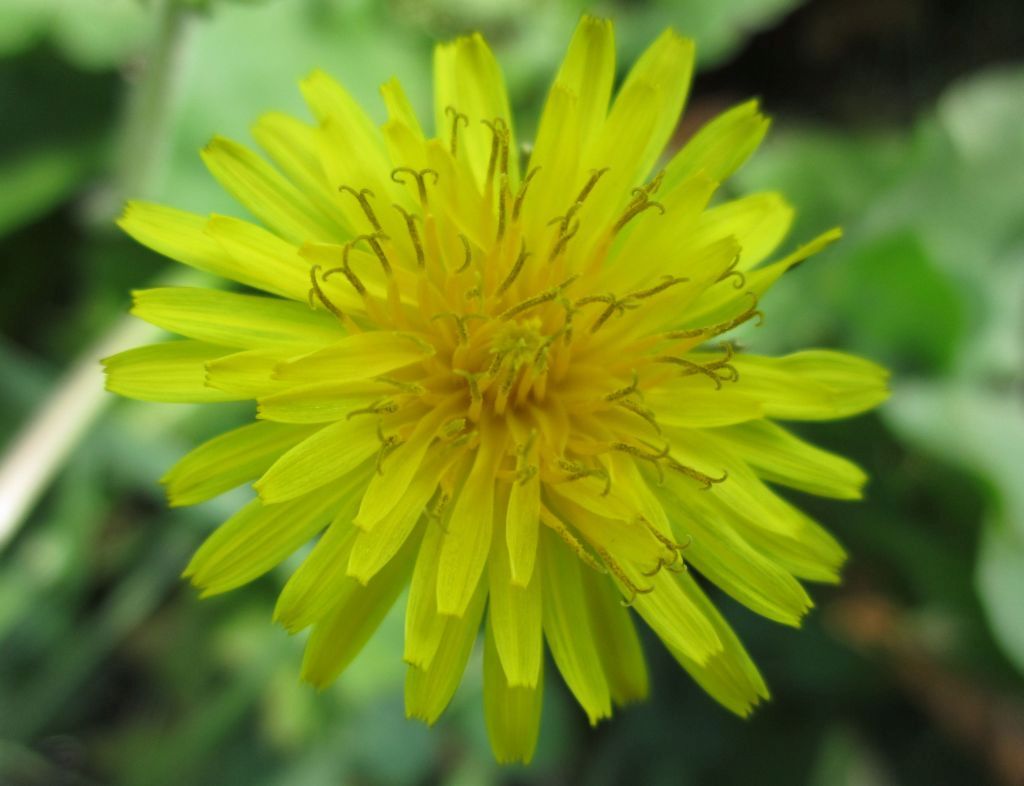
(NOTE: If you are not interested in growing Dandelions, but just finding the plant and using it, try going to the Nature's Restaurant Online site for Dandelion.)
Dandelion (Taraxacum officinale).
If you have the garden space, this is a great plant to grow at home. Very often in lawns, but since they are mowed down with the grass, the leaves are small, and for some reason, tougher. In a garden, it can grow nice big leaves for daily use, and big, straight roots for harvest as well. Composted manure or composted grass clipping and house scraps and some leaf mulch in the fall will make them do much better.
Is the growing of this plant compatible with Natural farming, Ecoagriculture or Eco friendly agriculture, Ecological farming, Sustainable agriculture, Agroforestry or Agro-sylviculture and Permaculture: This plant can be grown using conventional tilling based gardening methods, or using Natural farming or no-till gardening methods. Once established in an area, this plant, whether grown for greens & roots or just greens, does not need the soil tilled. However, if the soil becomes compacted, it is best to till in organic matter and start again, especially if growing for the roots.
Seeds: Of course, you can gather the seeds from Dandelions you find, and that is what I do. But you can also purchase the seeds from seed companies. When you purchase from seed companies, you have a choice of the variety to buy. There are a few varieties, many are less bitter than their wild cousins, and there are even varieties that don't spread as fast as wild ones.
Gather up the ripe seed heads when they are just about to blow off the flower head. Save the seeds until early spring, or plant right away. To get better germination rates, cold stratify the seeds for a week or two in the fridge before planting.
Soil & Site: Though this is a plant that adapts most conditions, for the best quality of leaves, and especially roots, you want to have soft, loamy soil that is soft down to at least 25 cm (10 inches). They will grow in full sun, but you get better tasting greens if you grow in partial shade, or full shade that is bright - not dark shade. The ideal is morning sun, then shade before the heat of the mid day sun.
To prepare the soil, turn it over with a shovel or tiller when you prepare the rest of the garden. If your soil is very rich, or you have already grown a Green Manure crop in the area, you are ready to plant. If not, mix in well some composted manure or a little general garden fertilizer in pellets. This plant can grow in slightly acidic conditions, but it likes the soil to be slightly alkaline, so if your soil pH is below neutral (pH 7.0), add some lime to the soil. Add lime as well if you dig in peat moss to increase the organic matter in the soil. Shovel a little of this prepared soil into a wheel barrow or a bucket for after planting. Finally, rake the area over flat where you are going to plant. The soil is now ready.
Planting: You need to evenly spread the seeds over the area you want to grow them. Because the seeds are so small, this can be hard. My preferred way of doing this is to take a bucket half filled with fine, slightly dampened potting soil, and mix in the seeds very well by hand. Mix and mix until you are sure the seeds are evenly mixed into the soil. Then take the soil and spread it evenly over the area you want the crop to grow. Lightly tamp down. Next, spread the soil over this that you put into the bucket or wheel barrow, then lightly tamp down - 6 mm (1/4 inch) at the most . Best to add a very thin layer of finer mulch over this area to keep the soil from drying out quickly. Keep the soil moist until they have sprouted and are growing well.
Maintenance: You only need to water if the soil is badly drying out. If it does dry out, the Dandelions will survive, but the leaves will get tougher and more bitter. To get the best quality roots and to prevent the plants from spreading all over, relentlessly keep popping off the flower buds all season long - don't let the plants flower at all. By fall, all the energy that would have gone into making flowers and seeds will have gone back down into the root for the next season, and the roots will be bigger.
Harvesting: The leaves can be taken a few at a time all season long, and the roots can be harvested in the fall or very early spring once the plants are two years old. You can harvest them all season long, but they are not quite as good. If you prepared the soil properly, you will have thick, fairly straight single roots.
There are a few things you can do to make the greens less bitter. The first is buy seeds that are from less bitter varieties. Another is to grow them where there is partial shade or bright full shade. It does help. If yours are growing in full sun, you can blanch them before you harvest the leaves by covering the plants with something to prevent them from getting full sun. You will need to do this at least a week before you pick them, two weeks is better. I find the best way is to make a simple wooden frame covered with dark garden fabric. Make it high enough to keep the fabric off the leaves. Cover the top and half way down the sides. A 30 X 60 cm (1 X 2 feet) by 45 cm (1 1/2 feet) high cover that you can move around is a good way to do this. Cover a couple of plants at a time, use the leaves from them, then move on to a couple of other plants. Another way, is just to pick young, smaller leaves. The younger and smaller, the less bitter. The final thing you can do, is quickly boil the leaves, pour off the water, and use the greens in your meal.
The ones you don't take for the roots will come back year after year for the greens. I suggest a three or four section system of rotation for this plant if you want to harvest roots every year. Take the roots from one section each fall, and replant that one the next spring. The next year, take the roots from the next section, and replant that one the next spring, and so on. With this method, you will always have enough greens and roots. By the way, don't let them get overcrowded, thin this plant so each one has its own square that is about 25 X 25 cm (10 X 10 inches). That way, the roots will get thicker instead of just having a pile of threadlike roots from many. If the spacing is right, each plant will get enough room, but there will be no soil exposed which helps keep the soil moist.
Using: There is a strange thing about Dandelion leaves. When you first eat them, they taste quite bitter, but as you have them more and more, you notice it less and less. Other people I've spoken to about this agree, so if you have them for the first time and find them very bitter, just keep eating a small amount regularly, and soon you will find them quite tasty.
Good raw in salads, or a snack on their own, when out walking. Personally, I like them best cooked with a few leaves in a stir-fry or soup. I find if I use too many, the taste is compromised, but with a few, they add a nice flavor. The well cleaned, dipped in batter and deep fried crowns are a real treat.
There are a couple of ways I regularly use Dandelion roots. One is to add small bits chopped up in soups – they go well with Burdock roots in soups.
The main use I have for the roots is for making coffee with the water Dandelion and Chicory roots have soaked in overnight. Wash them well, cut up into little bits, dry well or roast lightly in an oven on a flat tray at about 250-300 Fahrenheit until they start turning a gold-brown. If you don't roast them, but just dry them the taste is sharper and less coffee like. Keep them in lidded jar until used. I put about 1/2 teaspoon per cup of water the night before, and in the morning, strain them, and use that water for making coffee. I think it makes the coffee taste better (I use a dark roast coffee), and you don't get that hollow jittery feeling with coffee made that way. I now usually use half Chicory and half Dandelion (see Chicory section) with a small amount of Burdock. I don't use cream or sugar, but I have found for the very occasional time I use some milk, it does not affect the taste negatively.
You can let some of them produce flowers for both seed and food. The famous yellow flowers are edible and mild. Pull the pedals from the stem and cup that holds the yellow pedals, and put on top of a salad before serving. They have no bitterness and look fantastic. You don't need many to make the salad far more visually appealing. There is very little noticeable flavor to them, so they go with any salad, and can even be served fresh on top of a cooked meal to make it look nice. They have to be fresh, yellow flowers. They turn quickly to seed, and any time other than newly opened bright yellow flowers are not worth gathering.
Description:
- USDA Plant Hardiness Zone: 3-9 (More information on hardiness zones).
- Soil pH: 6.0-8.5
- Plant Size: Up to 70 cm (28 inches) tall, usually much smaller, can be very low on lawns when cut repeatedly
- Duration: Perennial
- Leaf Shape: Much longer than wide, usually widest near tip.
- Leaf Phyllotaxis (Arrangement) on branch: Basal - all leaves come from the base - there is never a stem with leaves coming off it.
- Leaf Size: 5-45 cm (2 to 18 inches) long and 1-10 cm (2/5 to 4 inches) wide
- Leaf Margin: Ranging from deep to very shallow lobes, sharp or dull saw-toothed.
- Leaf Notes: Large central vein that extends from base to tip, sometimes a reddish purple from about half way on leaf to base getting deeper in color closer to the base. Sometimes central vein is green only.
- Flowers: Bright yellow, usually 2.5-3 cm (1 to 1 1/4 inches) diameter
- Fruit: 2-3 mm long, less than 1 mm wide attached to a whitish pappus that acts like a parachute to let the fruit be carried by the wind.
- Habitat: A colonizer of disturbed ground - fields, paths, lawns, pastures. Requires good light, so not found in darkly shaded woods.
Web Resources:
- Seed search on the web here (Google search) and here (Bing search).
- Recipe search on the web here (Google search) and here (Bing search).
- Pictures on the web here (Google images) and here (Bing images).
- Interactive USDA distribution map and plant profile here.
- The Biota of North America Program (BONAP) distribution map here. BONAP map color key here.
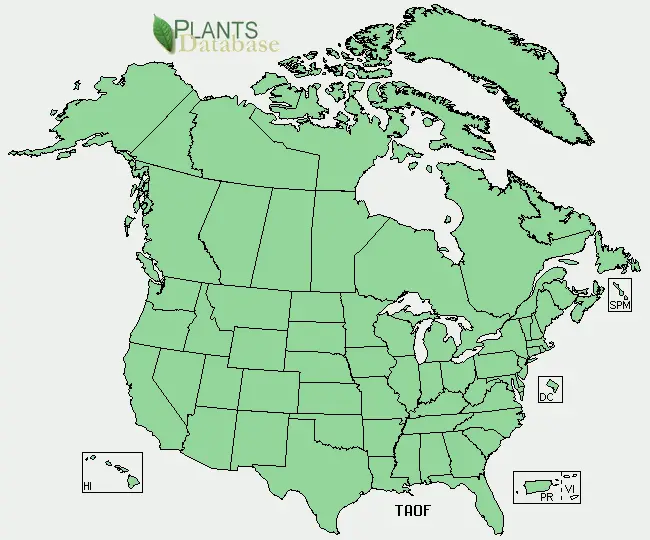
Dandelion (Taraxacum officinale) range. Distribution map courtesy of U. S. Department of Agriculture (USDA Natural Resources Service) and used in accordance with their policies.
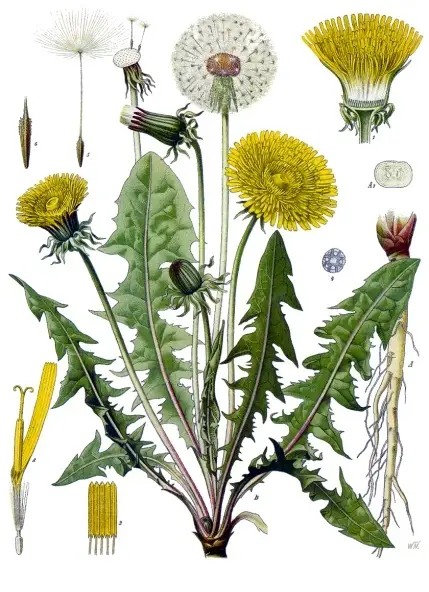
Drawing. (By: Franz Eugen Köhler, Köhler's Medizinal-Pflanzen)
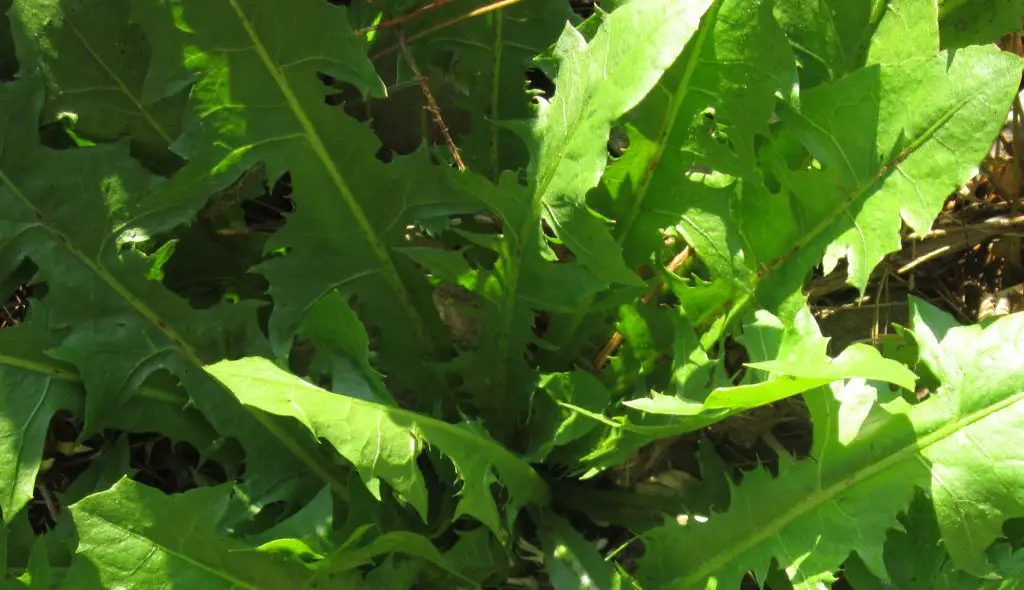
Dandelion leaves in a garden grown specimen.
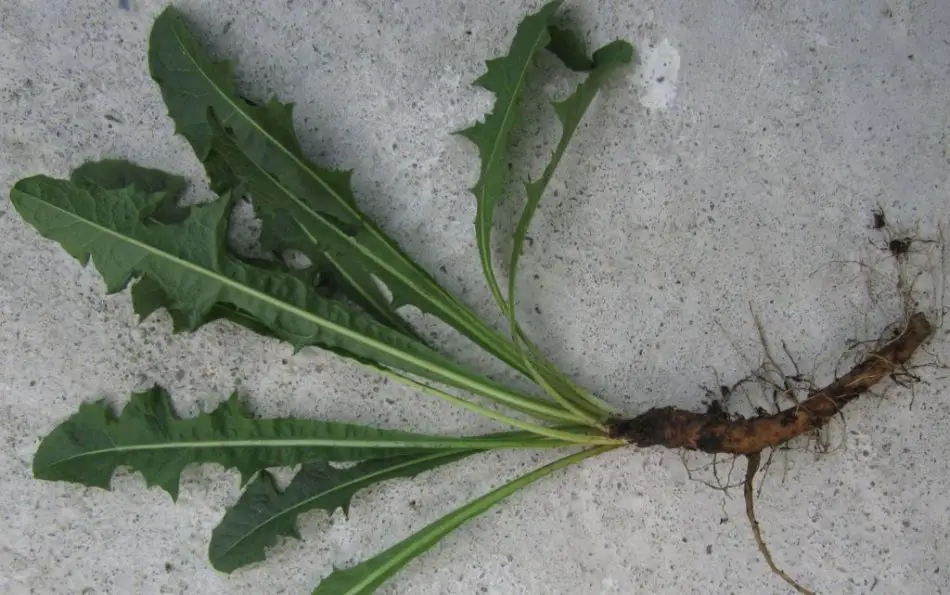
Cut off the root, wash and use, and use the excellent looking leaves for soups or stir-fry's. If digging up a lot of roots for drying or roasting for off-season, save the root crowns, wash well, batter and deep fry - a very nice treat.
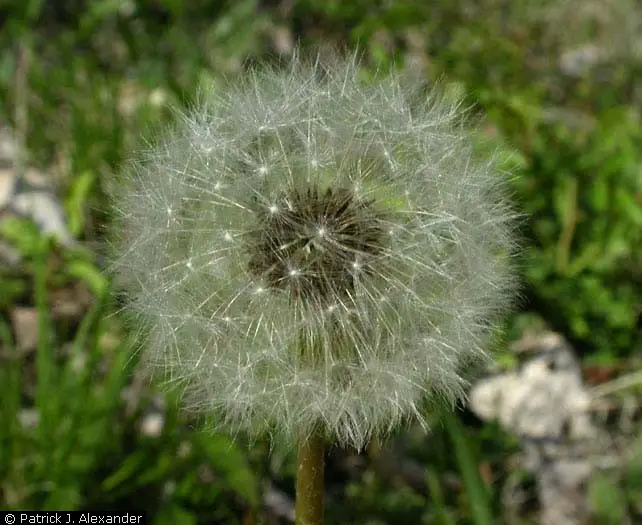
Dandelion flower in seed stage. (Patrick J. Alexander, hosted by the USDA-NRCS PLANTS Database)
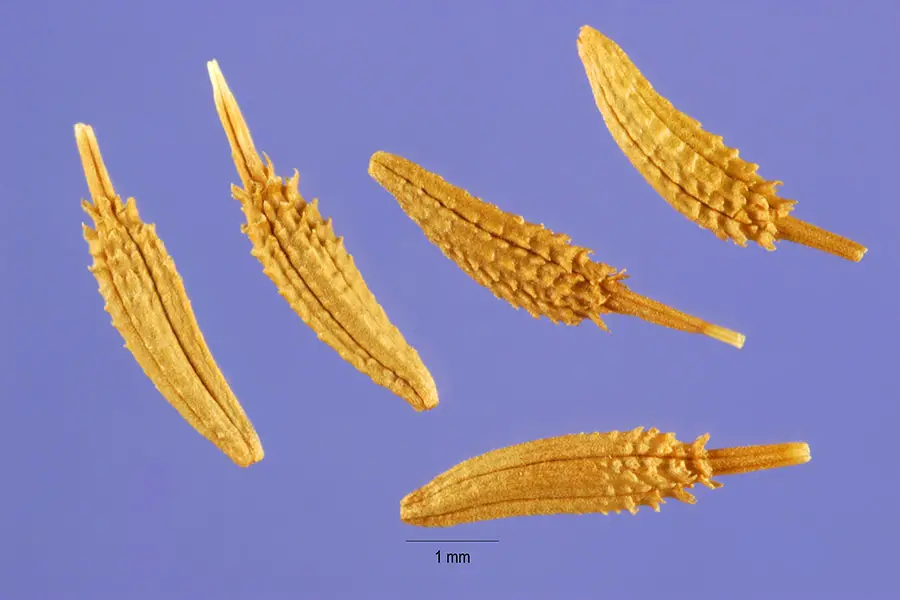
Danelion seeds. (Steve Hurst, hosted by the USDA-NRCS PLANTS Database)
Search Wild Foods Home Garden & Nature's Restaurant Websites:
Share:
Why does this site have ads?
Originally the content in this site was a book that was sold through Amazon worldwide. However, I wanted the information to available to everyone free of charge, so I made this website. The ads on the site help cover the cost of maintaining the site and keeping it available.
Google + profile
