Search Wild Foods Home Garden & Nature's Restaurant Websites:
Asparagus

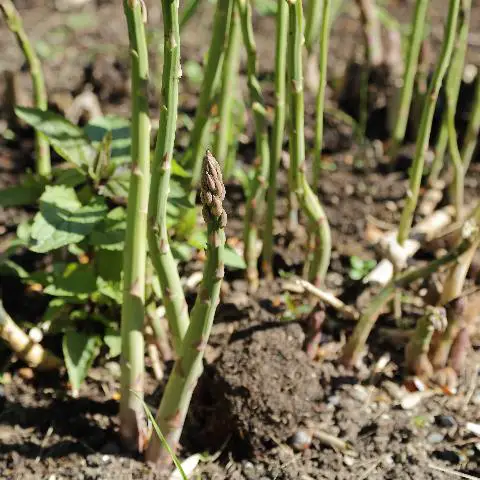
Asparagus in spring ready to harvest in garden.(Credit: C T Johansson, CC BY-SA 3.0)
(NOTE: If you are not interested in growing Asparagus, but just finding the plant and using it, try going to the Nature's Restaurant Online site for Asparagus.
Asparagus (Asparagus officinalis) spears (young shoots) are a great food. They are also a fantastic plant to get started in a garden. I'm not fully sure this qualifies as a wild food plant, but I find it all the time in the wild, and you can get these started at home without buying anything. There are three ways to do this - plant seeds, buy crowns, and transplanting established plants.
Is the growing of this plant compatible with Natural farming, Ecoagriculture or Eco friendly agriculture, Ecological farming, Sustainable agriculture, Agroforestry or Agro-sylviculture and Permaculture: Once established, this plant does not require any tilling of the soil, making it a great plant for Natural farming, or no-till gardens.
Seeds: To find seeds in the fall: Look for a blue/green plant on a single, finger thick stalk that is about a meter (3 feet) tall, with a wispy look. The leaves are very thin, and the whole plant looks like a cross between a delicate fern and a small tree. In the fall, there should be red berries on the plant. There are actually many varieties of them, and some have foliage that stays closer to the ground, but these can be much harder to spot. Often, you will see them in ditches along roads. Gather seeds (inside the red berries) from wild plants in the fall and plant in the spring. Put them in a baggie in the freezer for the winter.
If you can't find any in the wild, you can also buy a pack of seeds in the spring available at most places that sell garden seeds.
Crowns: You can buy mature plants that are known as "crowns" from nurseries. If you get them in the spring, plant early. If you get them in the fall, just plant before the ground freezes. You can take a couple spears from these the next year, and more the year after.
Transplanting: The third way is to transplant established plants. This can be relatively easy or hard depending on the soil you get them from. If it is loose, sandy soil, you are in luck. If it is hard clay, you are in for one major job (personally, I'd pass). After many years in one spot there generally are many of the crowns packed together - they have multiplied. First, the plants must be dormant, so that means early spring very soon after the ground thaws, or the fall before the ground freezes. I'd suggest the fall if you have a choice. A bonus is, that if you do a good job, and plant mature crowns, you will get a harvest the next spring - often a good one.
To dig them up, you will need a strong shovel and spading fork. If the clump is small, dig a trench all around it as deep as you can go, then dig under the plant even deeper starting from the bottom of the trench. The inside wall of the trench should be at least 25 cm (10 inches) from the edge of the stalks of the plant. Using the spading fork, then lift and pry out the mass of soil and roots. It will start to fall apart, but the trick is to do as little damage to the thicker roots. There can be a few crowns per lump to many, many of them all intertwined. In sandy soil, just carefully, slowly work them apart until you have each crown and its roots separated. When in clay, you might have to use a garden hose with a strong spray of water to remove this soil before you can begin the process.
If the clump of them is huge, and goes on for a sizeable area, best to either start from a side or edge and work them out as you go along. Or, you can just sacrifice some and trench around an area of them knowing that you are destroying a few. It really is soil dependent. If you are working in loose sandy soil, best to work from a side and keep working them out as you go along. In clay, you might have to do it the second way.
Soil & Site: As long as the soil is not mucky wet, most soil types are fine. No more acidic than pH 6.5, or alkaline than 7.5, though they can survive up to pH 9.0. They like mainly sun, and they prefer a source of moisture and soil rich in organic matter. Try to make the soil as loose and loamy as you can. Best to turn the area over and dig in some composted manure.
Planting: To plant the crowns: There are different ways to approach this depending on your garden. You need 6-12 plants (crowns) for each person in the house who eats Asparagus, and some people say up to 20 per person. You have to decide on how much and often you will be eating them, and if you are going to freeze some for eating out of season. Next, depending on the space you have you can either dig individual holes in a pattern for each crown, dig trenches, or place them all over the place - one here, one there.
For individual holes: First dig a hole a minimum of 30 cm (12 inches), but better about 45 cm (18 inches) deep, and at least 30 cm (12 inches) wide all the way down. Mix some soil you took from the hole with some composted manure right in the hole, then make a mound in the hole so that when you set the crown on the mound, the top of the crown is about 10 cm (4 inches) from where the soil surface will be. You just have to try, and adjust the mound. Then, take the crown, and spread the roots over the mound like putting a wig on a head. You want roots all the way around, going down at an angle. Cover with more mixed composted manure and soil from the hole, tamp lightly and cover with a mulch - about 5-10 cm (2-4 inches). Keep plants about 60 cm (2 feet) apart. If you are going to plant quite a few, you can do this in trenches. If the nursery where you buy the crowns has different instructions, follow what they say - there are different cultivars that may require different techniques and depths.
For the trench planting method: Keep trenches 1 meter (3 feet apart) or more, and keep each crown 60 cm (2 feet) apart in the trenches. Each trench should be 45 cm (18 inches) deep, and at least 30 cm (1 foot) across. Plant as above mixing some soil and composted manure in each hole and making mounds every 60 cm (2 feet) to set the crowns on.
For planting seeds: Soak the seeds in water for a few hours before planting, then plant the seeds about 4 cm (1.5 inches) under the soil and cover. They can take a while to germinate, but most will. Though it will be the spring of the third season before you get to pick the spears, the great advantage with seeds is the very small amount of work compared to the other methods - no digging big holes or trenches.
Maintenance: Each fall and spring, spread a little composted manure, then mulch around each plant or along each row. That should be good enough for feeding it. Cut down the plant in late fall. You can harvest the berries for seeds, then cut down. Just as a note: though the plant shoots are edible, the berries are poisonous. If you keep enough mulch around them, the weeding should be minimal, and any that do come up, hand pull.
Harvesting: If you planted seeds, the third spring begin harvesting. If you planted purchased crowns, follow what they tell you, but in general you can take 1 or 2 spears the next spring, but wait until the second spring before you start to harvest a normal amount. Leave the ones thinner than a pencil to grow up. If you transplanted mature crowns that you untangled, you should have a great harvest the spring after planting - they seem to send up a good crop when they get their own space.
Harvest when they are around 15 cm (6 inches) tall, and if the tops are starting to open up, don't bother, they will be woody anyway.
Description:
- USDA Plant Hardiness Zone: 3-8 (More information on hardiness zones).
- Soil pH: 6.5-7.5 (can grow up to 9.0, but best to stay in the range given)
- Plant Size: Up to 1.5 meters (5 feet) high
- Duration: Perennial
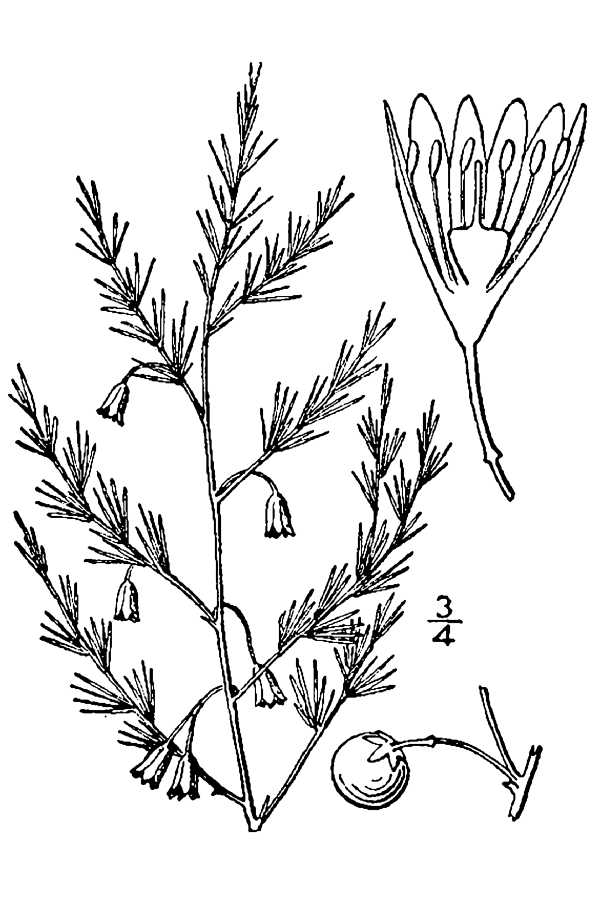
- Leaf Shape: Multi-branched, feathery, soft needle like, 4-15 leaves in clusters, bluish-green color.
- Leaf Size: 6–32 mm (0.24–1.3 in) long and 1 mm (0.039 in) wide
- Flowers: 4.5–6.5 mm (0.18–0.26 in) long, bell shaped, green-tinted white
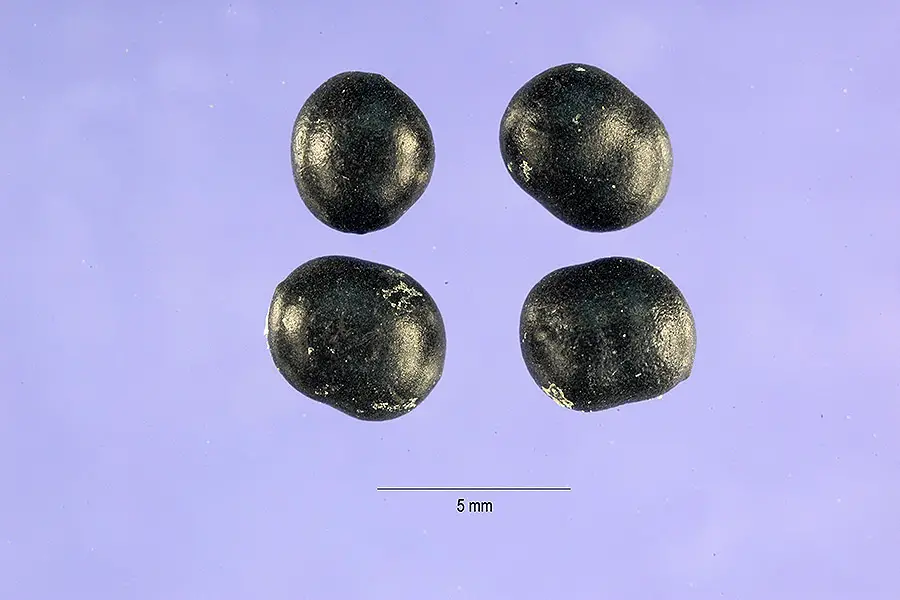
- Fruit: Poisonous red berry, 6-10mm (1/4 to 2/5 inch) diameter, spherical with small black seeds inside
- Habitat: open areas, prefers full light, rich, moist soil but not wet - fields, along fences, sides of ditches, not in shaded woods, but can survive in partial shade.
Web Resources:
- Asparagus pictures on the web here (Google images) and here (Bing images).
- Asparagus berries (seeds) pictures on the web here (Google images) and here (Bing images).
- Asparagus crowns pictures on the web here (Google images) and here (Bing images).
- Interactive USDA distribution map and plant profile here.
- The Biota of North America Program (BONAP) distribution map here. BONAP map color key here.

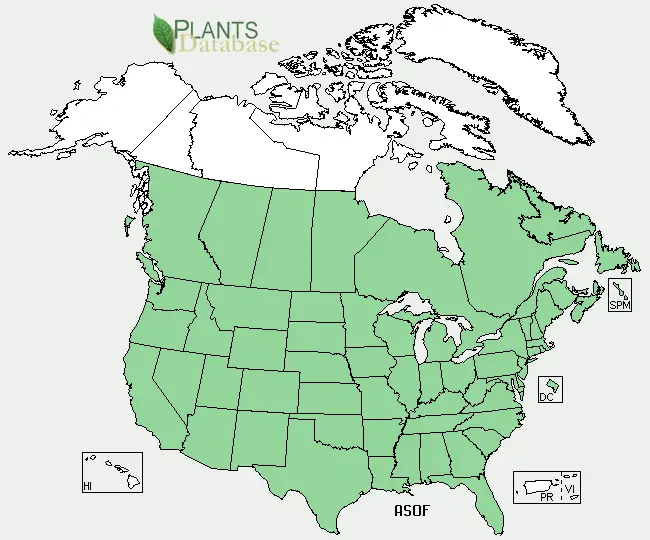
Asparagus (Asparagus officinalis) range. Distribution map courtesy of U. S. Department of Agriculture (USDA Natural Resources Service) and used in accordance with their policies.

Drawing of Asparagus. (USDA-NRCS PLANTS Database / Britton, N.L., and A. Brown. 1913. An illustrated flora of the northern United States, Canada and the British Possessions. 3 vols. Charles Scribner's Sons, New York. Vol. 1: 514)

Asparagus seeds. (Jose Hernandez, hosted by the USDA-NRCS PLANTS Database)
Search Wild Foods Home Garden & Nature's Restaurant Websites:
Share:
Why does this site have ads?
Originally the content in this site was a book that was sold through Amazon worldwide. However, I wanted the information to available to everyone free of charge, so I made this website. The ads on the site help cover the cost of maintaining the site and keeping it available.
Google + profile
