The Cedar Log Cabin
The Story of Living In & Restoring a Settler's Log Cabin
Adding an Authentic Loft
Background
The inside of the cabin wasn't much more than 400 sq feet. It was enough room for one person and two cats, as long as you didn't have a bed. A bed took up too much space, and just looked wrong in the main room to me.
The neighbours across the road, Bill and Elva, told me when they lived there, they had two rooms divided off and said there was an upstairs for their children. I had wondered what those filled in square holes were on the logs all around the main room. Turns out, they were the notches for the logs that were the floor beams. Odd thing was, they were only about 6 feet off the floor in the third log from the top. Picture showing notches here.
I asked Bill and Elva about this height issue, and found out something that was a bit of a shock. 14 years before we had bought the cabin, there was a concrete block foundation put in, to replace the log foundation that had rotted away completely. Not only were the foundation logs rotted, but the lowest cabin wall logs were rotted too.
Instead of replacing the bottom logs while putting in the block foundation, the owner just took them out and let the cabin drop lower by about a foot. This made the ceiling too low for the second floor, so he just cut it out. The sad thing is, Bill and Elva said the beams that held the second floor were hand hewn cedar, original to the cabin. I had found some old squared 5" X 8" inch logs in the yard that were hand hewn, took one over to Bill and Elva, and they confirmed it was one of the floor logs. It was beautifully crafted, with broad axe marks showing.
I decided then to put in a loft. It was too low overall in the cabin to put in a second floor again, but I thought a loft for a bed would both look nice and keep the bed out of the main room. I started in the spring of 2008.
By this time I had come to think of the cabin as a museum piece, so the loft must be fitting, and the only way to do that, would be to make it by hand from materials in the yard.
We had a red pine plantation at the top of the hill that had about 65 trees in it. Bill had planted it when they lived in the cabin. He had been working as a tree planter in the area. There were lots of trees left over, and the workers all took some saplings home for themselves. Bill said the plantations they were working on were for utility poles. Bill planted the trees close together, so they had grown up tall and straight – like utility poles.
Bill had been telling me that the trees needed to be thinned out, and had told previous owners, but no one did it. I thought I may as well thin out the lot by using the lumber from the trees to build the loft.
Main Beam
The first thing to do was put in the main log across the room to hold one end of the beams that the floor would be built on. The other end of the beams would go into the wall.
I chose a tree, and with an axe, cut it down. There was still snow on the ground, and the tree was quite tall. This was the first time I had done anything like this.
I chose a straight, tall tree with as little taper as possible, and began to cut it down with an axe.
The tree was so straight, that even cutting to the point where there was little left, it just stood there. I didn't know what to do. I decided to take a picture. I ended up getting a rope, putting it around the trunk as high as I could, went to the side of where the tree was to fall and gave a pull. It fell right where I wanted (to the picture's right), and landed in the open spot.
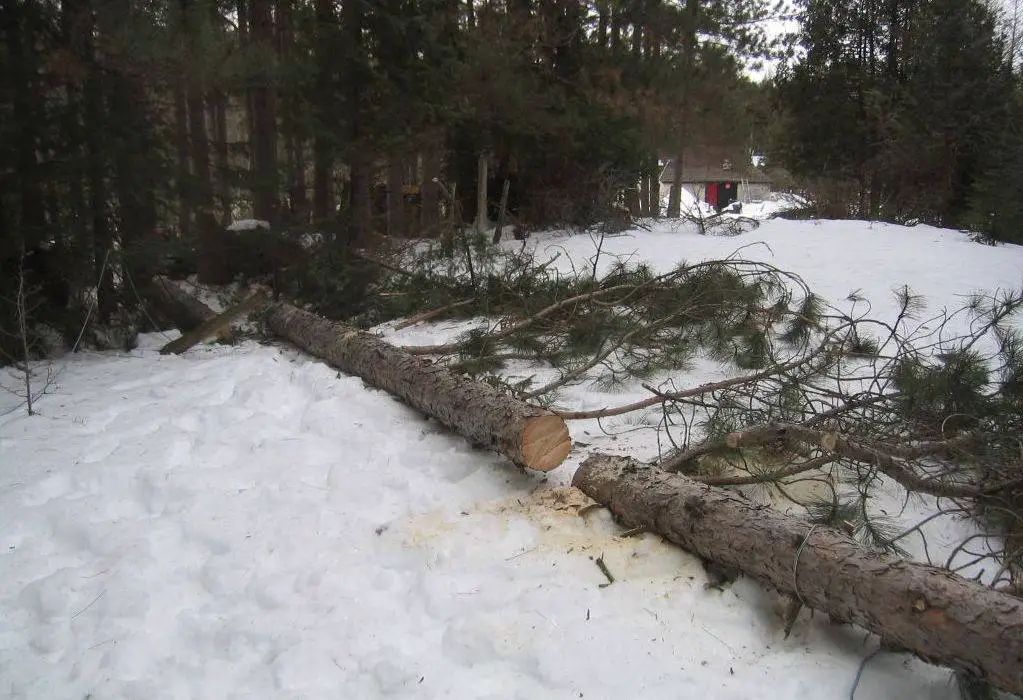
The distance between the walls where the main beam was to go was around 16 feet, so I found the best 18 foot section and cut it with a chainsaw.

Getting the log to the cabin turned out to be a big job. The log was just a bit under 11 inches in diameter, not including bark, at the thick end, and 9 1/2 inches at the thin end. The wood was green, making it even heavier. The only way I could move it, was to pull it with a rope tied to a piece of wood for me to hold, and roll it over the ground on round firewood. I was so very lucky the ground was still frozen. It took hours to get the log to the cabin.
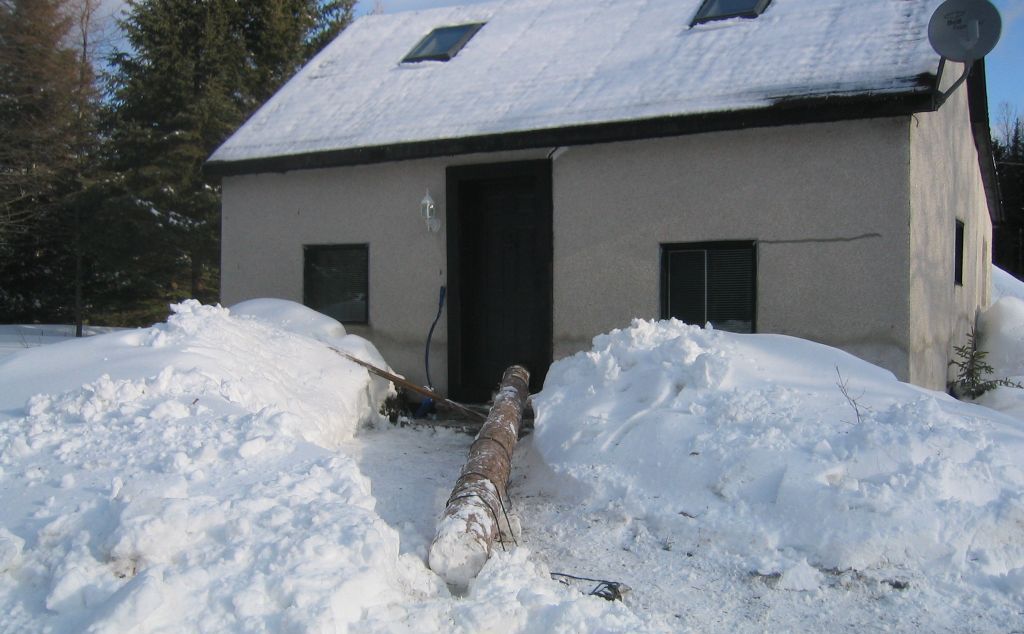
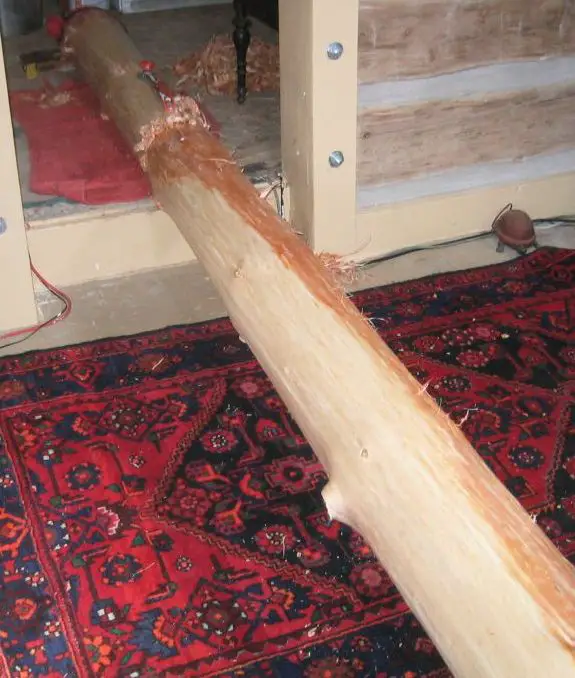
By the time I had pulled it back through the trees, along the yard, down the driveway, around the corner to the front walk, then up the walk I was tired and soaked from perspiration. Even though it was about minus 10 Celsius outside, I was stripped down to jeans and a T-shirt. One of the worst problems was, I just couldn't get a grip on the ground and spent a lot of time just slipping.
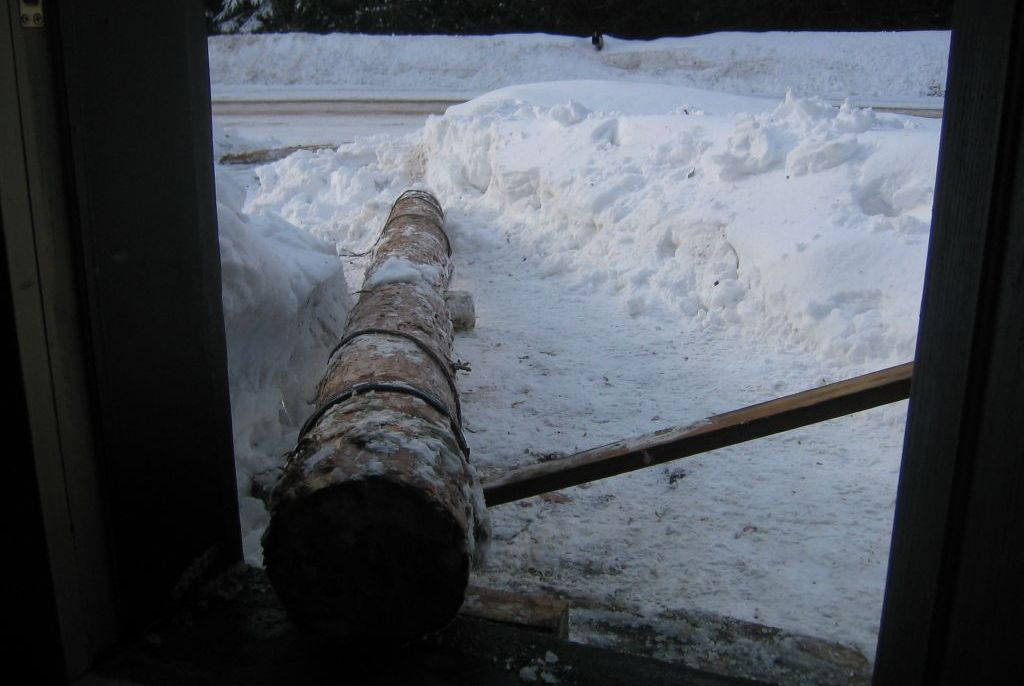
At the front door. It turned out, even with my feet pushed against the sides of the door, I wasn't strong enough to pull the heavy log up and in. I ended up using a 2X4 at the end of the log, levering it forward an inch at a time. Just getting the log through the door took about an hour and a half.
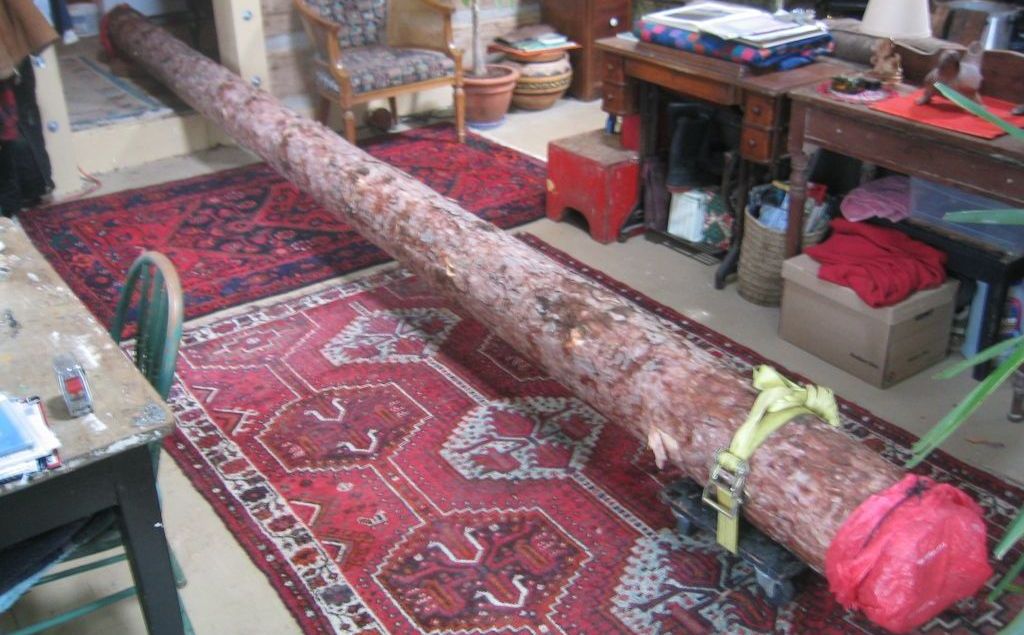
Finally inside. After covering the ends of the log so they wouldn't dry out too fast and check (crack) at the ends, I packed it in for the day with the log as the new centrepiece in the cabin.
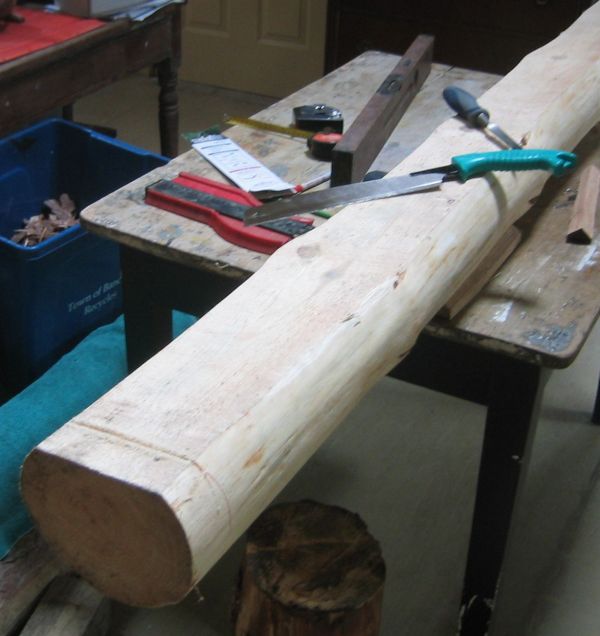
The next day I began the tedious job of removing the bark with hand scrapers. I didn't want to damage the log, so went slowly and carefully. I had read to not let the log dry with the bark on or it wouldn't come off, so I got it done in one full, long day. It was still cold out, and the wood stove would dry things out very fast.
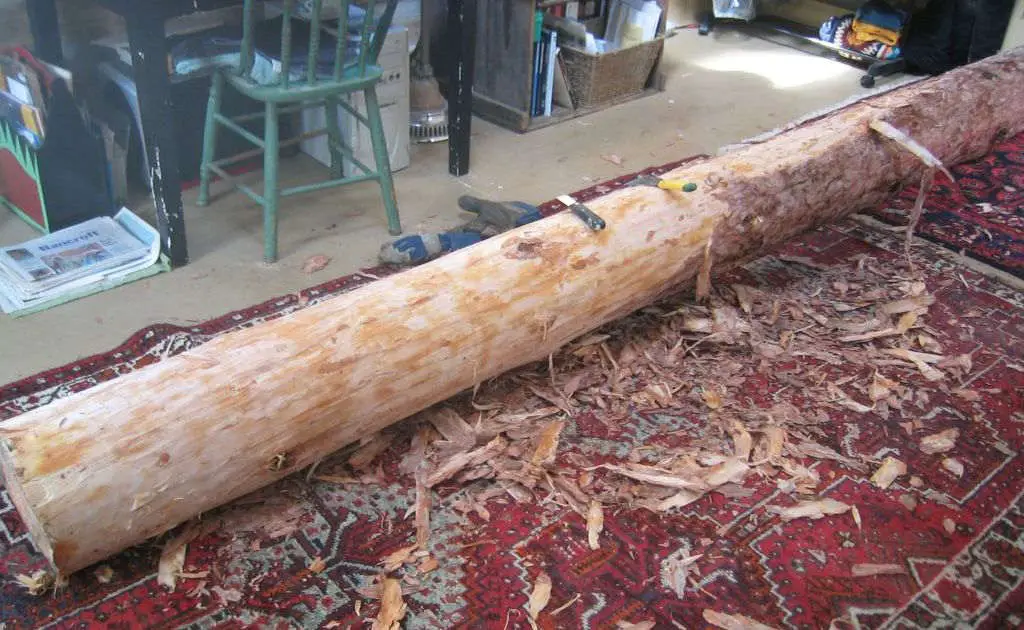
Once the bark was removed, I discovered that there was another layer underneath. It was a skin thick layer (Cambium) that looked terrible, so it had to go too. I found out through trial and error that a good quality paint scraper did the trick without damaging the surface of the log. However, it was slow going.
Once the reddish layer was taken off, and the log washed with hot water and soap to remove a sticky coating, the log was a beautiful blonde colour with a satin shine on the surface. When I saw that, I realized it had been worth all the work.
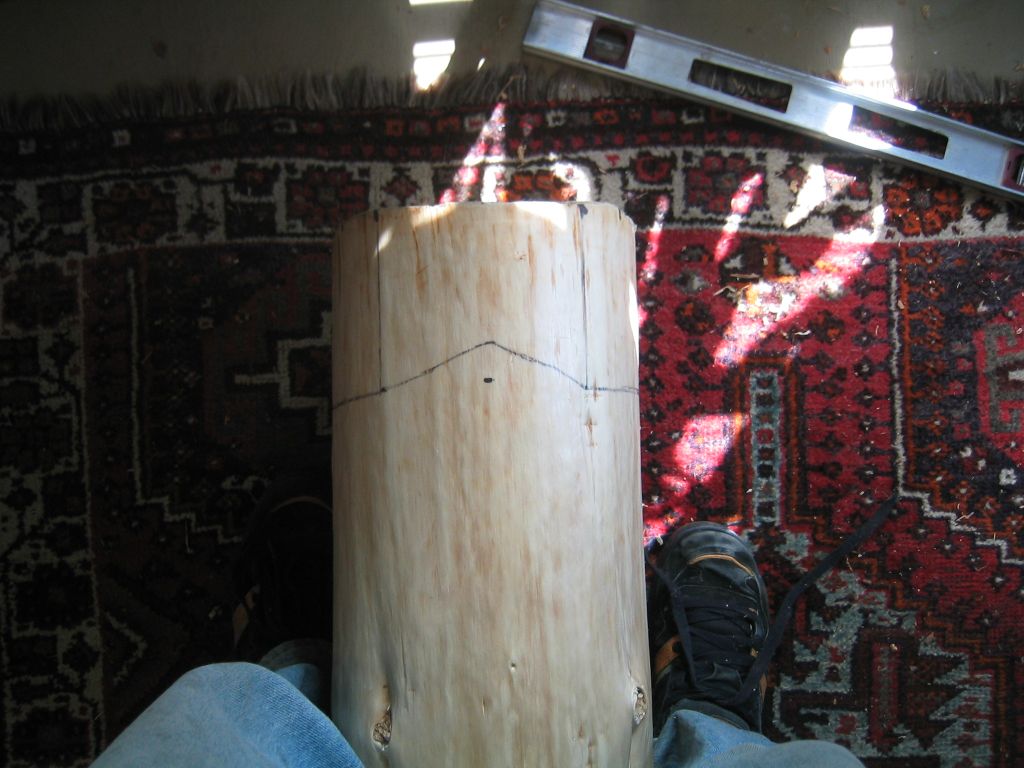
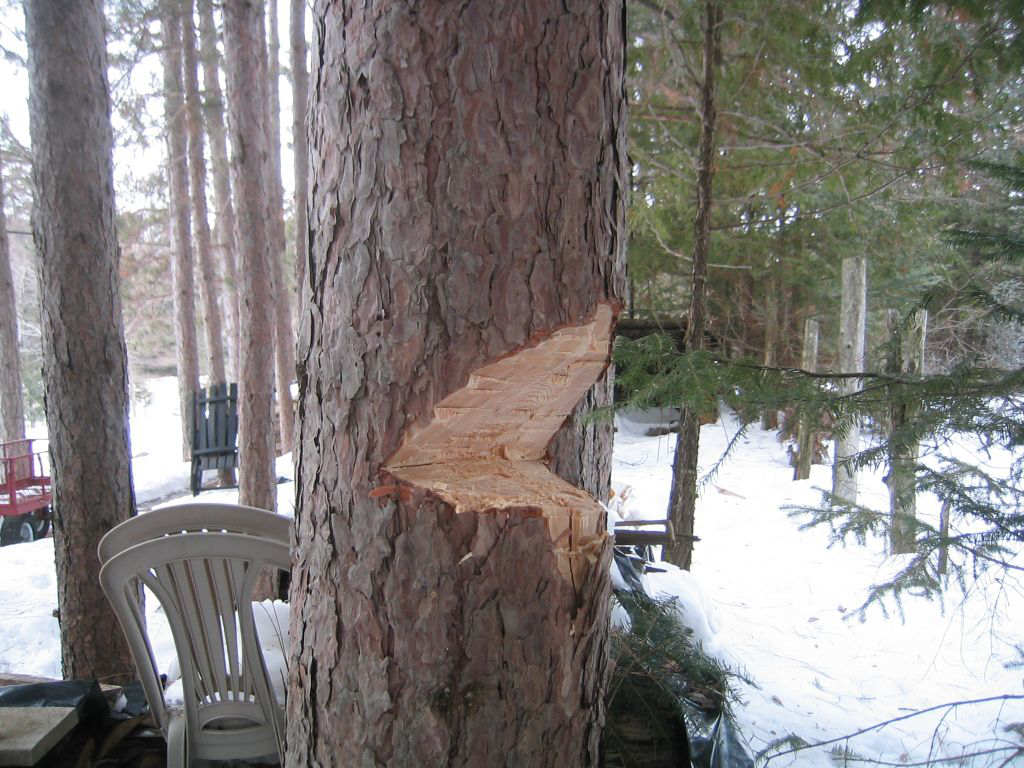
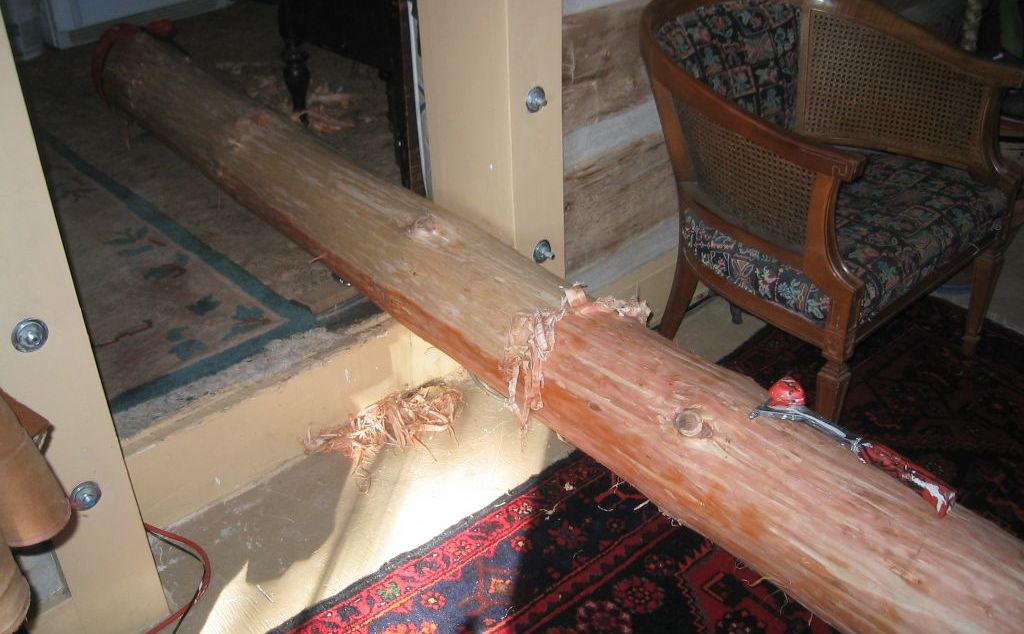
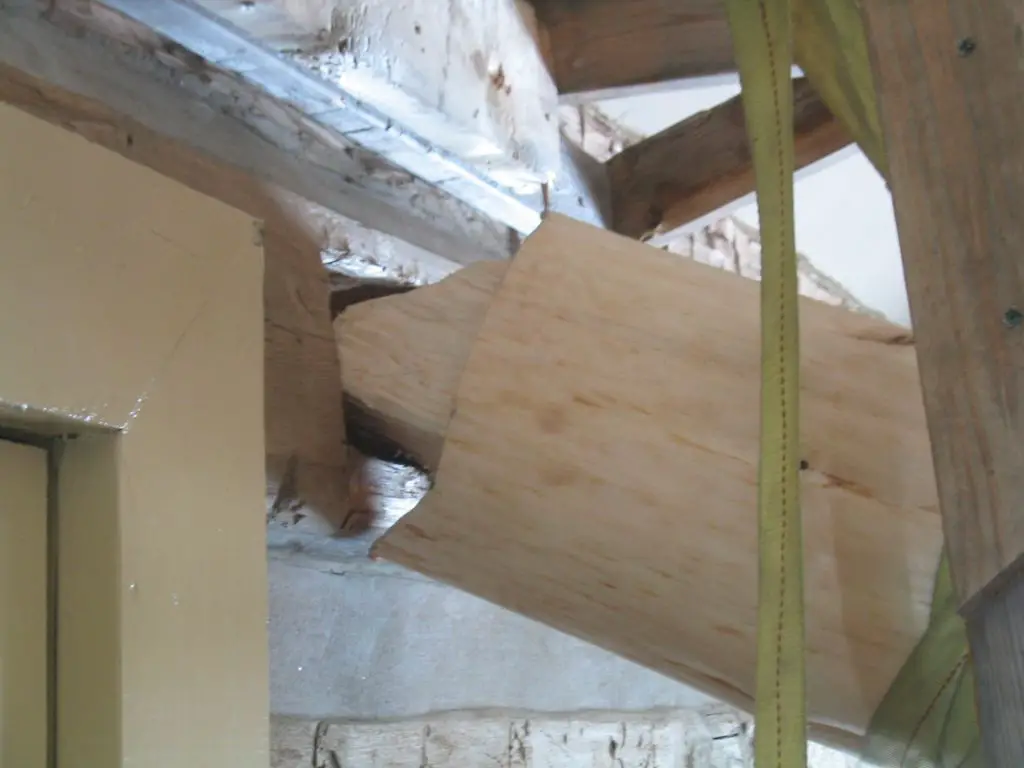
I had to make a tenon on the end of the log where it would fit into a mortise to be put in the log on the south wall.
The face of the wall log was rounded and uneven due to being hand hewn. I carefully measured and laid out the shape on the main beam end.
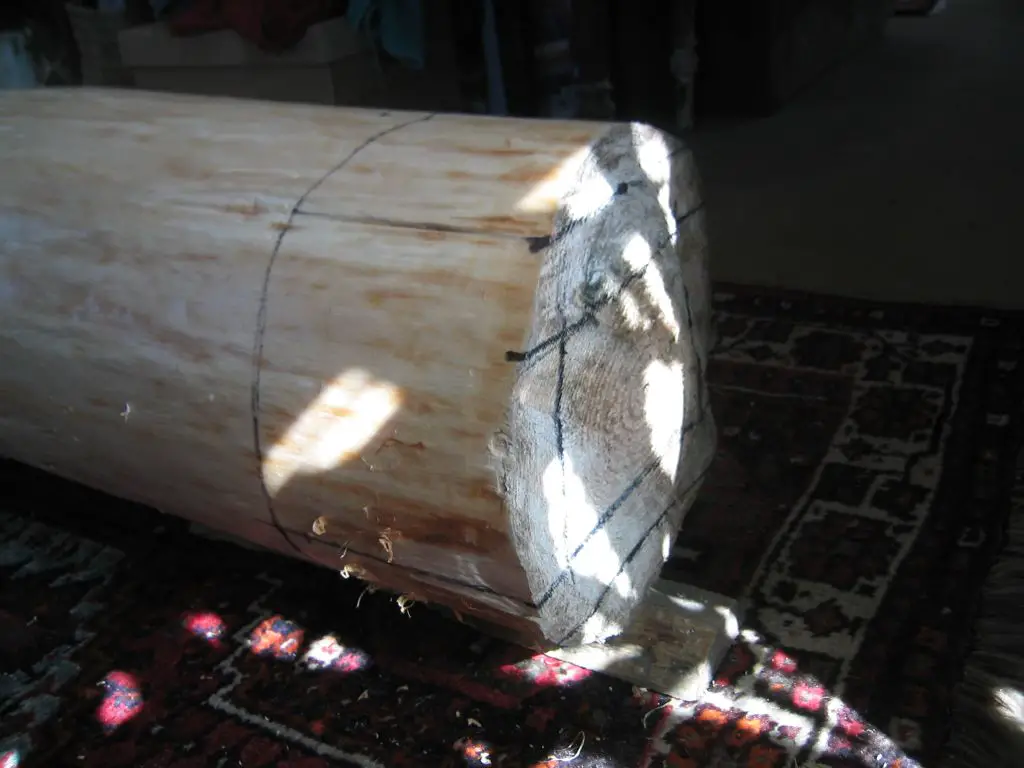
With a sharp chisel and a chunk of wood for a mallet, I carefully chopped out the shape of the tenon and the inverse of the shape of the wall log.
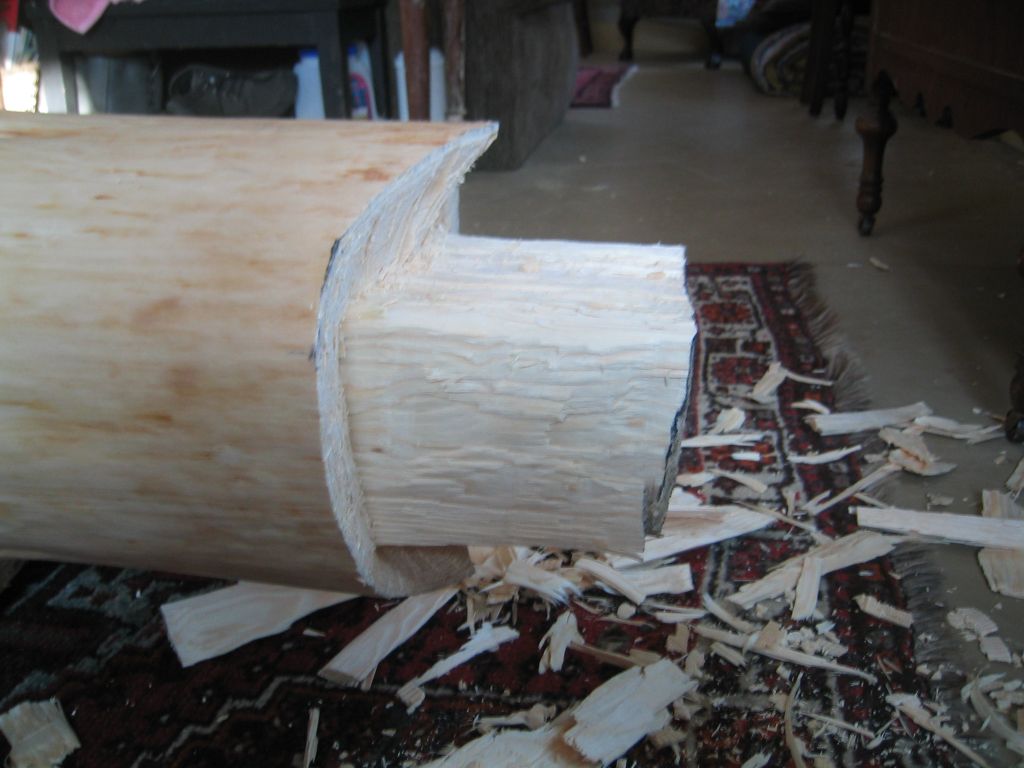
This was the first time I had done anything like this and was very careful to get it right.
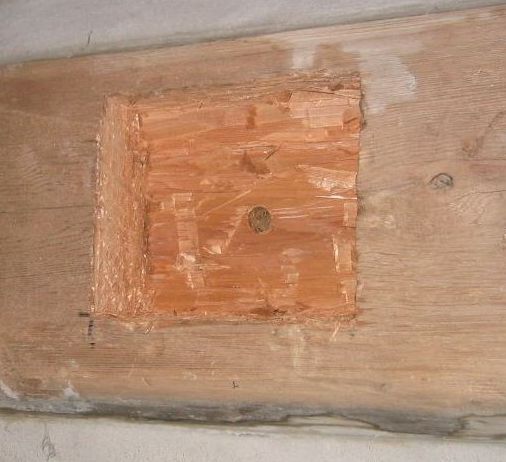
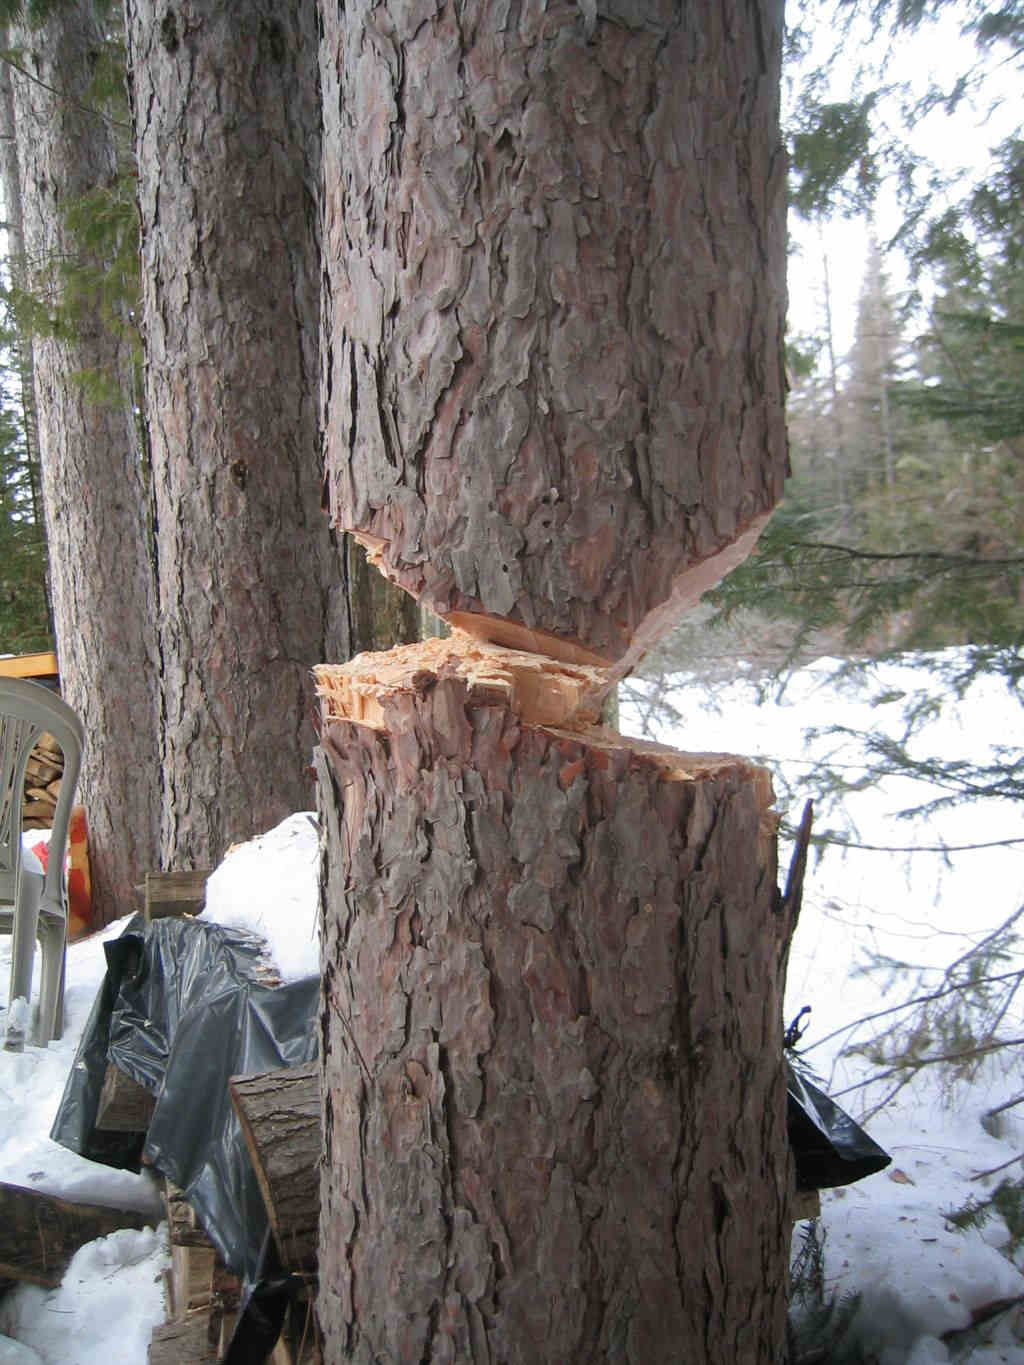
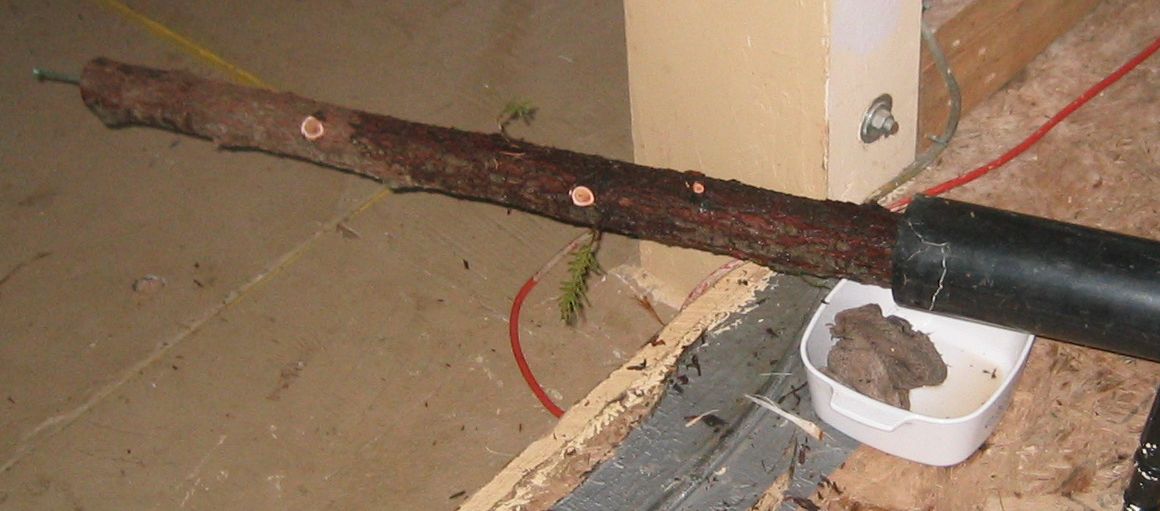
Chiselled matching mortice in log wall. I then drilled the hole in the centre, right through the log and through the outer cement wall. When the log was in, I would put in a one foot long, 1/2” thick lag bolt into the end of the log.
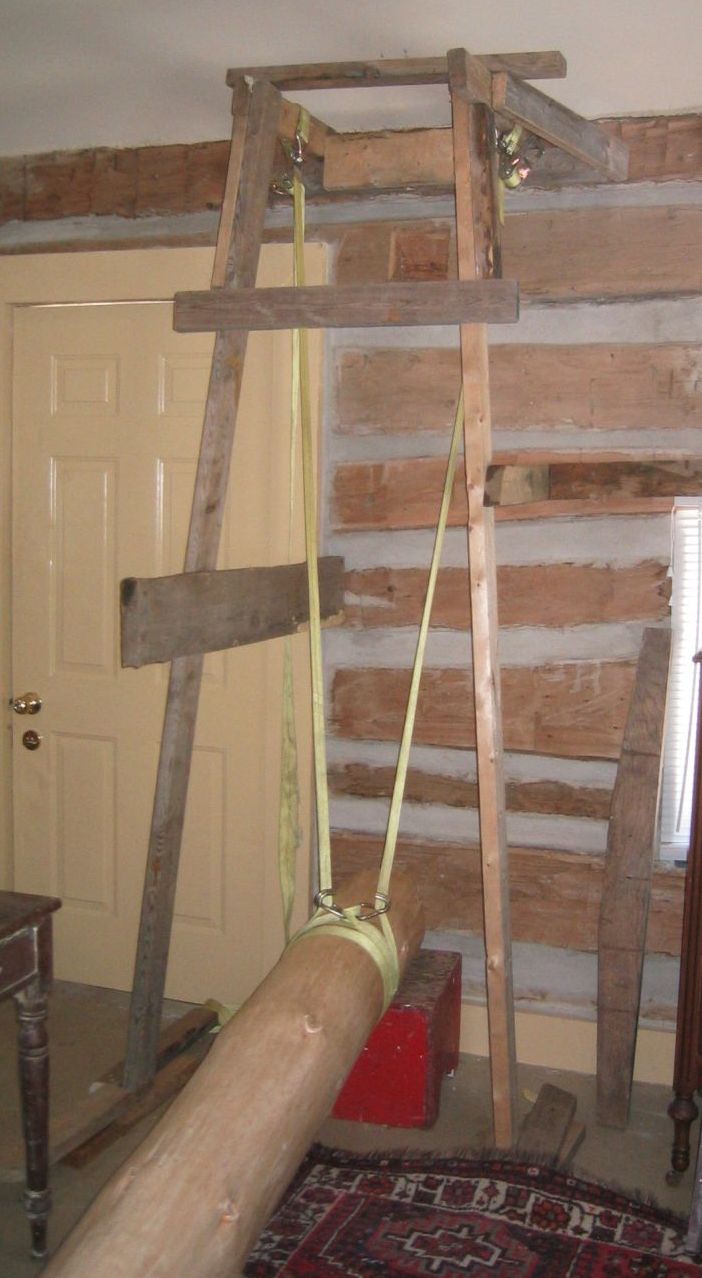
Built a scaffold to raise the log, and attached heavy duty ratchet straps to the log and scaffold and began the slow process of raising the log into place.
I was working alone, so took things very slowly and carefully. As I raised it, I would screw a board under it to the scaffolding to hold it if the straps slipped.
When the log got to where the tenon was to meet the mortice, it just fell into place. I was so happy, it was like it wanted to be there. This was all I could do at this end (the south wall), now I faced the issue of raising the log at the other end, and hoped it all fit.

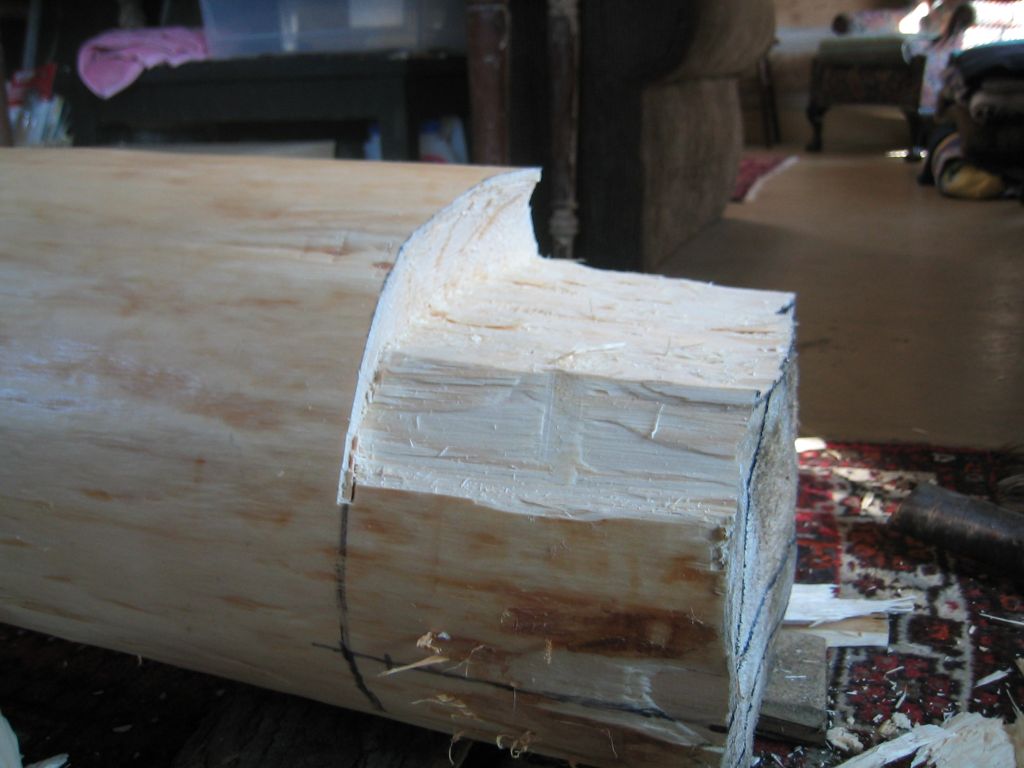
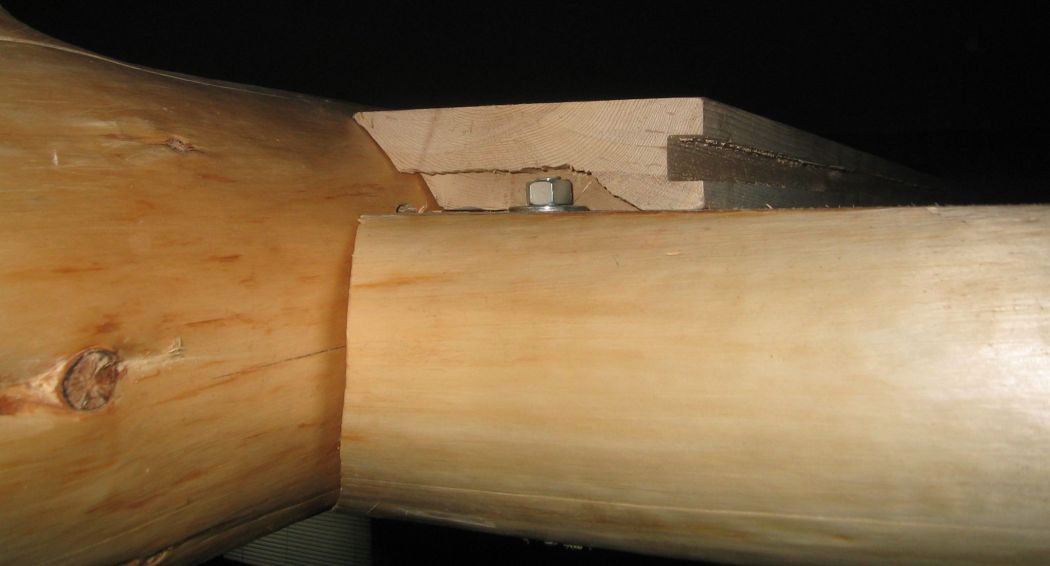
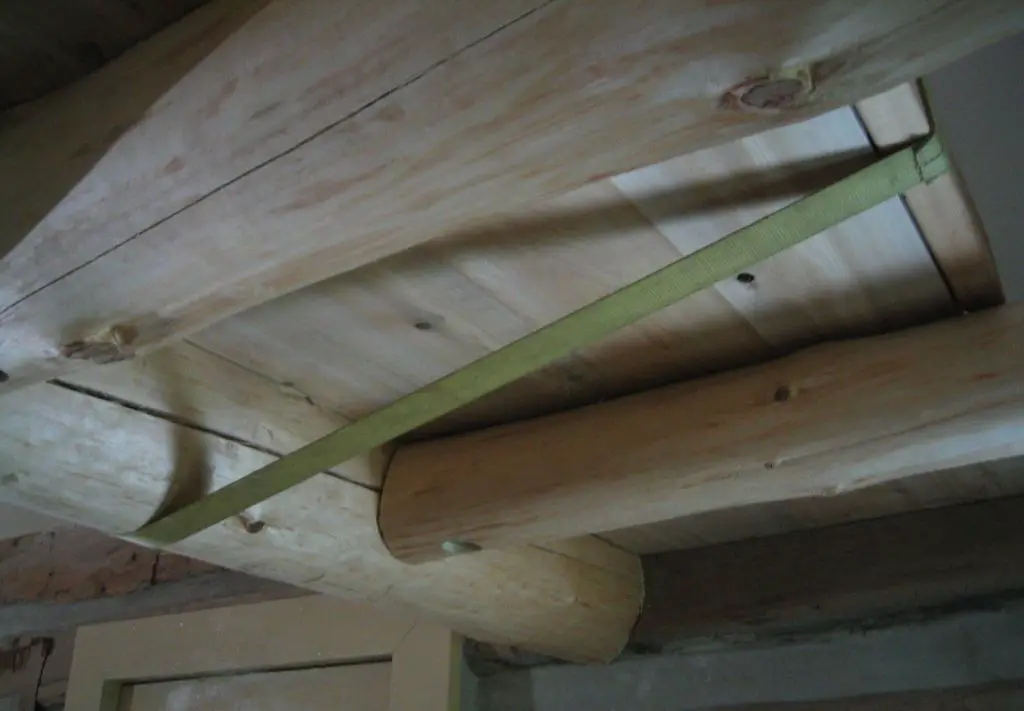
The north end was a different story. There was no way I could mortice and tenon that end. As it turned out, where it was to go against the wall, that log was recessed back, so all I had to do was get the log to the right height and slide it over into place, and the log below would act as a shelf. After it was in place, I would put three, one foot long lag bolts through the wall log, into the main beam end from the add on room side, in holes I had counter sunk.
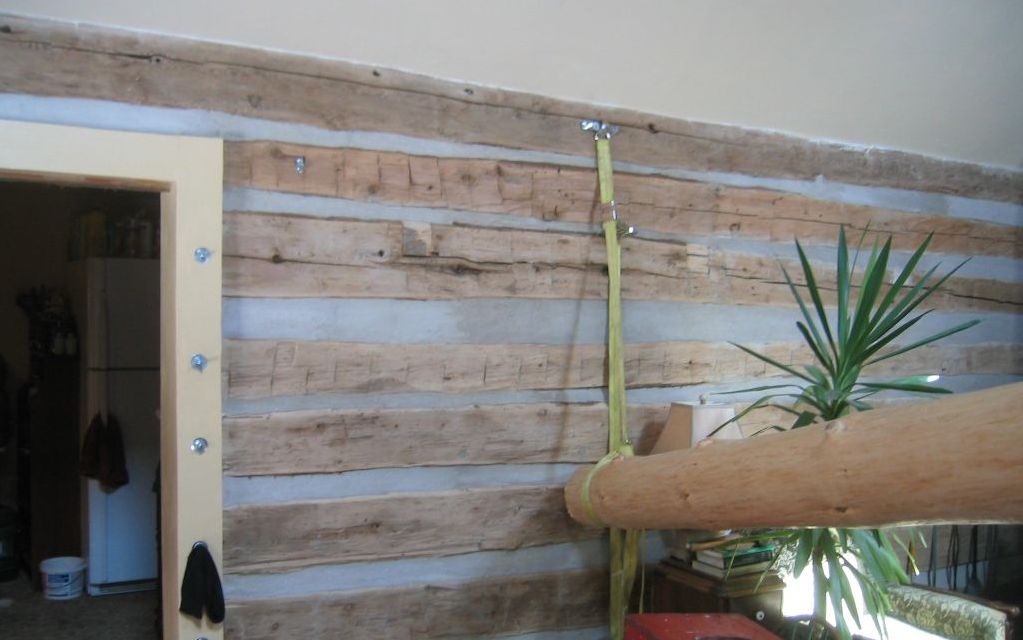
I lag bolted a strong piece of metal to the log wall, put the hook end of the ratchet strap into it, the other end around the log, and began the process of ratcheting the log up along the wall, about 3 1/2 feet to the east (right on picture) of where the log was going to go.
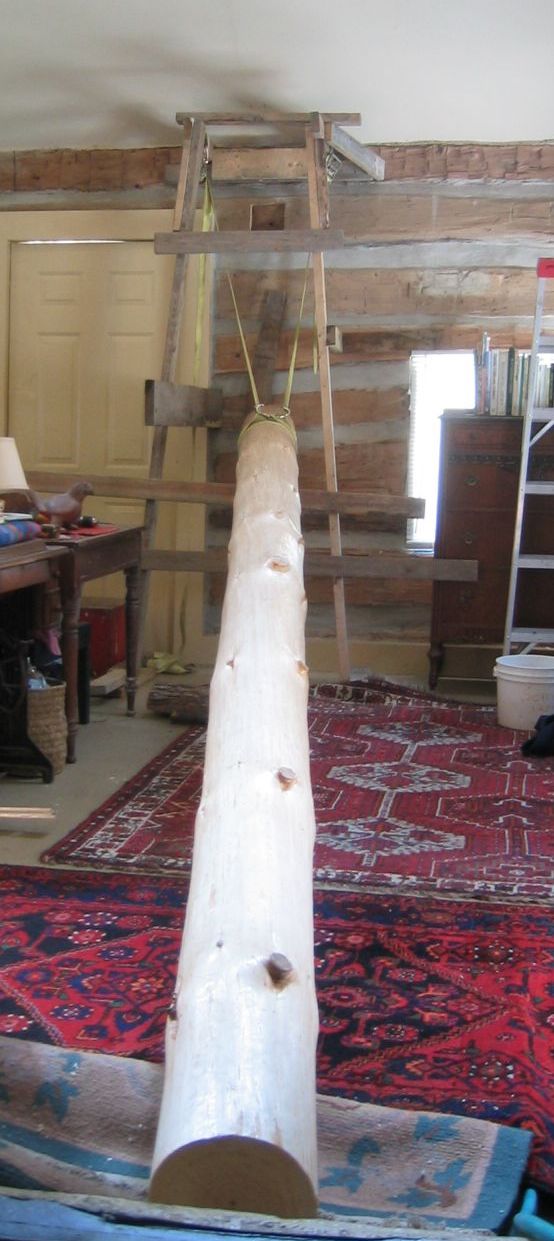
Once the log was at the right height, it had to be pulled over to the west (left in picture) to go into place. I had very carefully measured it all, and had measured to make it tight. It was tight, and had to be ratcheted over with another ratchet strap.
On the south side, the tenon went right into the mortice, and the fit was very good. I had been worried the whole time I may not have measured something right and would have to take it all down and re-do it.
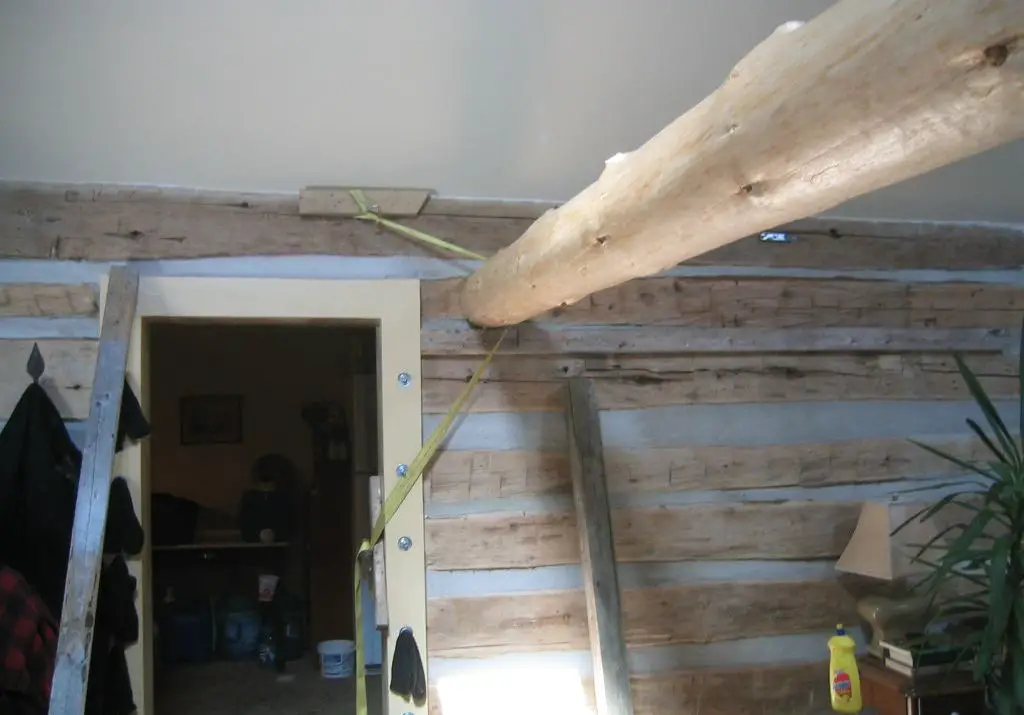
I screwed a 2X4 on the wall to act as a guide for the log to slide along. Then put dish soap (yellow container by lamp) on the wall, the 2X4, and the end of the log to help it slide as I ratcheted it into place. This picture is after finally getting where it belonged.

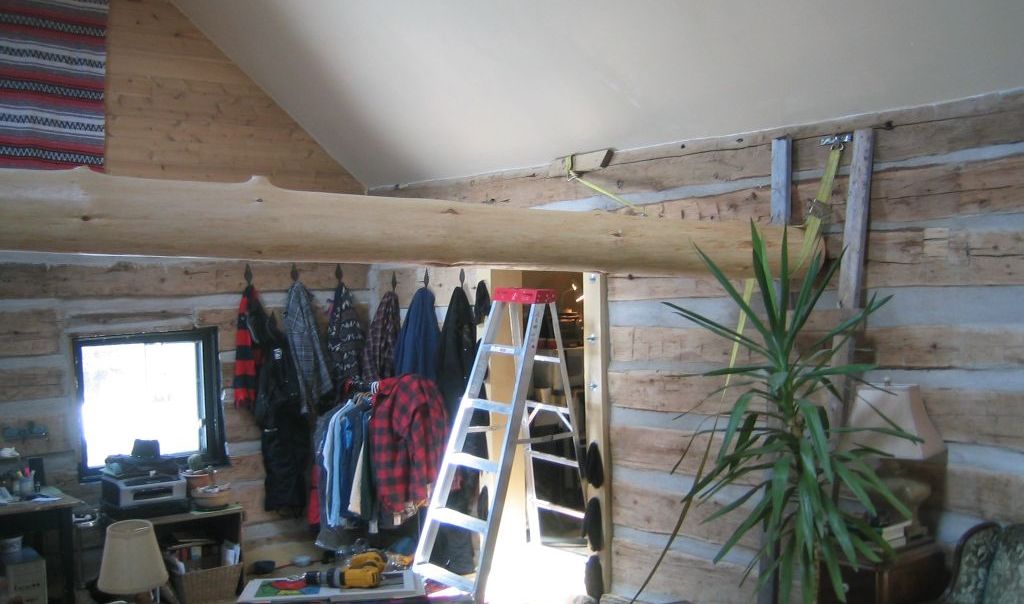
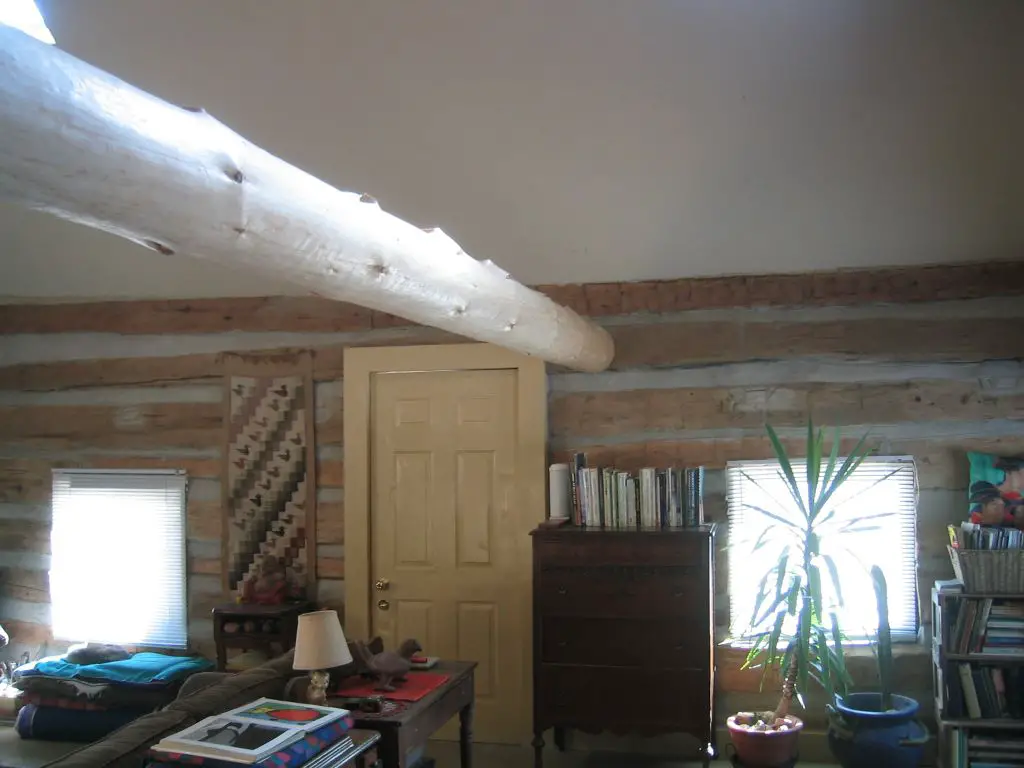
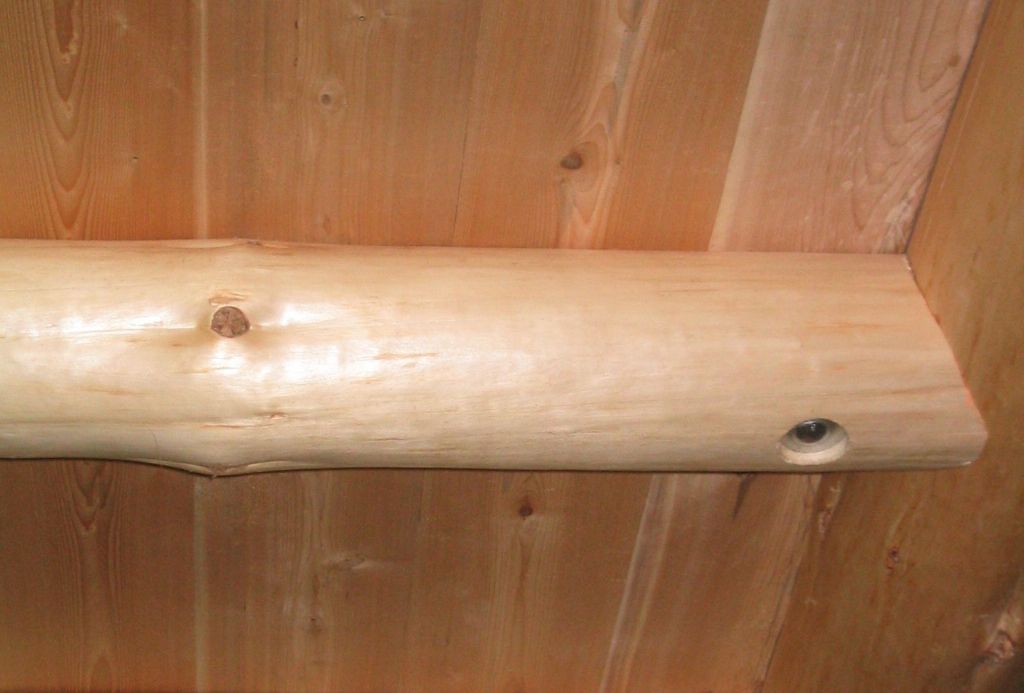
Log in place, and secured with 12” lag bolts, countersunk from other side of the wall logs into both ends of the main beam. There were three lag bolts at the north end, and one at south end.
Afterwards, on the web I found a calculator to find out how much a log weighs. The calculator said this log would have weighed 500-600 pounds wet. Glad I didn't know that beforehand.
Cross Beams
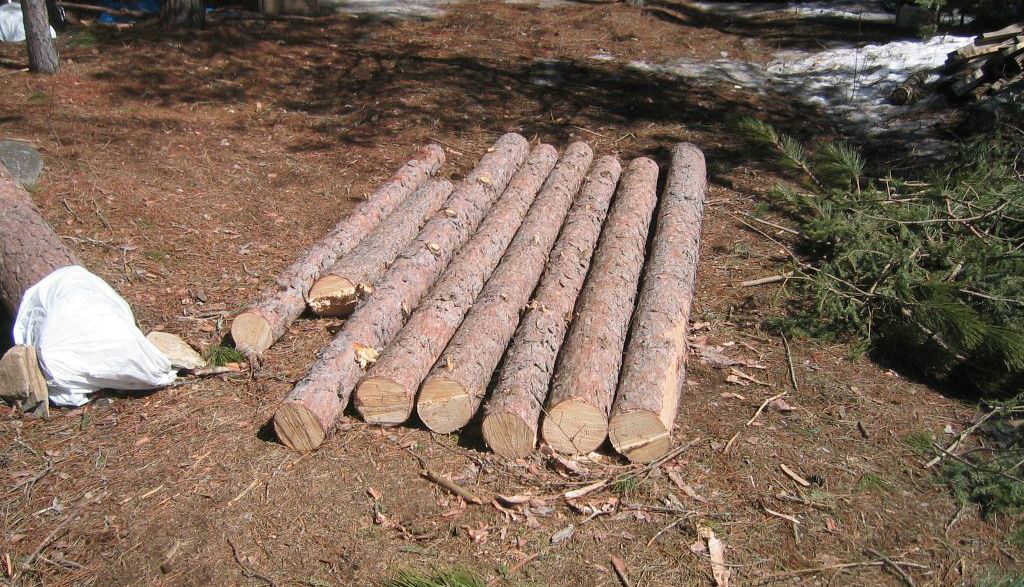
Next, I needed to make beams that connected the newly installed main beam to the west wall, to put the floor on. I selected the trees and cut them down. I realized, I had to make one edge of these beam logs flat so the floor boards would sit evenly on them.
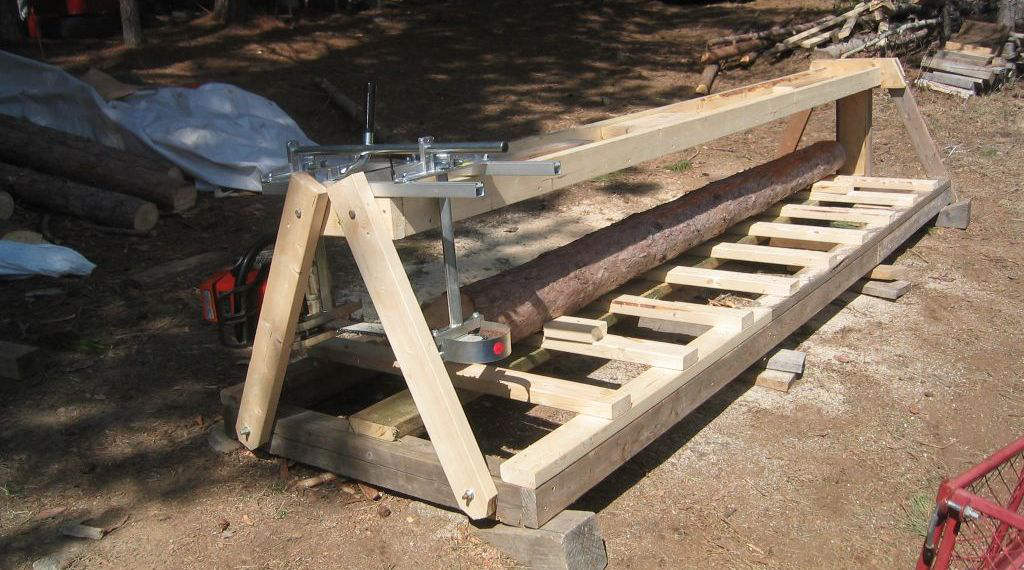
After a lot of thinking, trying to find a solution to getting a perfectly flat side on all the logs that made them the same thickness regardless of their original size, I came up with this contraption. I rolled a log into it, and slid the chainsaw mill along the top rail of this jig.
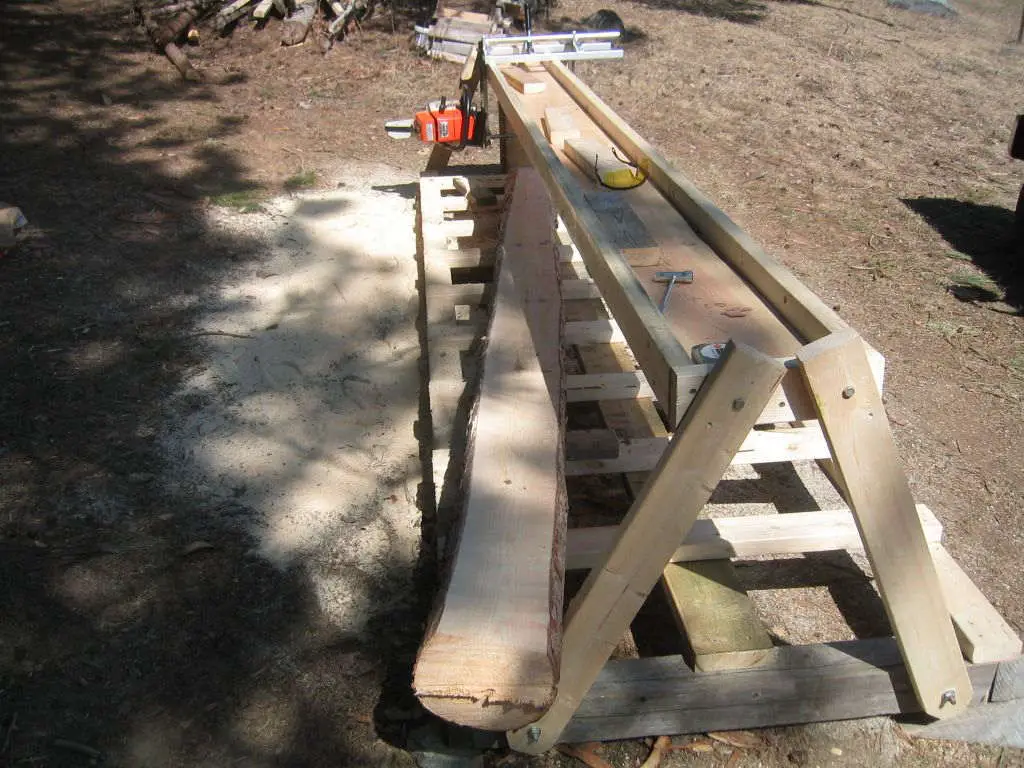
Log after running the chainsaw mill over it in the jig.
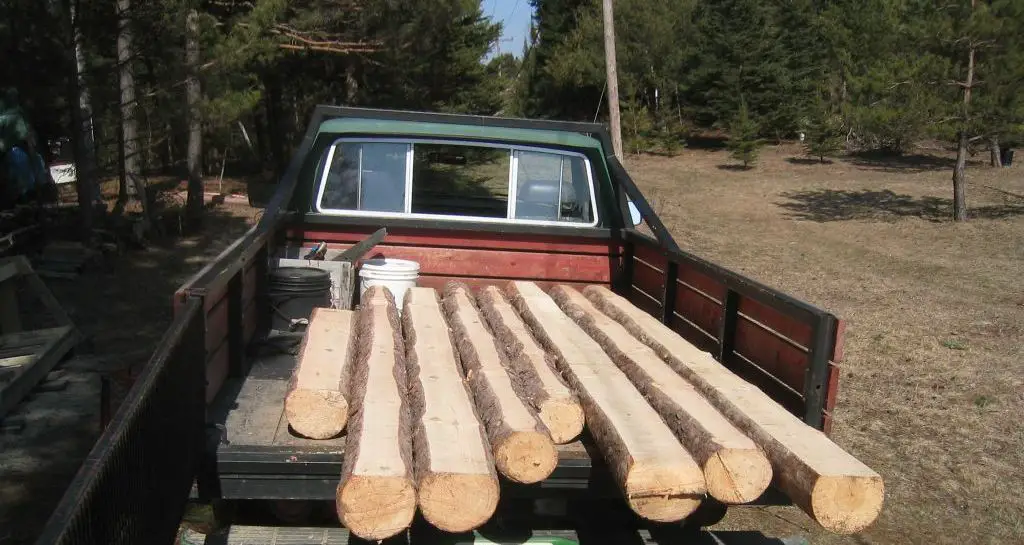
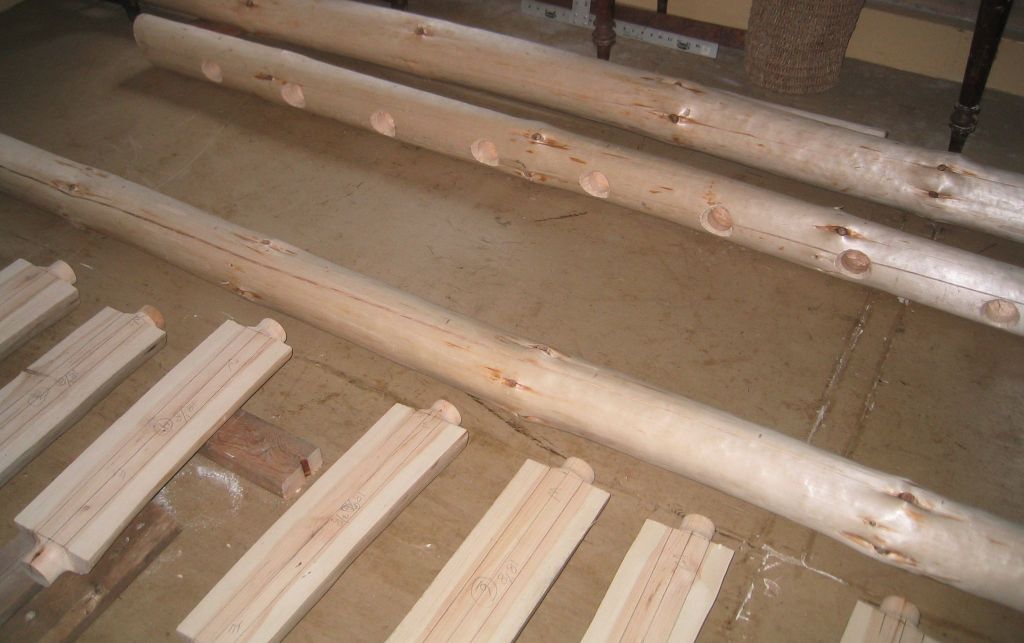
When all the logs had been run through the jig, I laid them out in my truck and laid a board across them. I was blown away when the board sat flat on every one. It had worked! You can see on the smaller logs only a little was taken off, while on the larger ones quite a bit came off.
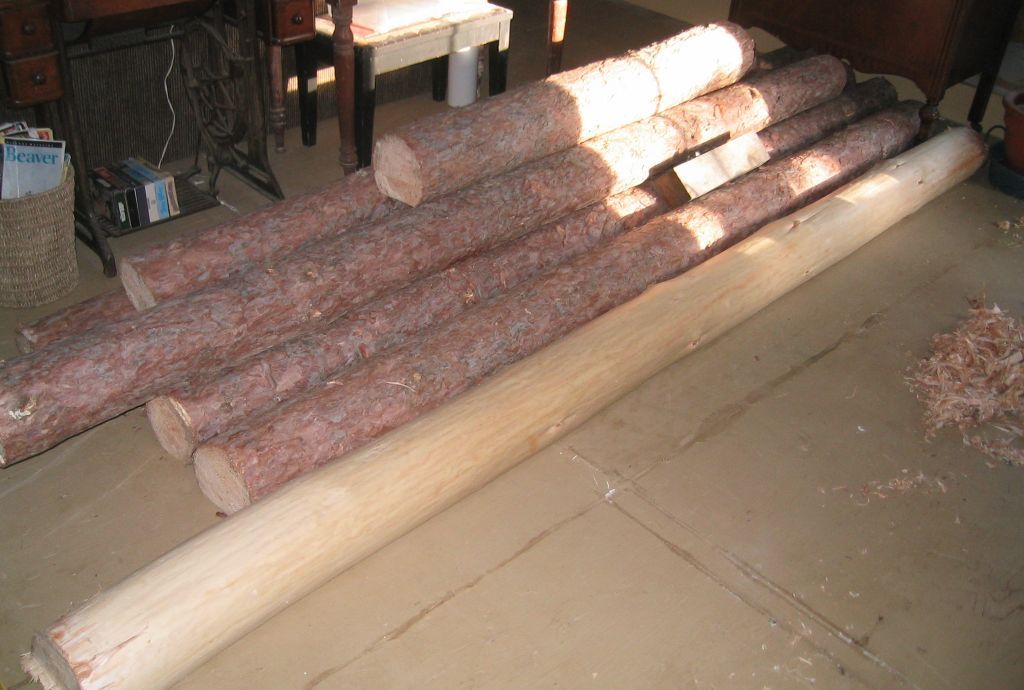
Getting these logs into the cabin seemed like a breeze compared to the big log. Once in, the process began of stripping the bark and that skin underneath. With all these logs, it was a long and boring job. The magazine in the basket is a Canadian history magazine that changed its name for some reason in 2010 to “Canada's History”.
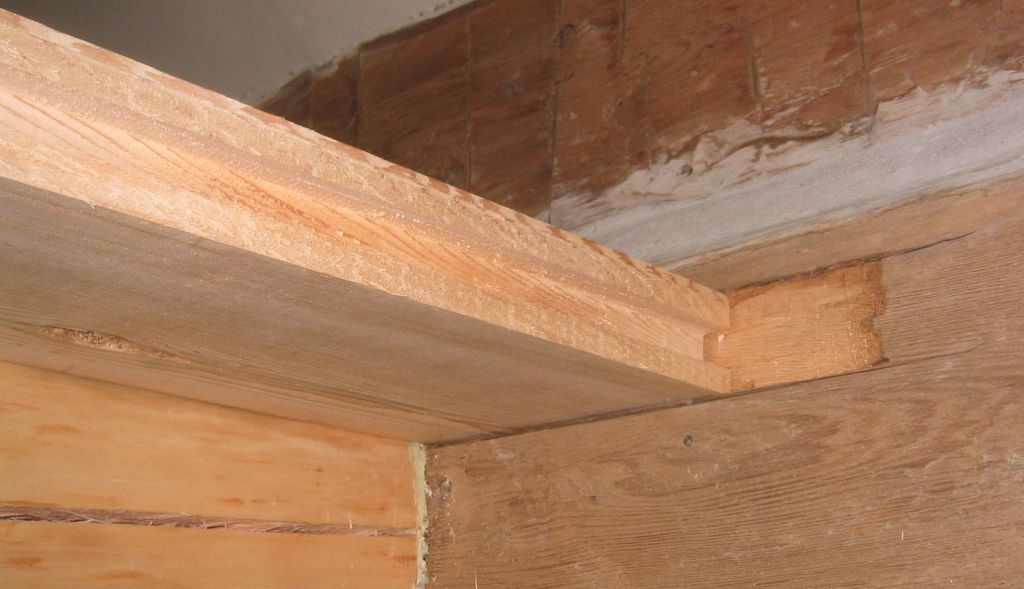
Each log had to be fitted to match the main beam, and I wanted a way of attaching it without seeing it from the front of the main beam.
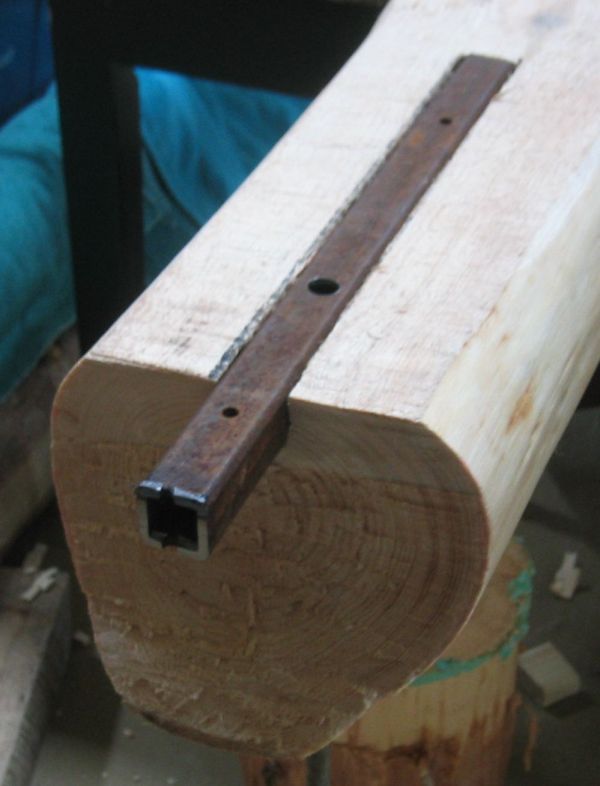
I came up with the idea of a steel tenon that fit into holes in the main log.
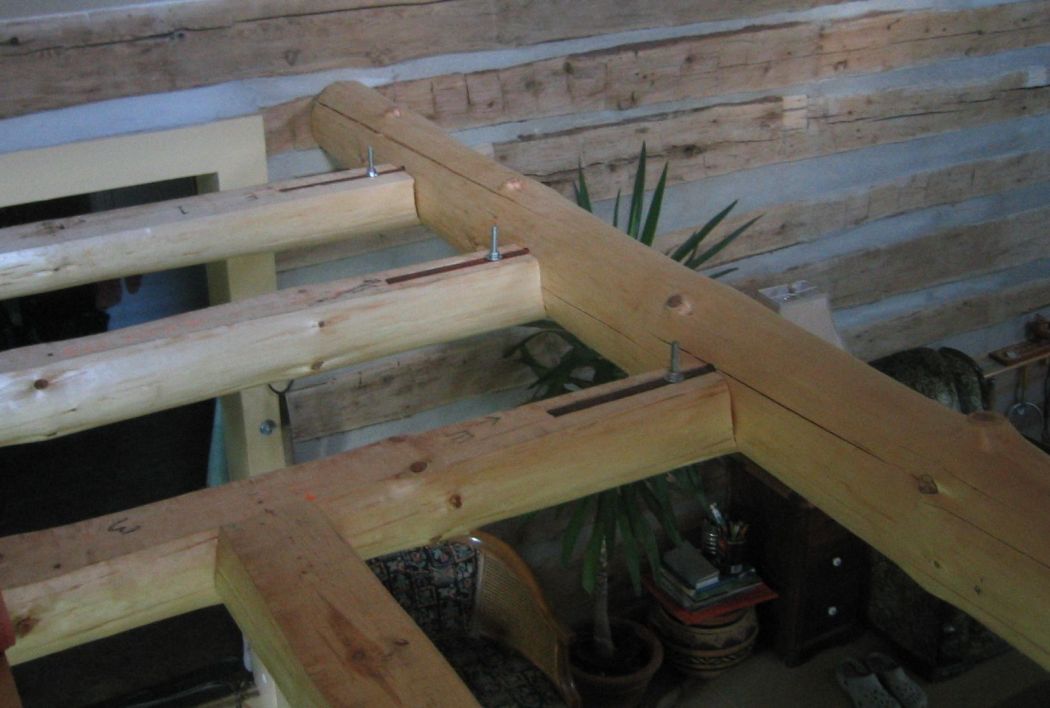
Assembling the beams, although a lot of work, was a fun job. The steel tenons turned out to be very strong and adjustable, so the flat top of each beam could be made level with the others.
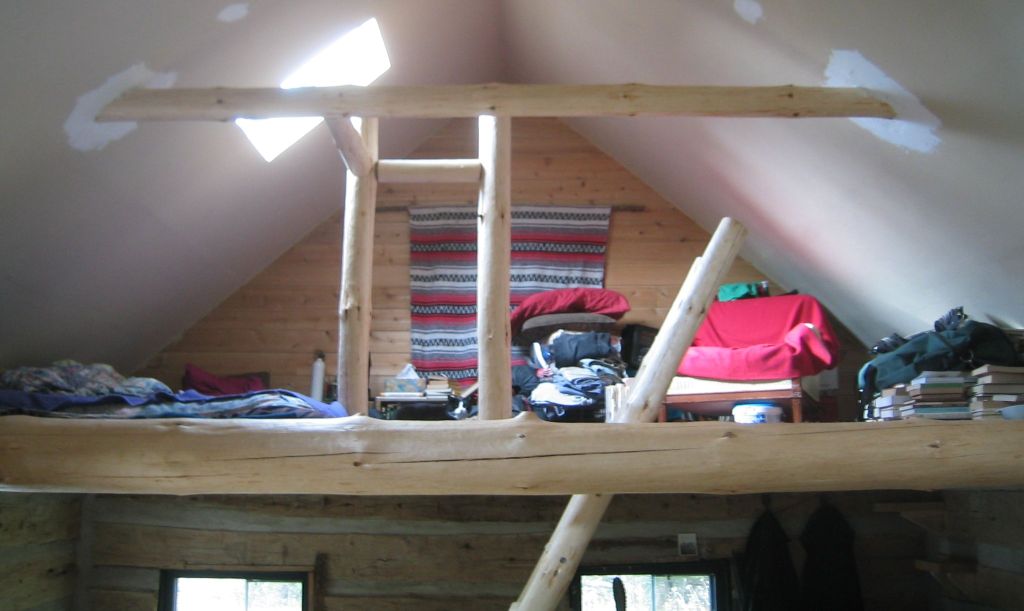
The first beams in. The opening is for the steps that were to go in later.
Floor Boards
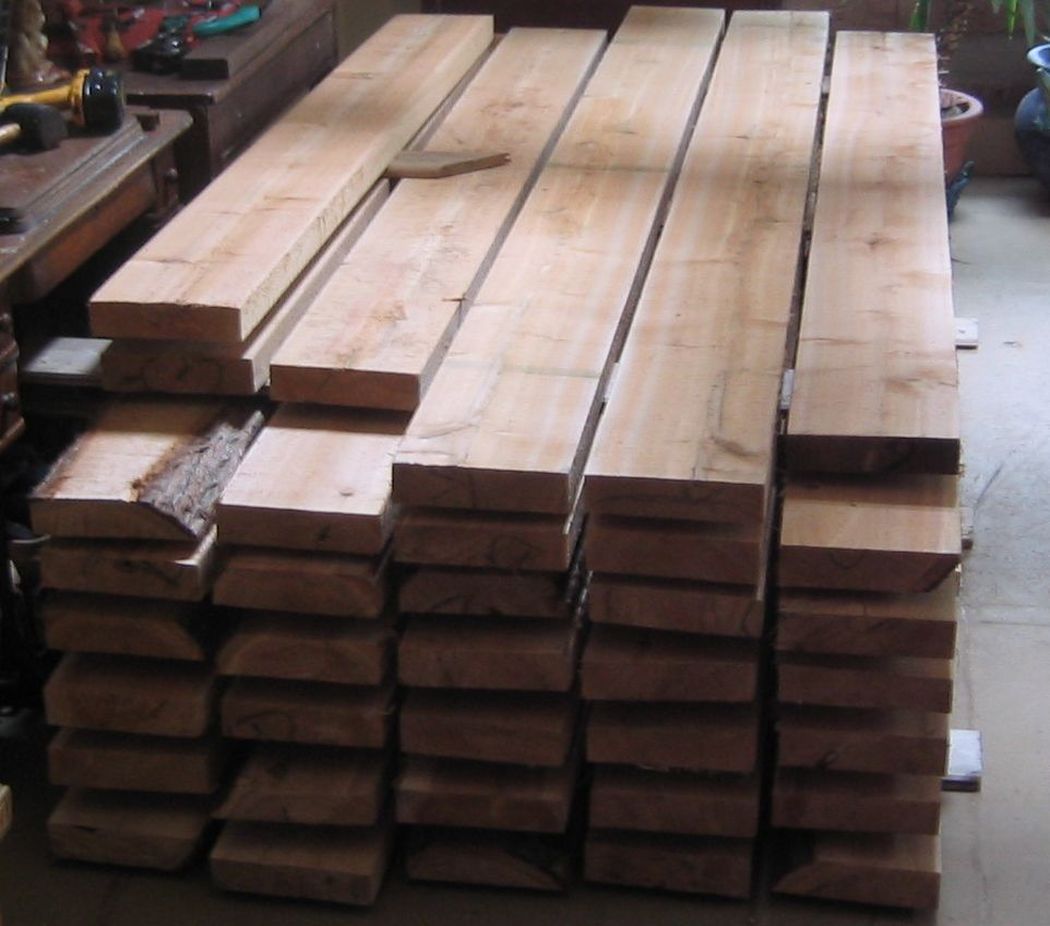
To make the loft floor, I decided to use cedar that was available to me at a great price from a local person named Brendan with a sawmill. I got rough cut, 2" X 8" boards and let them dry out in the cabin with the wood stove going for over a month. Another great quality of white cedar, is that it air dries quickly.
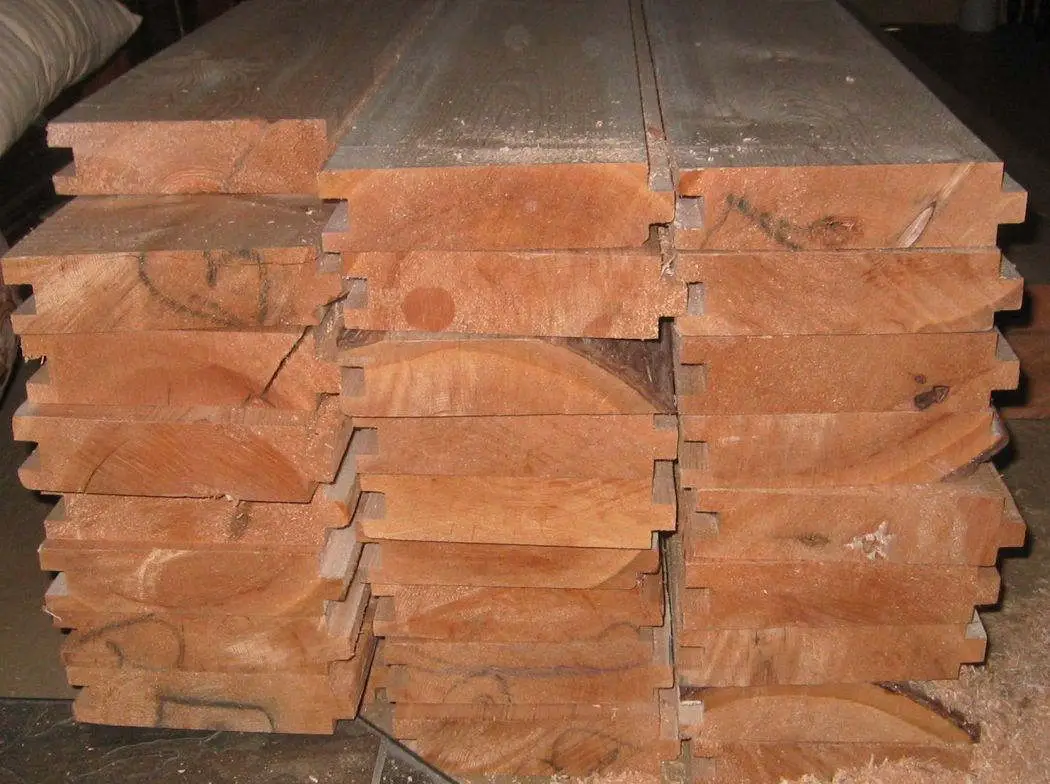
Using a router, I turned the boards into tongue and groove boards. After that, I ran both sides through a thickness planer. By the time the boards were done, they would be 7 1/2 inches wide installed, and 1 3/4 inches thick.
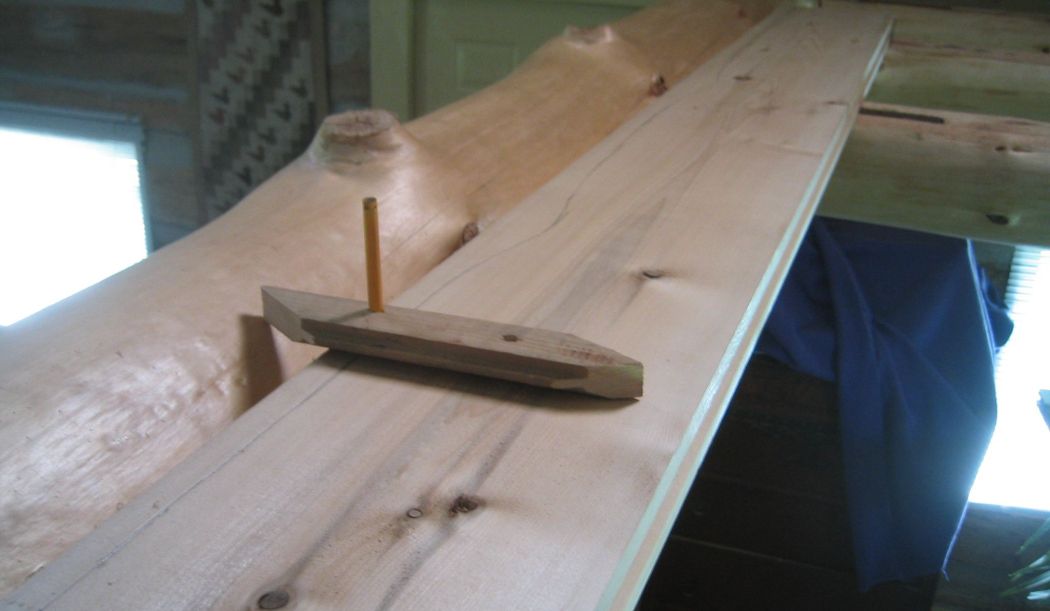
Although I was looking forward to installing the floor boards, there was one board I was not. It was the board that had to go flush against the top of the main beam. If it had been a square beam, it would have been easy. But as it was round and not uniform, it needed to be fit the entire length. The picture shows a homemade jig to hold a pencil to mark the line on the board. Because the cut was also concave, I had to cut and shape the entire length (16 feet) with a chisel and mallet.
Once the edge of the first floor board was finally fitted to the main log, the next issue with the first floor board was the nut and washer that held the steel tenon. Each section was carved out with a chisel. None of the cutouts were noticeable when it was done.
Since there were no beams at the ends, I cut a channel in the log walls to fit the floor boards into. By this point, I was getting confident with using the chisel. For years I always used power tools for everything, but I was enjoying using the hand tools.
When the next floor board was put in place, I used the ratcheting straps to pull it tight to the previous one, then put three inch screws through the inside of the groove of the floor board into the beams. This way nothing was visible.
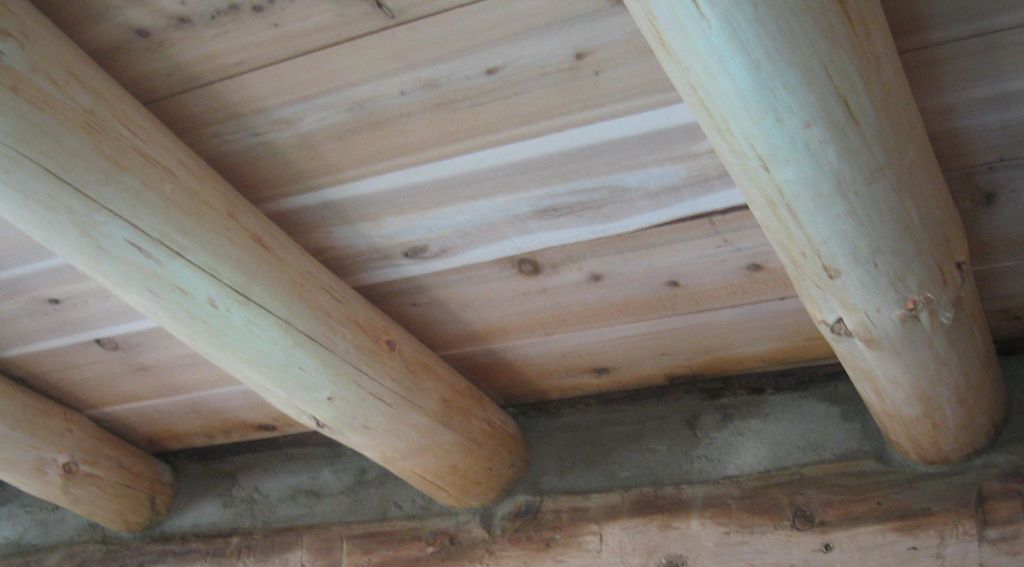
From below, the floor looked like it belonged with the cabin. Hard to tell in a photo, but the blonde colour of the red pine logs looked great with the yellow/red of the Cedar floor. The only hardware you could see was the bottom of the countersunk bolts that held the steel tenon.
When it was done, I re-chinked the cement where I had put holes in the wall for the beams to fit in.
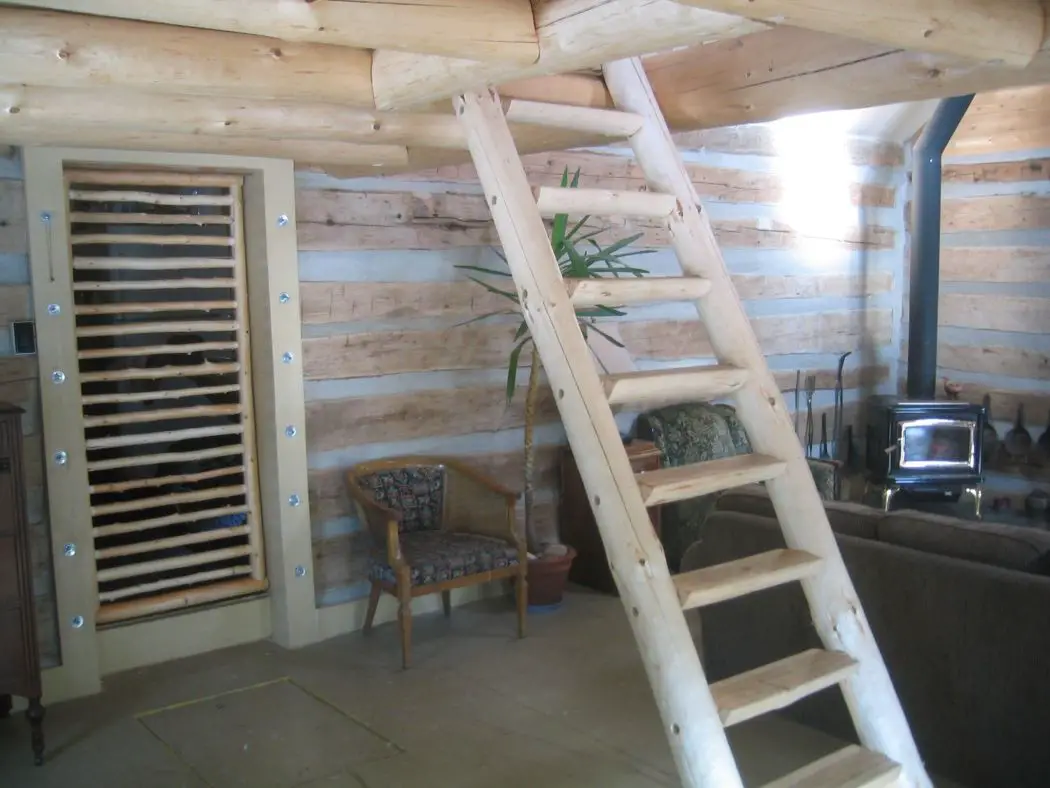
Steps
Next task was to make some steps going up. I wanted to keep with the theme, so I prepared two logs to be the sides of the steps. Then taking two more logs, I sliced them down the centre with the chainsaw mill, cut them to step sized pieces, and made tenons on the ends to be fitted and glued into the the mortices on the sides. The third log in behind was to become the top rail for the railing at the front of the loft.
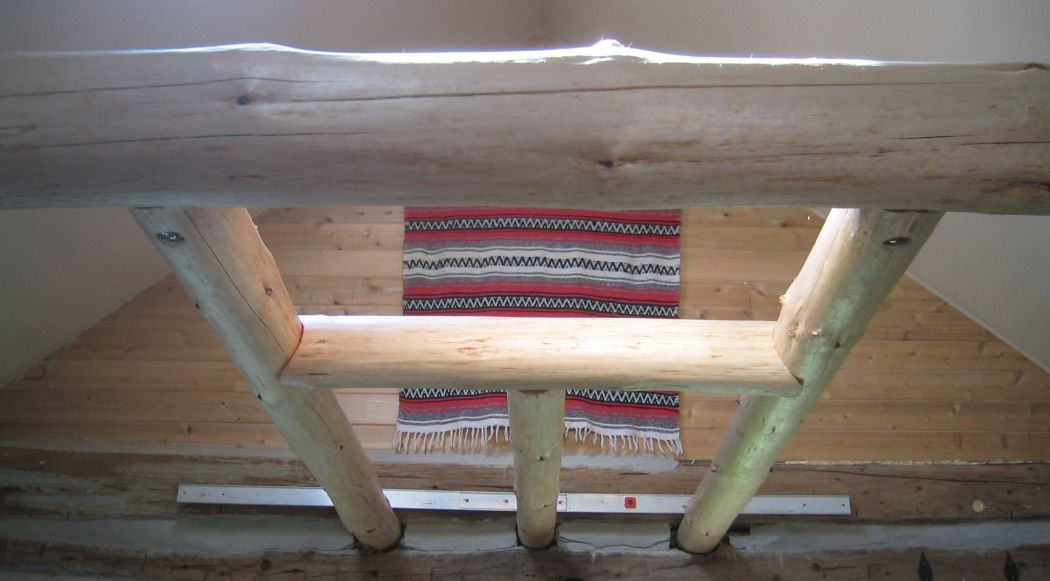
Railing
I wanted to not only make the loft railing fit in with the overall theme, but have it not block the view, and be very solid and safe. I cut holes in the ceiling drywall and attached each end of the top rail to the roof rafters. Then, put vertical posts attached to the floor, at the opening for the steps, and connected them with horizontal sections. All made from the same red pine on the hill - cut, debarked and scraped. I still have dreams where I'm scraping bark off logs.
To make the spindles for the loft railing, I used white cedar branches and small trees gathered from woods. Just gathering enough was quite a job in itself. I spent hours wandering through woods to find straight, similar sized pieces. An even bigger job was to get the bark off. In the spring it is fairy easy with cedar, but this was not done during spring, so I had to devise another way. I took a four inch diameter ABS pipe five feet long, hooked it up to an electric kettle with some 1” radiator hose, put an end cap on one end, slid the cedar into the pipe, capped the end, and steamed for 20 minutes. The screw in the end of the cedar was so I could pull it out of the pipe. I had to work fast while they were still hot and damp to get the bark and skin off. For all the spindles this process took many full days.
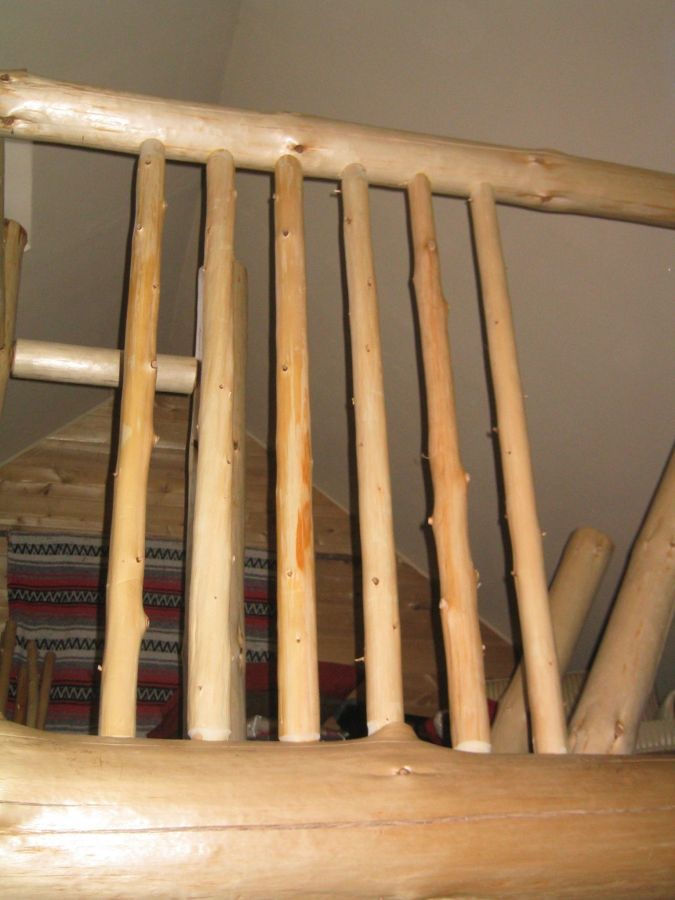
Once a piece was ready, I hand carved the ends and fit them into holes in the top rail and main log. I made the hole in the top rail deeper than the carved tenon, so I could push it up to be able to pull it over the hole in the main log, and then slide it back down into the bottom hole. I had glue on the tenons so had to work very fast. Since both tenons on each spindle was hand carved, there were endless dry fittings.
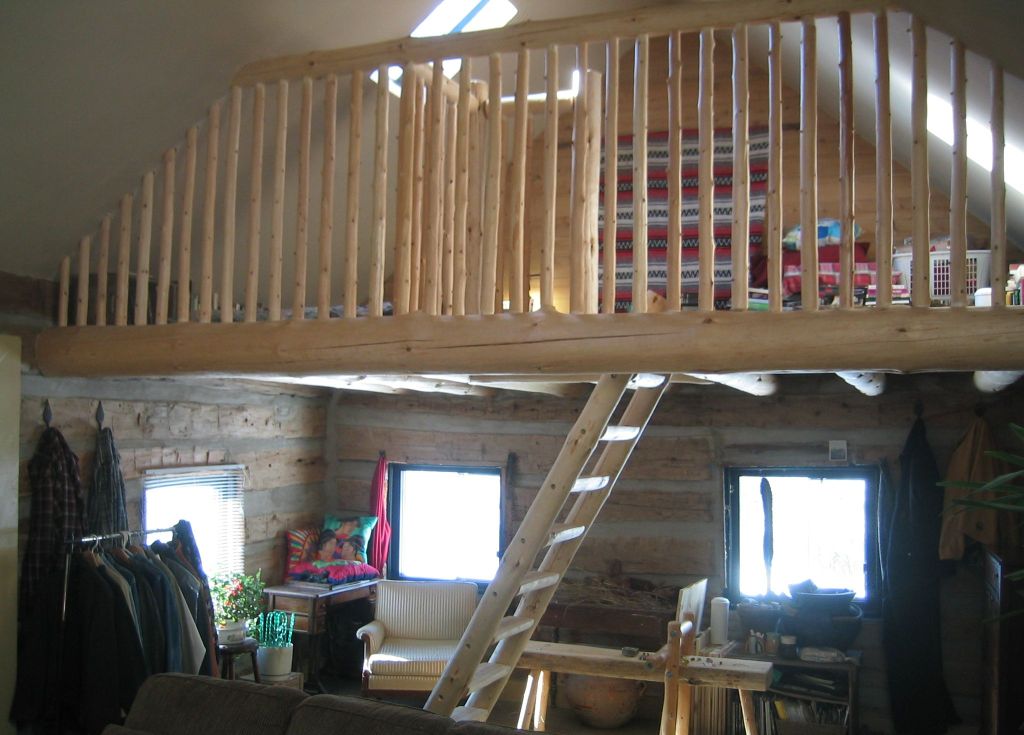
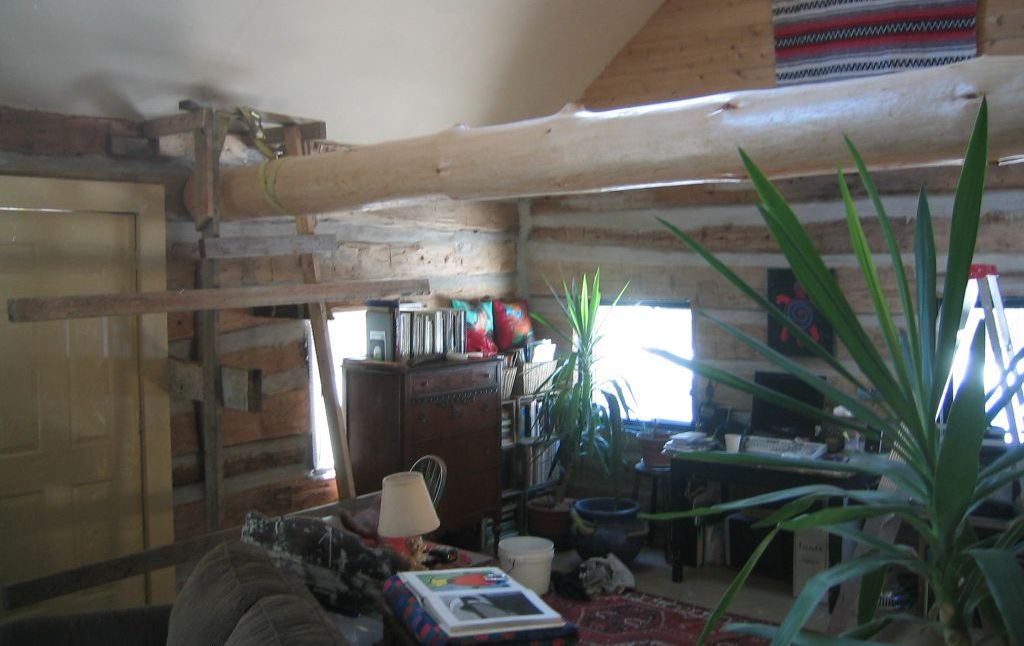
Finished loft looking west from east wall.
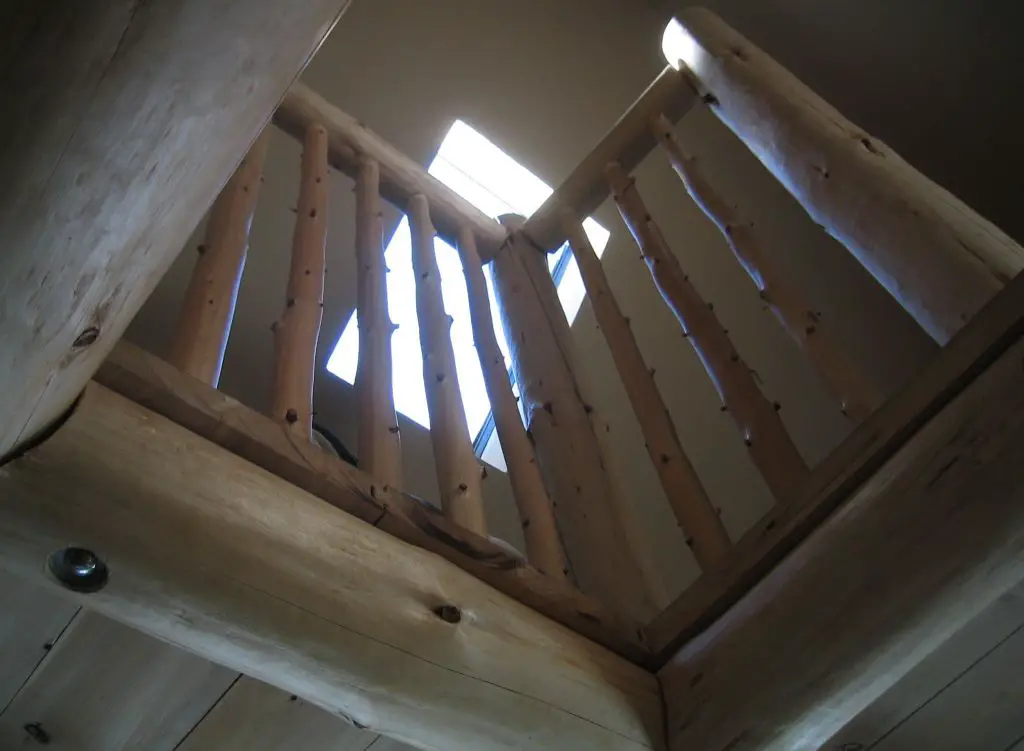
Looking up to railing around the steps opening, standing beside the steps.
Looking from top of steps into loft area:

Loft inspector Cornelius making sure the loft was up to comfort standards.
The finished loft from underneath. I was very happy with the loft and steps going up. It may or may not look like it was put in by the original builder of the cabin, but at least, in my opinion, it fit in well with the feel of the log cabin, and provided a place to sleep that the cats loved. They loved being up there peering through the gaps in the spindles watching me work below.
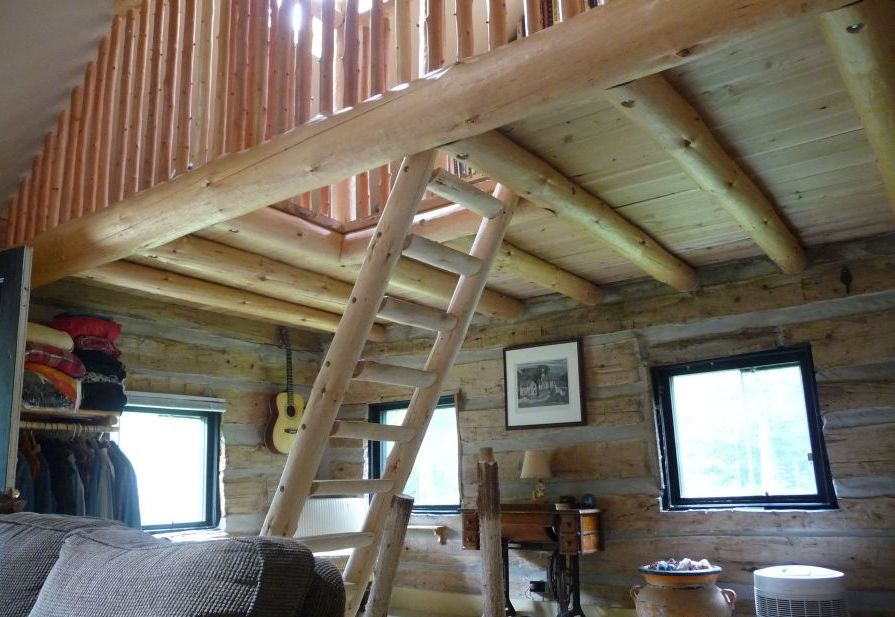
Another angle of the finished loft. Photograph by Pamela J. Walsh.
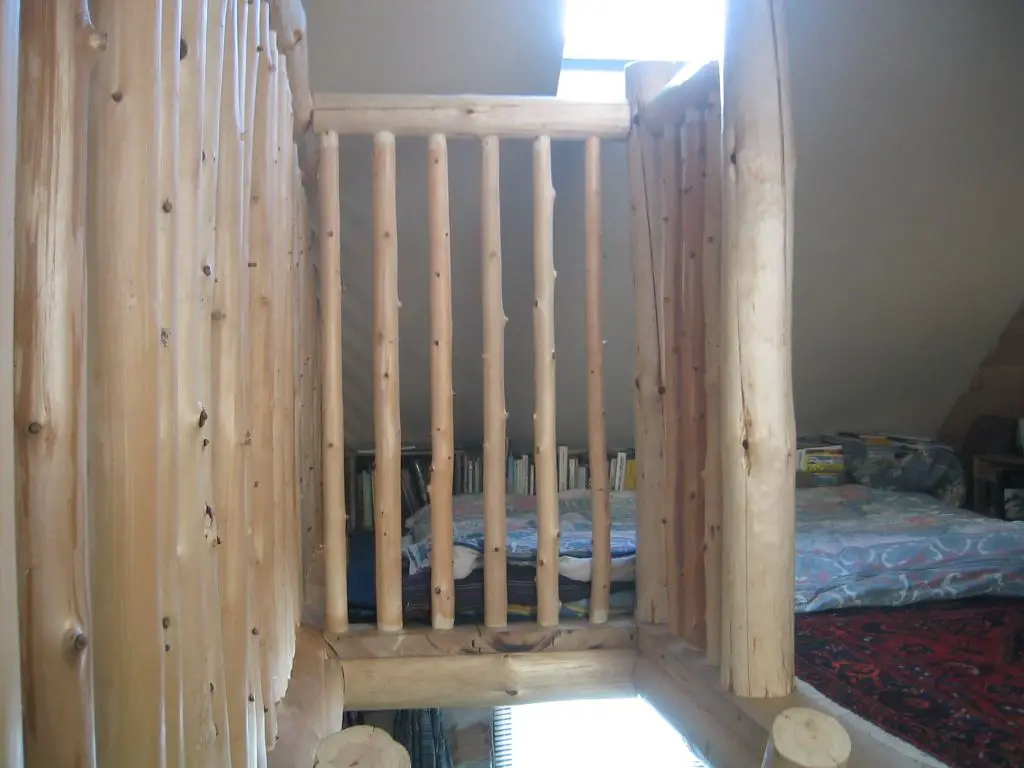
Bookshelves and Window
The peak at the end of the room in the loft area seemed dull, and a wasted space. I had so much lumber left over from other jobs, I decided to put in a window and bookshelves. It looked much better when done, and a place to put books and other items was very welcome. I ended up putting an old dresser bottom section under the shelves to act as a desk. I eventually put the computer on it and found it a nice place to work.
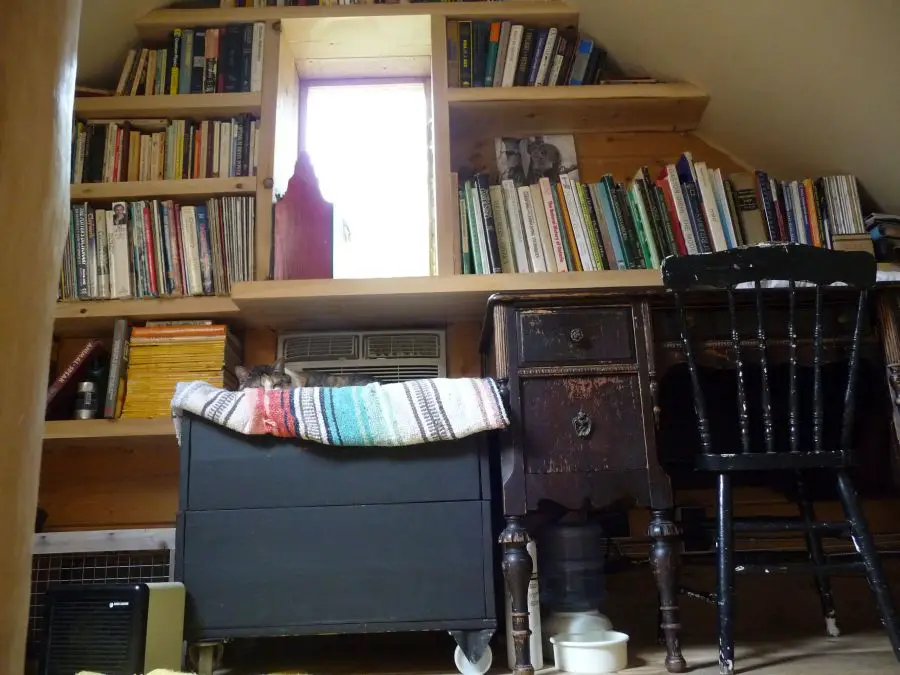
The bookshelves are all made from full two inch thick cedar lumber left over from other jobs. The bottom section from a dresser made a nice desk. Photograph by Pamela J. Walsh.
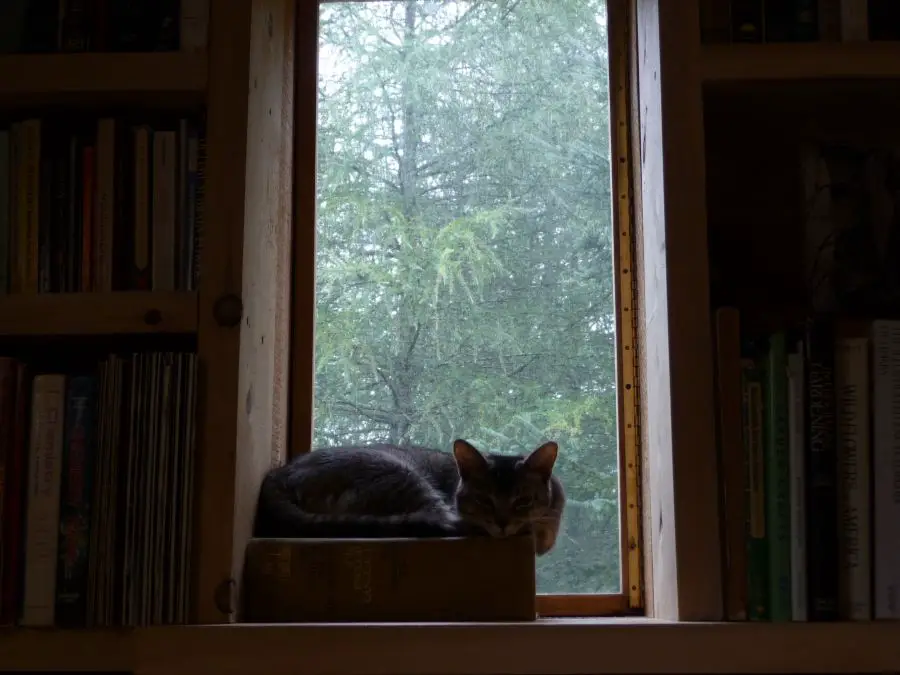
The depth of the bookshelves created a place for the cats in the window area they all loved. This spot was rarely unoccupied. The opening window itself is made from Lexan plastic, not glass. Photograph by Pamela J. Walsh.
By the time it was done, I was very tired from it all. It had taken about 9 months from start to finish. I was happy with the result, so was uplifted. When I was first able to see it with fresh eyes a couple of months after completion, when coming home from a trip to town, it reminded me of something someone had told me many years before. They said, “I don't know what it is, but everything you make looks like it was made in the 1800's”. Not sure if it was meant as a compliment, but I took it as one now.
I am very grateful I was able to work this project from conception to completion. It felt great knowing most of it came from trees on the property or close by, and that I did it every step of the way by myself. I had never done anything like this before, and really didn't have a clue before I started, just took it a little bit at a time ,and figured things out as I went along.
Share:


Why does this site have ads?
Originally the content in this site was a book that was sold through Amazon worldwide. However, I wanted this story available to everyone free of charge, so I made this website. The ads on the site help cover the cost of maintaining the site and keeping it available.
Google + profile
![]()
Wild Foods Home Garden Logo Copyright © 2017 David G. Mills.
Text Copyright © 2014, 2015, 2016, 2017, 2018 David G. Mills.
All Photographs Copyright © 2014, 2015, 2016, 2017, 2018 David G. Mills except where noted.*
All Drawings Copyright © 2014, 2015, 2016, 2017, 2018 David G. Mills except where noted.
All Rights Reserved.
This may not be reproduced in any form, in whole or in part, without written permission from the author.