The Cedar Log Cabin
The Story of Living In & Restoring a Settler's Log Cabin
We Need more Power
When we bought the place, there were no power lines from the pole to the cabin. There was a panel in the cabin on the main room wall, but it was a very old two fuse, 30 amp box that had only a single wire running from it – to nowhere.
The first thing to be done, was get a new panel put in the back room, and have it hooked to the transformer on the pole behind the cabin.
It turned out, we were very lucky where the pole was located. The pole was about 40 feet behind the cabin, and there was a transformer on the pole that had one set of lines coming off it, going across the road to Bill and Elva's house. We found out that if the transformer had been more than 75 feet from the cabin, the cost would have been significant. If we had needed a pole put in, the cost would have been $12,000 per pole, we were told. Because we were under the 75 foot limit, the cost to hook up was nil. Ontario Hydro paid for the line from the cabin to the pole.
At this early point, we had no idea of what the eventual layout would be in the cabin, so having all the outlets installed was pointless. The electrician said they could put in a a breaker panel, and one outlet. We would have a year to decide what would go where. That sounded good, and that was the route we took. At least we could turn off that annoying generator and save some money. The cost of running the generator 24/7 was about $25 per day.
I never liked having just one outlet in the cabin, but got used to it, and learned to do everything that needed to be done by patiently unplugging and plugging in over and over. There was a fridge, kettle, power tools, lights, TV and so on. When I needed to use power tools in the work area outside, which was as far away from the cabin as possible to not scare the cats, I used the generator.
I got so used to one outlet, that the year passed without calling the electrician. He called me, and said the permit was about to run out. Still not ready to decide the eventual inside layout of the cabin due to being so involved in serious structural renovating, I asked if it could be put off. He said yes, but with a cost being charged by the the hydro inspection authority.
At nearly the end of the second year, I decided I wanted to do it myself. The reason was very simple: I wanted to use BX wire – the kind of wire with the spiralled aluminium shield around it, instead of plastic. That way, it would be animal proof, and I would be able to run it in areas in the open if need be. I told the electrician, and he gave me a figure of how much more it would cost. It was significant, so I thought, why not spend the extra on the BX wire, and save on the labour?
I bought a great, and I mean great, book called, “Electrical Code Simplified: Residential Wiring” by P.S. Knight. It is for Ontario, and the author is a former inspector for the “Electrical Safety Authority” known just as “ESA”, which is the authority that inspects and gives certification for wiring in Ontario, Canada. I studied that book from front to back about 5 times. When I was ready, I followed the instructions, and came up with a wiring plan on paper using proper symbols and done to code, then called the ESA and told them the story. I told them I had read the book, had a plan, and wanted to wire. I had to pay more money for yet another permit, and got the permission to start.
It took me about six months to do it. For one thing, I was doing many other jobs in parallel and trying to survive alone in the woods day to day. Another reason was, I wanted it to look fantastic and be perfect. I saw this log cabin as a true gem, a work of art you lived in. I took it one circuit at a time, starting from the farthest point from the box, and worked my way to the box.
Once everything was done, I called and asked for an inspection. When the inspector showed up he didn't seem very happy as I was letting him in. I said, "sorry the job took so long" and his response was, “it sure did”. After he was gone, it struck me, I bet he thought he was in for some hack job that he wouldn't pass, and there would be an argument. I kept forgetting how bad the place still looked from the outside. I had been told stories about some really crazy people who lived alone in the woods around there, and I think I may have been put in that category. At the very least, the cabin looked that way from the outside.
As soon as he saw the log cabin interior, his attitude took a 180 degree turn. He said, “this place is beautiful”. I told him the story briefly, and showed him some before pictures that were always ready to go on the computer. After that we did a tour of the wiring.
He was silent during the tour. I told him the reasons for every detail. At about halfway done, he just stopped me and said, “This job is perfect, you really should be an electrician”. I said that would be great if the clients didn't mind it taking six months to wire a two room cabin. We had a good laugh.
He said he had never seen a residential wiring job with only BX wiring before. I told him why I wanted it, and he thought it was great.
After he put the sticker on the inside of the breaker panel, he went to leave. At the door he said this was one of the cleanest residential wiring jobs he had seen in his career and he was about to retire. I can't explain how good that made me feel. Sometimes during the renovation, it was hard to maintain motivation to keep going, life had not been going well since moving to the cabin, I was now living here alone, and my confidence in myself was slipping. That parting comment gave me a boost that kept me going for months. If you, the inspector, ever read this and know the log cabin south of Bancroft, east of L'Amable, thank you, you made a big difference in my life by saying that.
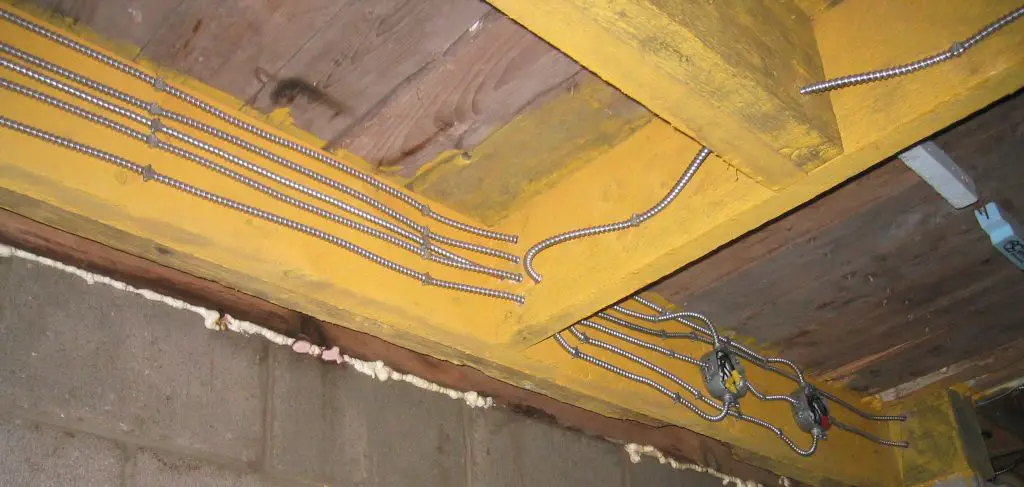
Picture in basement, under main room, during the process of wiring. At this point, these wires were not live. This group of wires is for the outlets along the wall in the main room. Some outlets were switched for lamps, some unswitched. The junction boxes are for the switched outlets.
When I was young, my hobby was electronics. I used to make projects on circuit boards I made myself by drawing them out on the copper with an acid resistant marker, etching the boards and soldering in the components. Doing this over and over lead me to think before drawing, because you couldn't have lines crossing. If you did, you had to solder in a wire junction. So, when laying out the wires coming out of the panel, I had three rules for myself. One: No wires crossing over another wire – it had to be 2 dimensional. Two: It had to be visually appealing - it was going to be seen in the back room. Three: It had to be functional and logical.
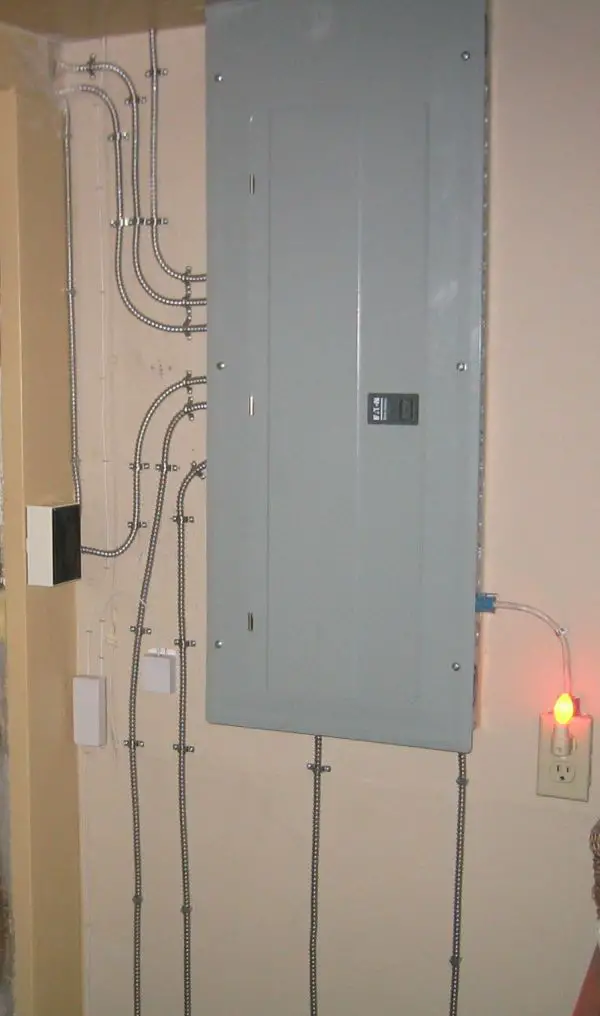
The panel at the half way point of the wiring. I maintained the clean look all the way through. The outlet on the right, with the night light, is the original outlet the electrician put in with the breaker panel. I lived off that outlet for 2 1/2 years. That outlet came out as the final act in the wiring of the cabin, leaving nothing but BX throughout. I had never wired a place before, and it took a lot of reading, but it was satisfying when done.
Share:


Why does this site have ads?
Originally the content in this site was a book that was sold through Amazon worldwide. However, I wanted this story available to everyone free of charge, so I made this website. The ads on the site help cover the cost of maintaining the site and keeping it available.
Google + profile
![]()
Wild Foods Home Garden Logo Copyright © 2017 David G. Mills.
Text Copyright © 2014, 2015, 2016, 2017, 2018 David G. Mills.
All Photographs Copyright © 2014, 2015, 2016, 2017, 2018 David G. Mills except where noted.*
All Drawings Copyright © 2014, 2015, 2016, 2017, 2018 David G. Mills except where noted.
All Rights Reserved.
This may not be reproduced in any form, in whole or in part, without written permission from the author.