The Cedar Log Cabin
The Story of Living In & Restoring a Settler's Log Cabin
Making the Walls Beautiful
The Logs
They were white cedar log walls that were hand hewn. That was the good news. The bad news was, they had been painted with a whitewash of some kind, and had hundreds of nails sticking out of them. There was no chinking on the inside, just bits of wood jammed and nailed in. The log walls were a mess and needed to be completely restored.
During the time that Pamela was there, she washed off the whitewash surface. That was no easy task. It required hard scrubbing with soap and water, and a lot of scraping and rinsing. She would wear out brush after brush. While she was doing that, I was pulling out nails, and dealing with the wood between the logs that in most cases stuck out beyond the log faces. They had to be taken back far enough that chinking could be put in.
Putting in the chinking was a job. After the logs were cleaned, the wood chopped out of the space in between, any gaps were filled with spray foam insulation on the outside walls. After that, hundreds upon hundreds of galvanized roofing nails were put in where the chinking was to go, to hold it tight. Next, the chinking was put in. At first, I didn't do the best job, but got better quickly, and when done, it made such a difference to the place that it was worth the incredible amount of work.
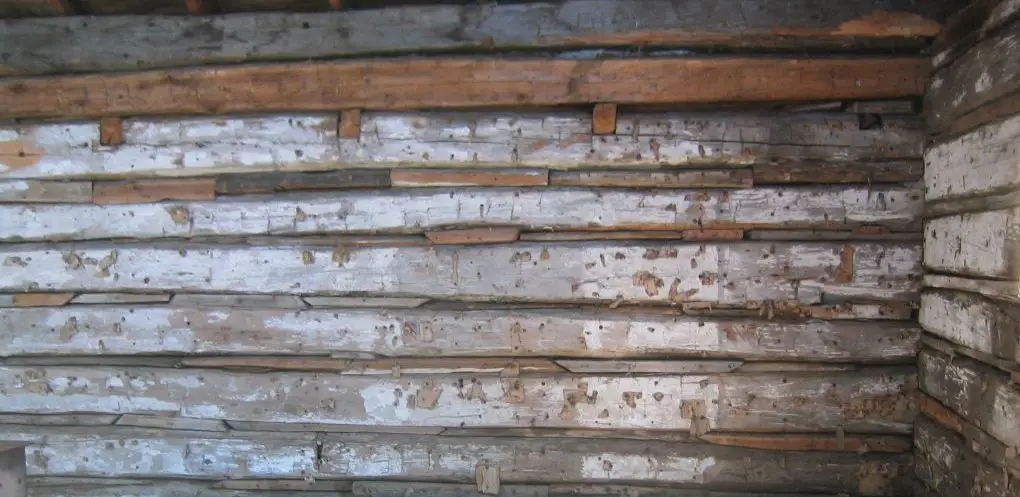
This is a picture of the log walls before we started. If you look carefully, you can see the hundreds of nails with bits of drywall paper backing left nailed to the wall. You can also see how chunks of wood were used between the logs instead of chinking. Also visible in this picture is the cut-off beam ends where there used to be a floor – the walls below the floor are whitewashed while above they are not.
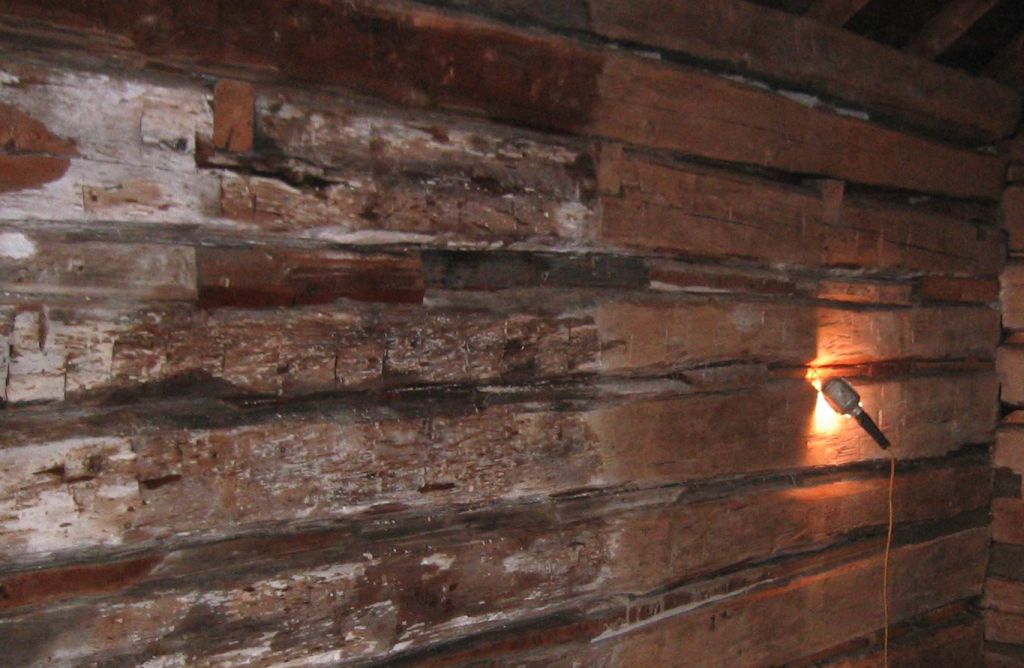
During the cleaning of the walls. The difference between before and after is dramatic.
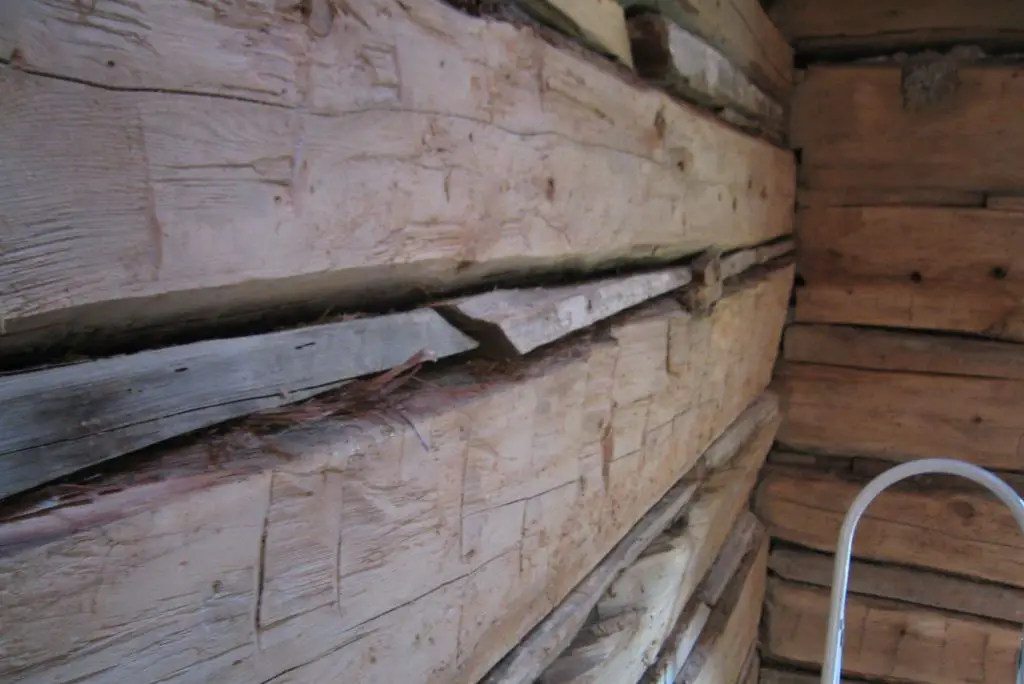
After cleaning, the wood between the logs had to be trimmed back.
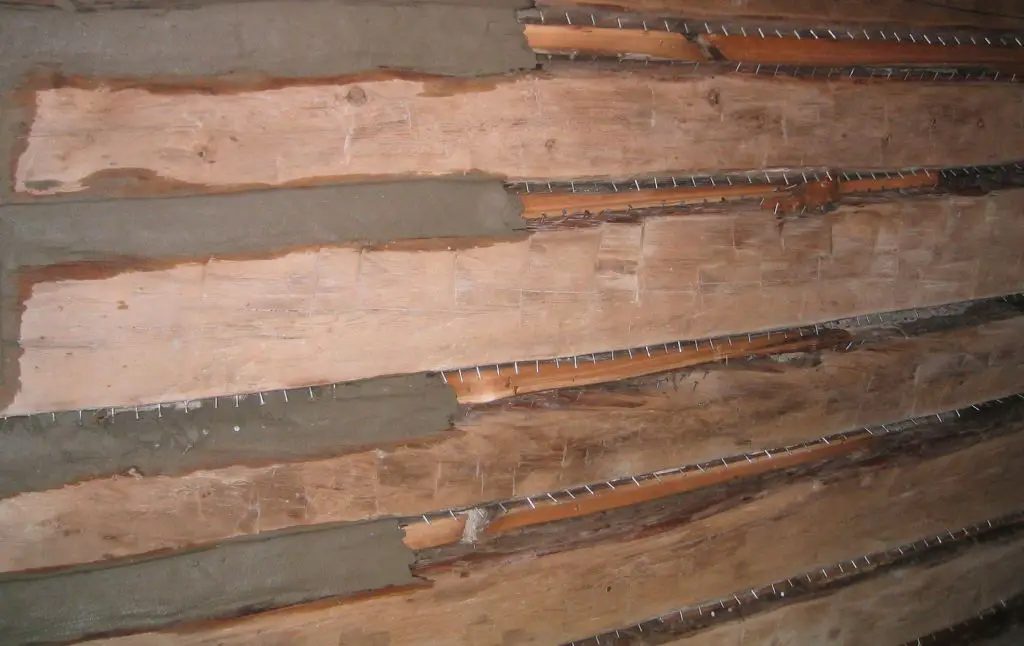
Once the wood between the logs was trimmed back far enough for chinking to be put in, hundreds upon hundreds of galvanized roofing nails were carefully nailed in to hold the cement chinking. Two or three layers of cement chinking were put on and troweled smooth.
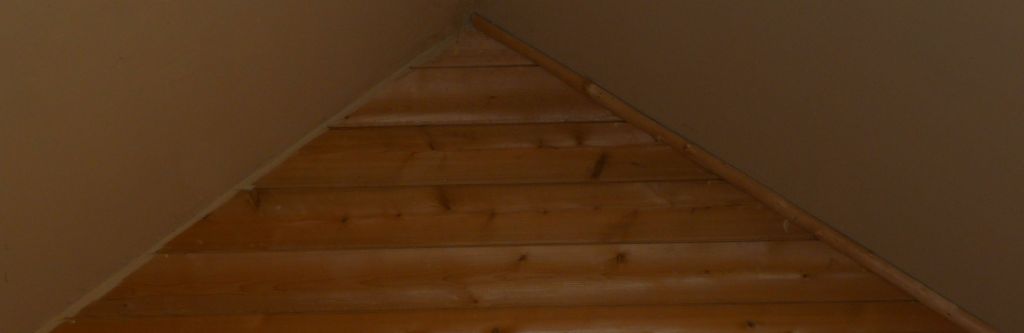
The End Peaks
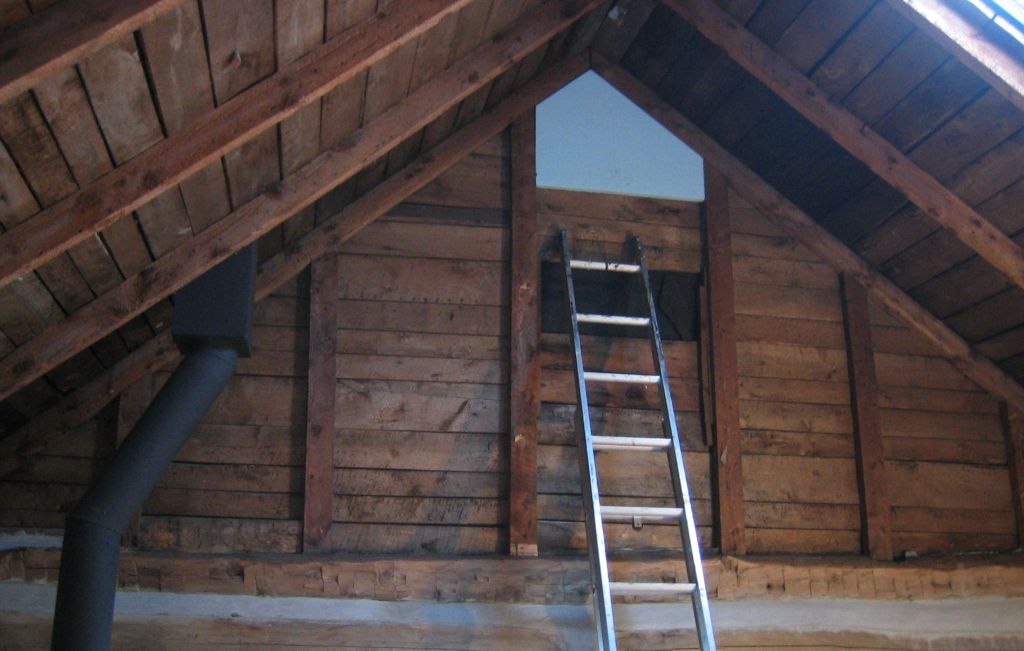
The east and west end peaks above the logs were boards with no insulation, so I began the process of insulating with foam boards.
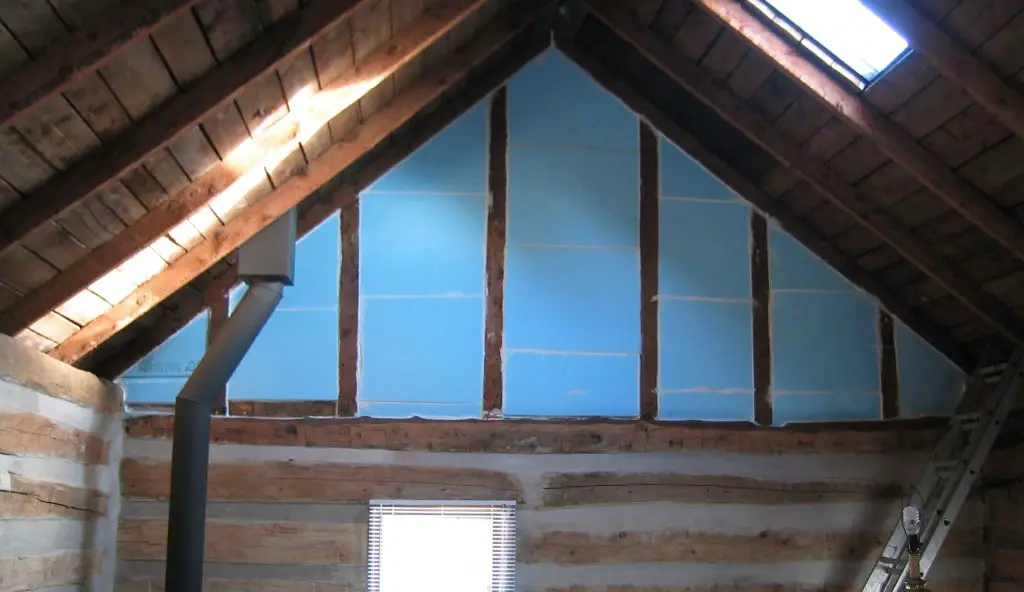
The east end wall insulated and caulked.
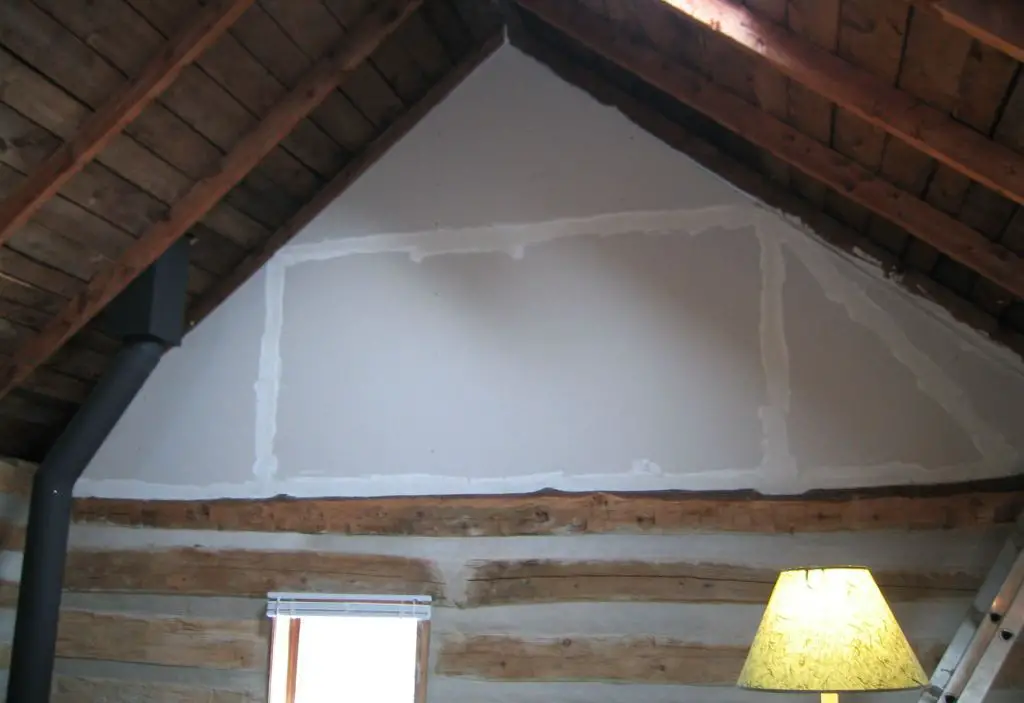
Over the insulation was put a layer of drywall. Note the chinking on the logs. The excess cement had to be washed off the logs before it looked right. It had not been done when this picture was taken.
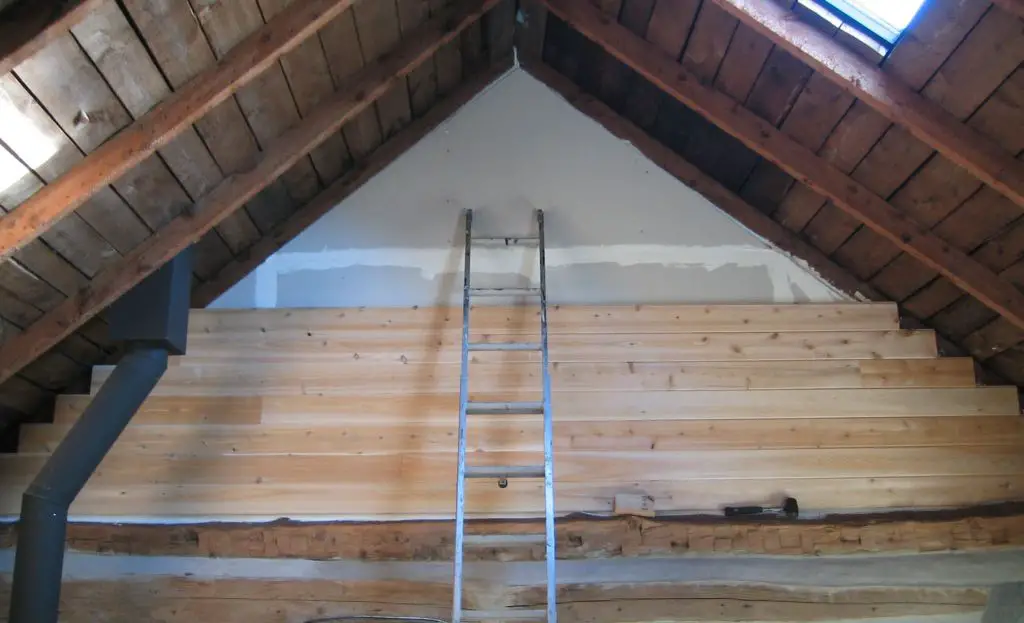
Over the drywall went tongue and groove white cedar.
Finished, except for the trim in the corners.
For the trim, I took a 16 foot long, thin, straight cedar tree, sliced it lengthwise into quarters, and installed it as trim. On the right side of picture it is installed.
Share:


Why does this site have ads?
Originally the content in this site was a book that was sold through Amazon worldwide. However, I wanted this story available to everyone free of charge, so I made this website. The ads on the site help cover the cost of maintaining the site and keeping it available.
Google + profile
![]()
Wild Foods Home Garden Logo Copyright © 2017 David G. Mills.
Text Copyright © 2014, 2015, 2016, 2017, 2018 David G. Mills.
All Photographs Copyright © 2014, 2015, 2016, 2017, 2018 David G. Mills except where noted.*
All Drawings Copyright © 2014, 2015, 2016, 2017, 2018 David G. Mills except where noted.
All Rights Reserved.
This may not be reproduced in any form, in whole or in part, without written permission from the author.