The Cedar Log Cabin
The Story of Living In & Restoring a Settler's Log Cabin
Dealing With the Ceiling & Redoing the Roof
The Ceiling
The ceiling structure in both the main room and the add-on were in quite bad shape. When the add-on was built, they rested one end of the roof rafters on the the roof of the main room where there was no support. To make it worse, the rafters of the main room were just 2X4's. They were full 2” X 4” rough cut cedar, but this was still too small for the job even before resting the back room rafters on them, about one third of the way up the ceiling. Also, the rafters were not spaced evenly, but were an average of around 22 inches on centre.
The way the roof was made, it would be hard to put larger rafters up there, as they would have to come down onto the face of the logs. I didn't want that, and there was no way I was going to tear off and replace the roof, so I had to come up with a different solution.
I decided to jack up the sagging rafters, then triple some and quadruple others with new 2X4's screwed into them. This would create homemade laminated beams. Next, I would take the load from the add-on off the main room rafters, and put it on the logs with a little wall behind where the cupboards would go.
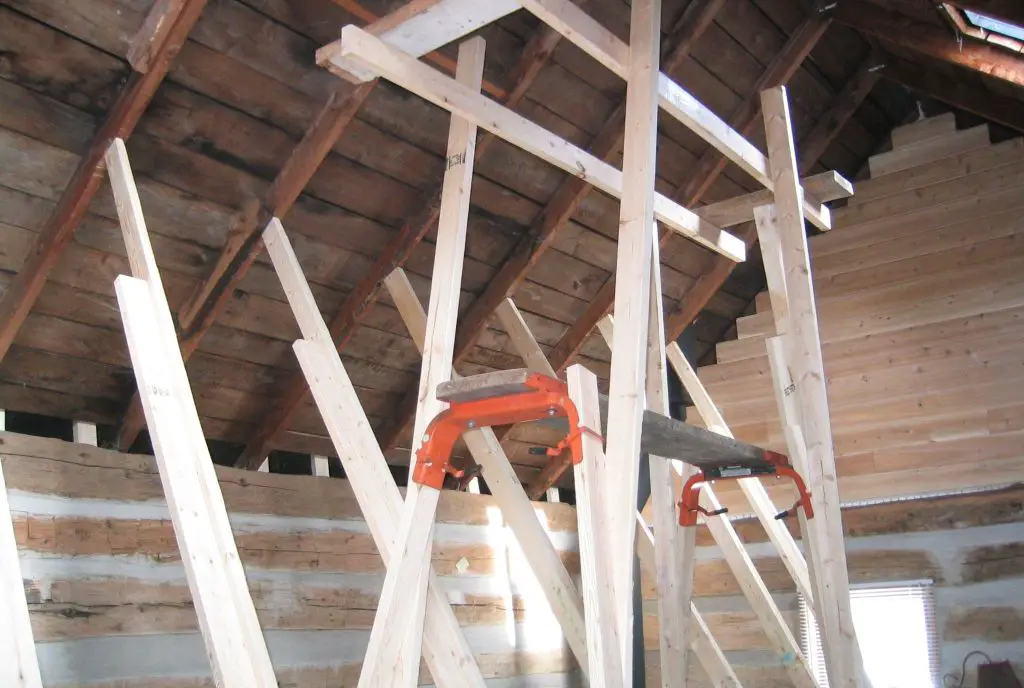
Using hydraulic car jacks, I would jack up one rafter a little, put in a 2X4 brace made of two 2X4's screwed together at 90 degree angles, and move onto the next rafter and do the same thing. I kept going back and forth from one end to the other until it was jacked up a little past straight. This was a slow process done early in 2007 while Pamela was still living there. It made it hard to live in the room, and Pamela was trying to find a job at this time. We had no closets and the whole job was dusty. I had to screw 2X4's to the floor so the jack boards wouldn't slip, and that made walking around treacherous.
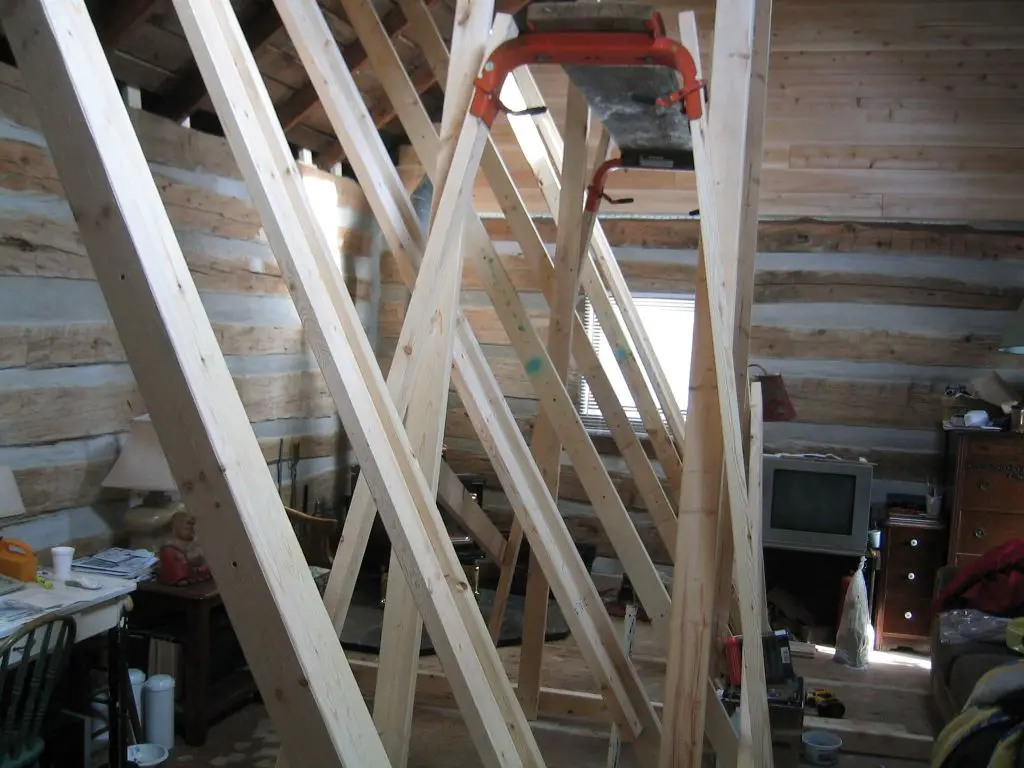
Living in the cabin while jacking up the roof rafters.

After the rafters were tripled (some quadrupled) and screwed in, the jacking posts were removed. When the ceiling sank a little after the jack boards were removed, the ceiling was straight.
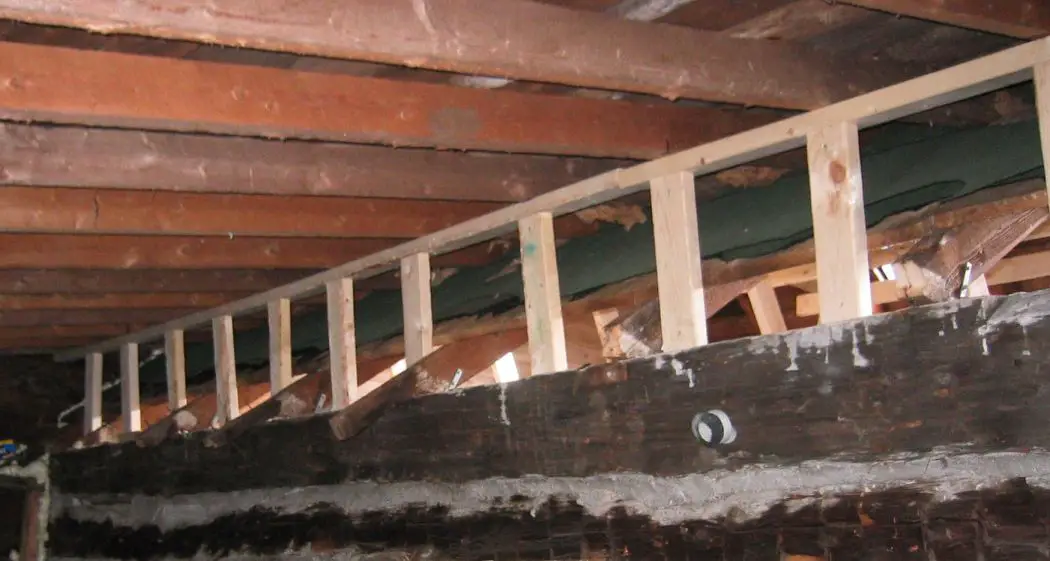
This picture is taken from the back add-on room. The rafters from the main room can be seen resting on the logs. You can see the rafters from the back room were laid on the roof of the main room. This, and the rafters being too small, is what caused them to sag badly under snow loads. When I jacked up the main room rafters, I built the structure, that can be seen here made from the new lumber, to take the load from the add-on room rafters off the main room rafters, and place the load down on the logs. It is all screwed together including to the log tops.
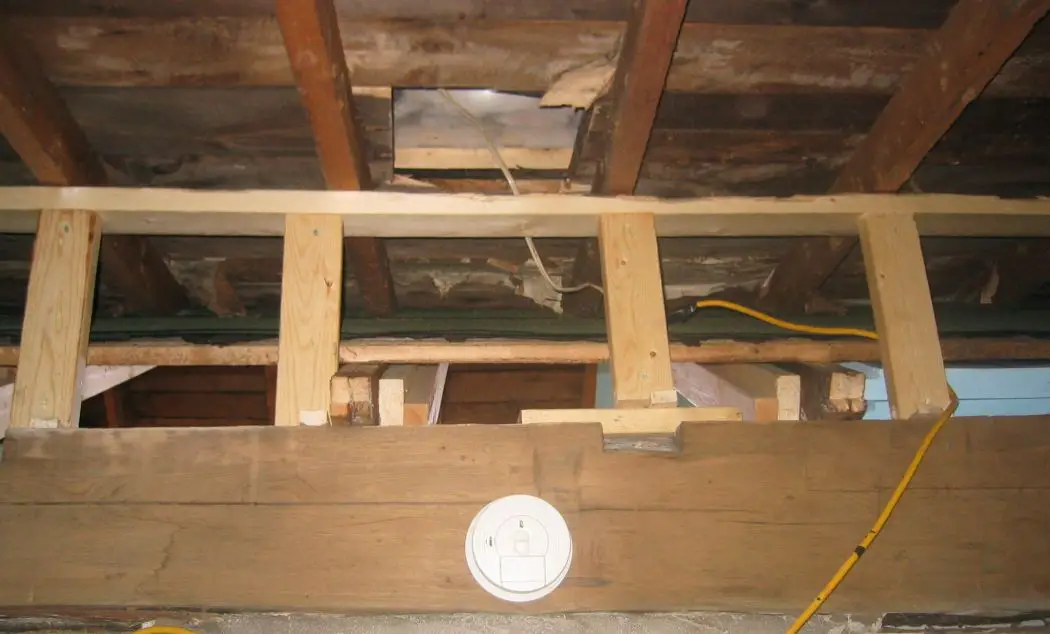
You can see the tripled & quadrupled main room rafters from the back room.
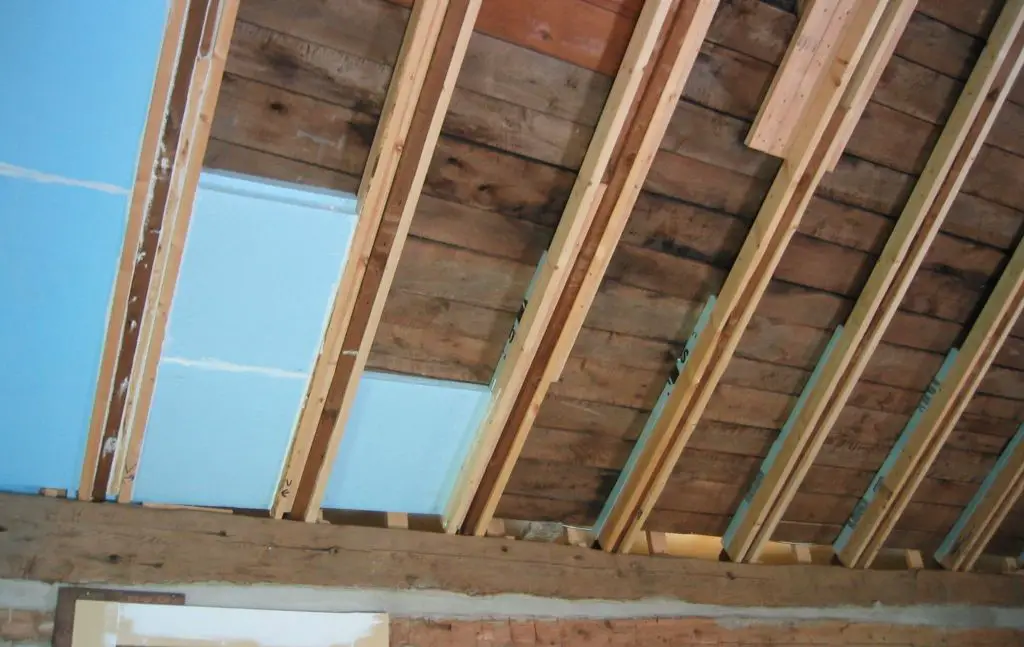
The next step was to install two layers of two inch thick foam board insulation. All edges were caulked to prevent any air leaks.
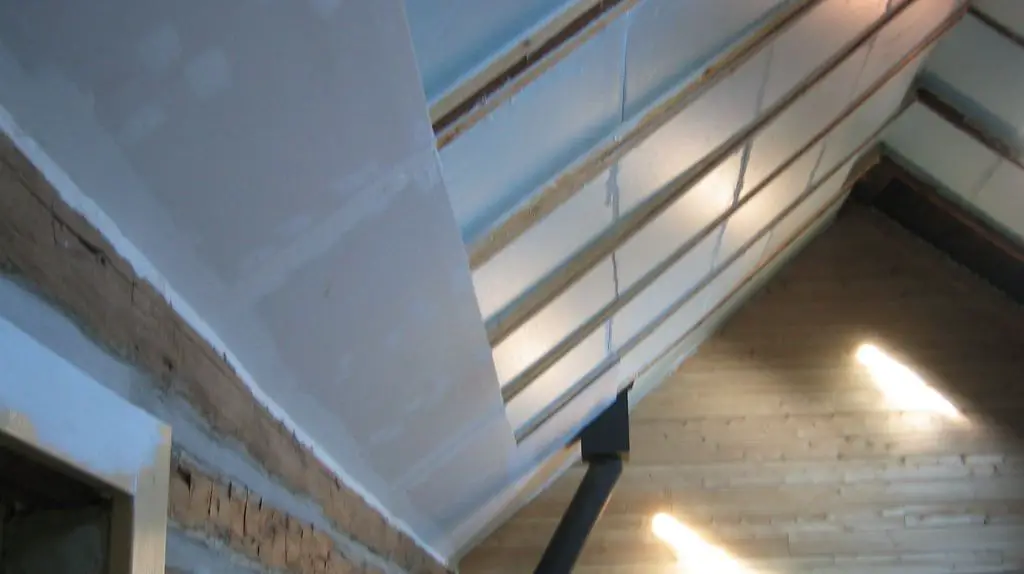
After the insulation was in, the next step was putting up drywall. I was working alone by this time, and combined with the height of the ceiling, I decided to cut the drywall sheets in half lengthwise. It took a while to get it done, but it felt so much better in the cabin when it was sanded and painted.
The Roof
Now that the ceiling was done from the inside, something had to be done about the outside. Even though I had jacked up sagging areas and reinforced them, the roof was still uneven, not square, and the shingles were shot. Another issue was there was very little overhang past the walls on the roof, and no protection over the front or rear doors. When it rained, you got soaked while getting the key in the lock, and the snow fell right up to the door.
There was also a serious long term issue. Now that the roof was insulated from below, there was no gap for hot air to escape under new shingles to prevent them from drying out too quickly. It would hardly be worth it to put on new shingles, just to have them be ruined in a few short years. I did think of metal roofing, but it would not help with the other problems.
To remedy all of the above, I decided to put another roof with a venting gap over the old one, screwing everything together, creating a corrugated effect to make it super strong, be square, and have overhangs and ventilation.
Since the old roof boards were all white cedar and had lasted even during the 14 years the cabin was unoccupied, I wanted to use Cedar again.
I came up with a design and began the process of making a roof over a roof.
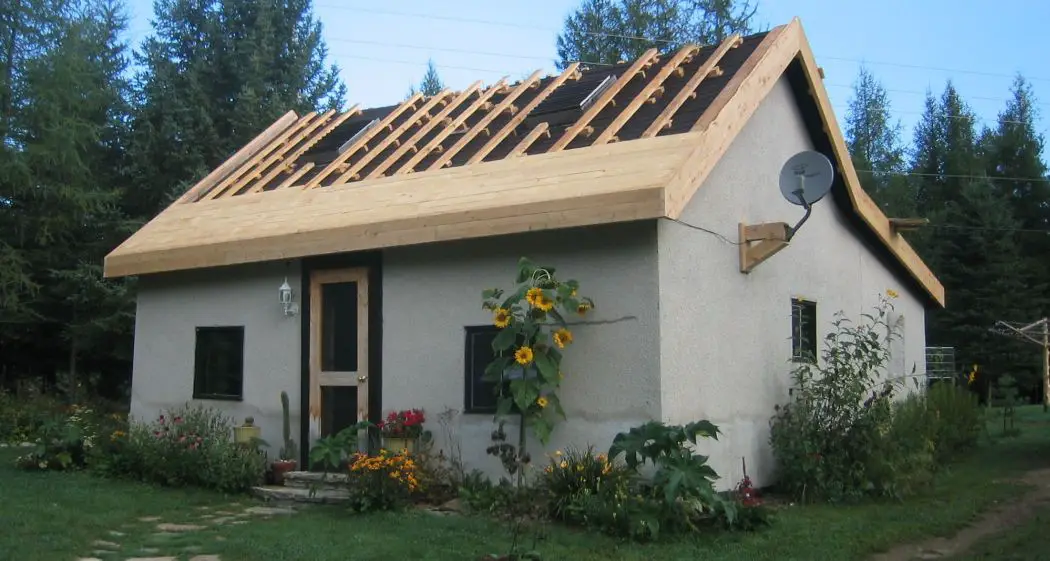
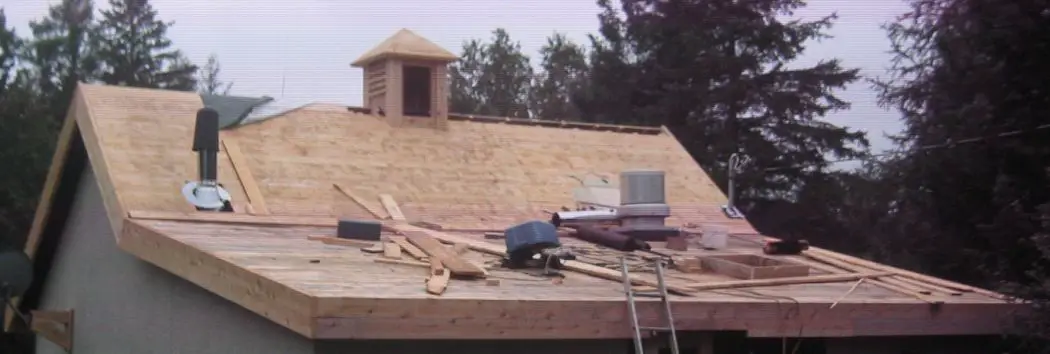
Putting an entire new roof over the old one. The vertical boards are full 2X4's of rough cut white cedar. As the roof underneath was uneven, I shimmed the boards level. The shims are screwed into the old roof, and the new wood is screwed into the shims. Every thing was screwed together with hundreds of 4” decking screws. I wanted the two roofs to create a corrugated effect, making it super strong.
In every house I've worked on in the past, the fascia was made of wood that was too thin to hold eves trough under a heavy snow and ice load. I made the decision to make the fascia out of two full 2X6” white cedar boards and screw it all together. This way when the eves trough was hung, it would be on something very, very solid. And being cedar, it would last and last.
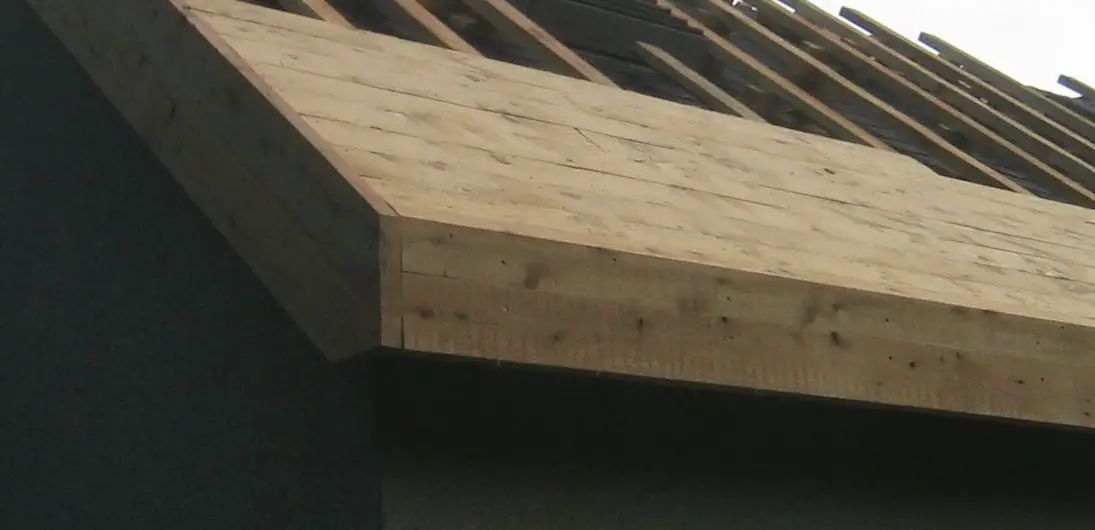
Detail of fascia made out of full two 2X6” white cedar screwed together.
Now, when the roof was finished, I wanted it to vent very well, but I didn't want those standard commercial roof vents on the cabin. I wanted something authentic looking, and that would give the cabin some character. I had always loved cupolas when I've seen them, and decided that is what this place needed.
Again, I made it out of full 2” thick white cedar, and 6X6 Cedar logs, and knew it should be installed before I got too far along with the roof.
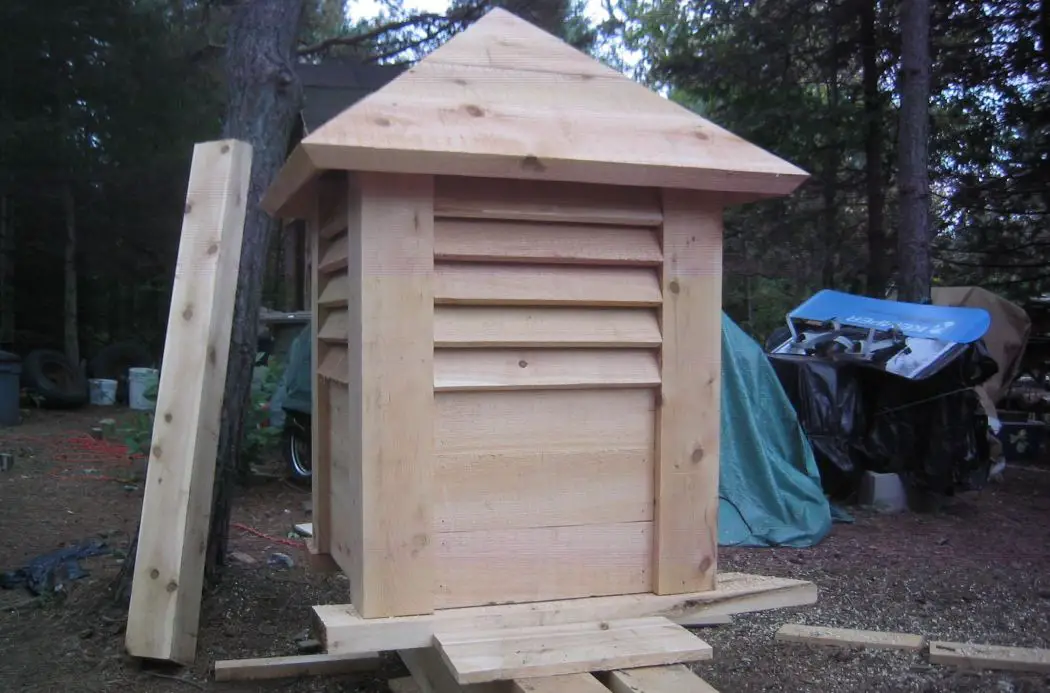
The cupola after being made in the yard.
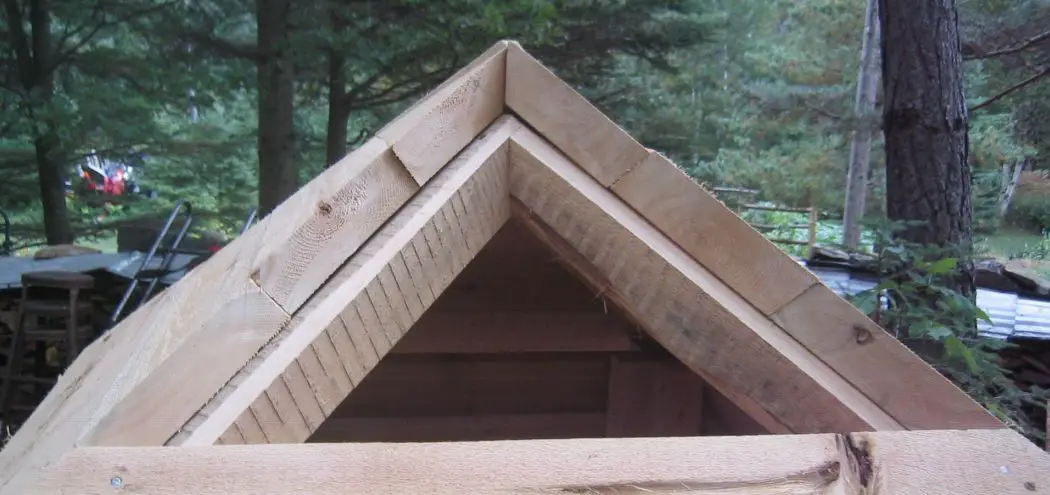
Detail showing construction of the cupola before last three boards were screwed in.
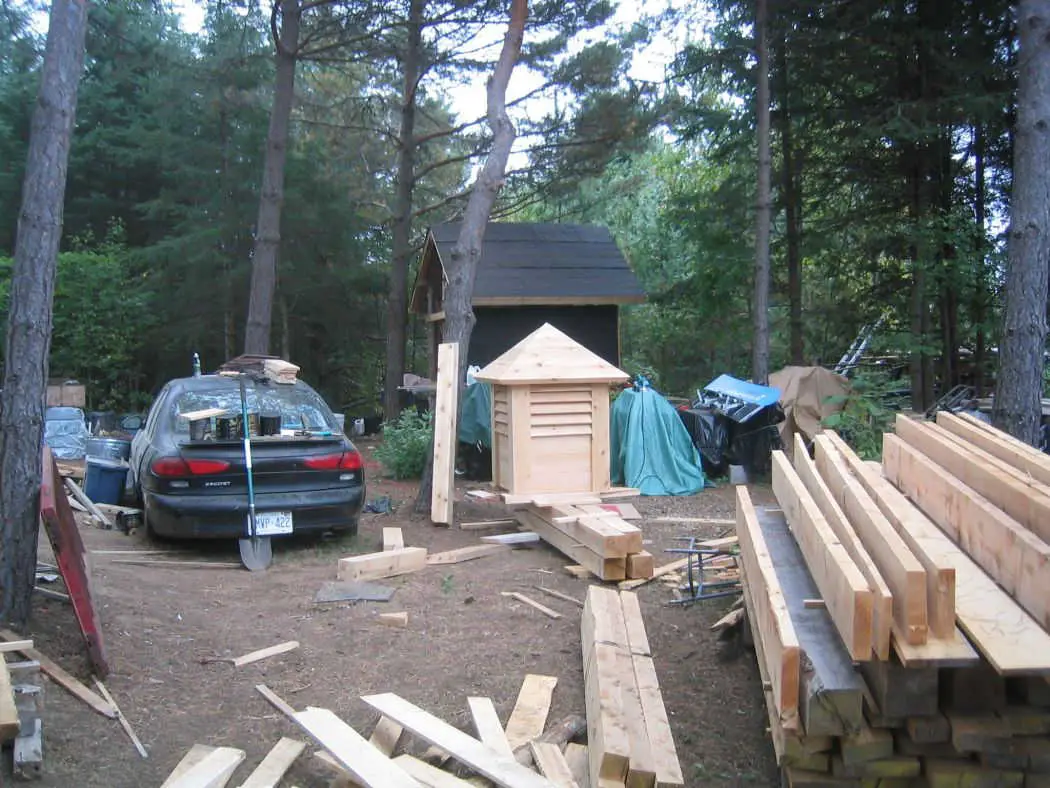
My workshop in the woods. A real mess, true, but so nice to work in the woods in the fall. The cupola is sitting on four 6X6” white cedar square logs. This is what I made the four corners of the cupola out of. Very, very solid but quite light and rot resistant.
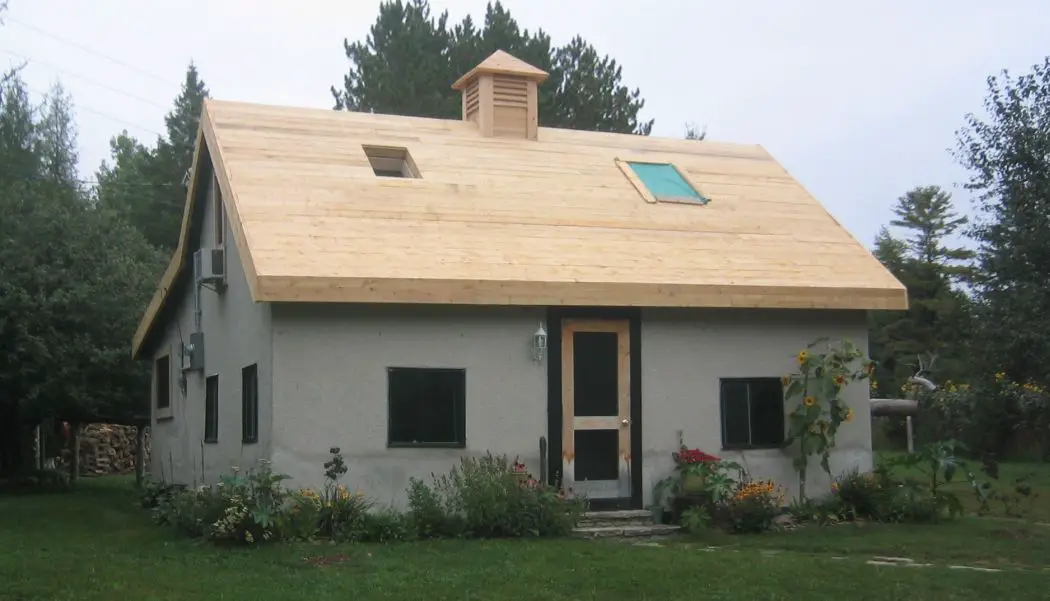
The cupola on the roof from the front.
The cupola on roof from back. I made a removable door for servicing the inside of the cupola.
Getting the cupola on the roof turned out to be a challenge. Even though it was made of cedar, it was heavy, and I was working alone. I got it onto the back of my truck, parked the truck right behind the cabin, got under the cupola, pushed it onto the edge of the roof, and tilted it onto its side just on the edge of the roof.
After it was on the roof, it was just a matter of working it up to the peak and placing it. I was pleased that I had measured and cut correctly, so it just plopped into place. It was then a matter of attaching it with dozens of 4” decking screws to the roof.
I had to laugh as I was working after it was up. People would take a double look – you could see the shocked look in the faces of locals when they saw it as they drove by.
The local building inspector happened to be driving by at this time, and pulled in and wanted to know what was going on. He was not happy I had no building permit, but I was courteous and showed him around, and all that I was doing. I explained the hows and whys of each aspect. I took him inside, showed him the finished inside and the before pictures. When I was done giving him the tour, he shook my hand and said the place would hold up through a hurricane. He said he wished everyone built things so solidly, and was impressed everything was screwed together, not nailed. He also complimented me on thinking the engineering aspects through. I never saw him again, or heard from him.
Now the next step was to install overhangs over the front and back door. I wanted them to be authentic looking, and made of the 6X6” cedar logs and 2X6” cedar boards. I had never done anything like this before, but just decided to go ahead and give it a shot. This was one of those jobs I couldn't wait to get to each morning.
The first one was the front, and although I wanted dovetail joints in the logs, I chickened out and made square type joints.
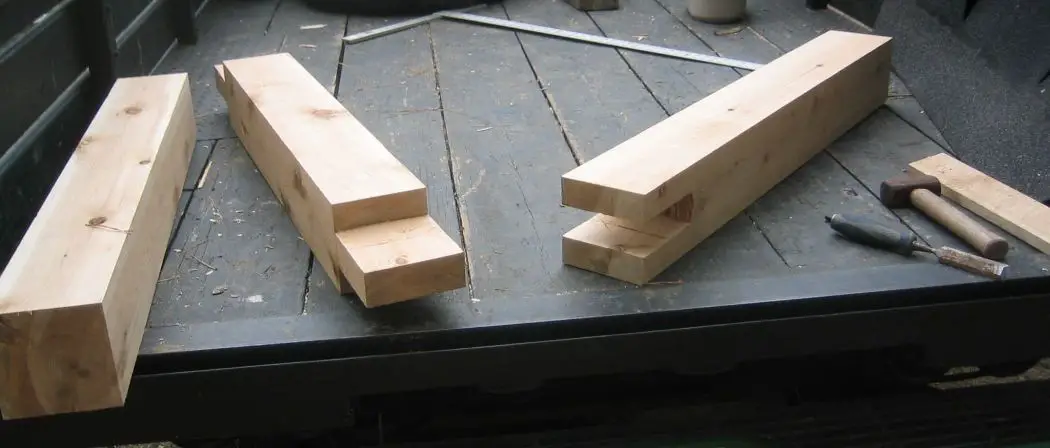
The first three logs for the front overhang. I had no workbench, so the back of my homemade pickup truck served the purpose.
After the experience of getting the cupola onto the roof, I decided to make the overhang in place. As it was at the front, and I didn't really know what I was doing, I didn't want anyone driving by to see what I was up to, in case it was a total failure. The time of year this was being done was the most quiet on the road, so I had lots of time between the cars and trucks to work. When I heard a car or truck coming down the road, I would throw a blanket over the whole thing and pretend I was working on the roof itself.
It went better than I expected. I didn't have to waste any wood. I really like working with big pieces of wood, and because the cedar is so light and easy to work with, it made the job much simpler. This was to be the first thing along with the cupola you would see from the road, so I really wanted to get it right and have it set off the front of the cabin.
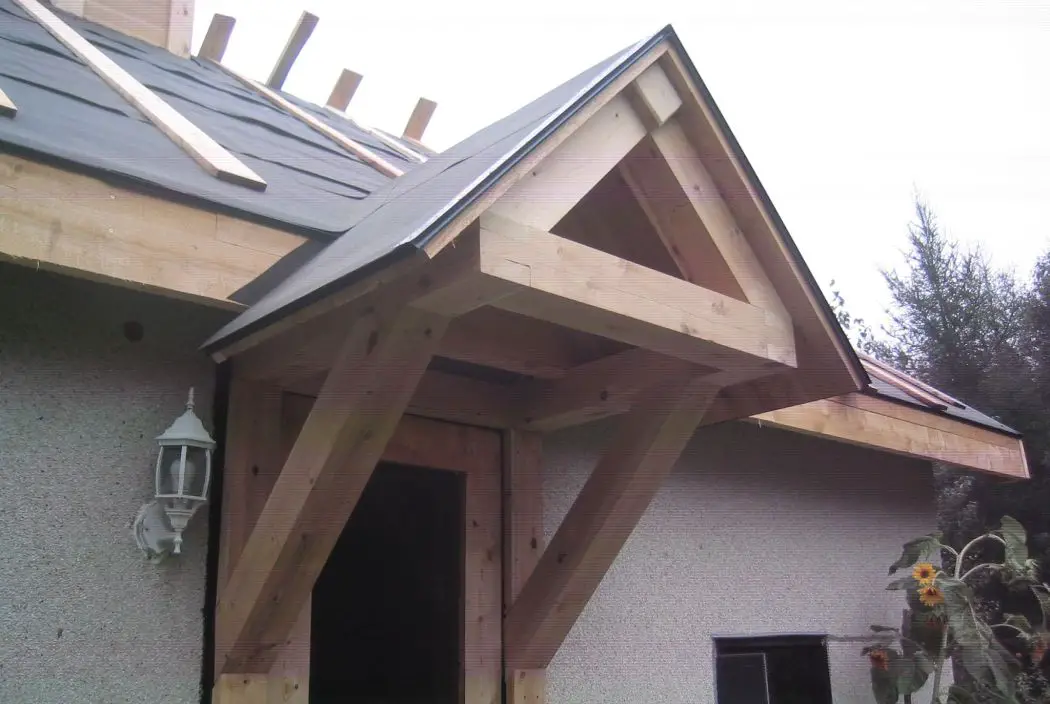
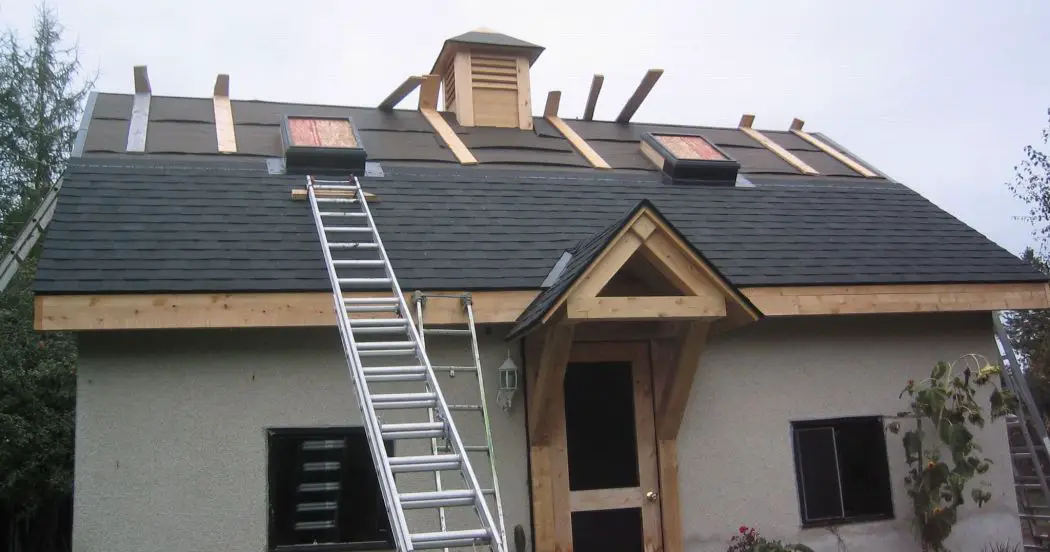
The front overhang finally done, and starting the process of shingling.
I wanted something to make a statement at the front of the cabin, this and the cupola did the trick. This now gave you a hint of the log cabin that was inside, something the cement exterior did not do.
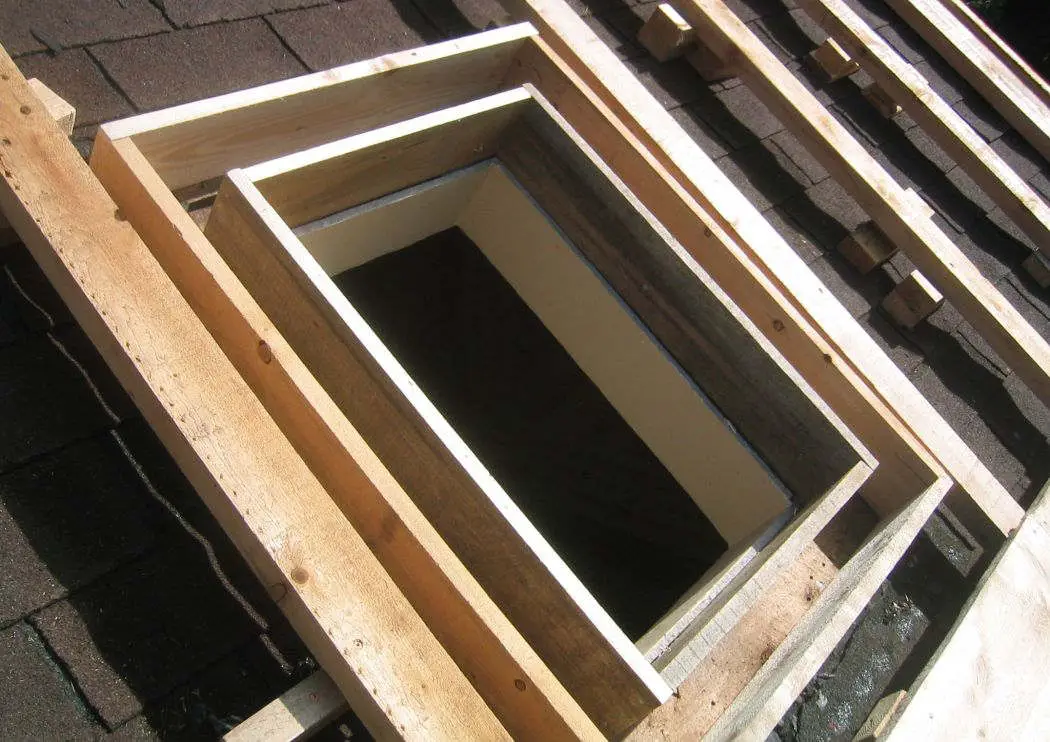
The skylights that were flush mounted on the old roof had to come out. I built boxes around the tunnel that would lead to the new skylight and back filled it with foam insulation.
I didn't want flush mounted skylights, I wanted box mounted, so I built frames of cedar, and installed them while the roof was being shingled and made step flashing out of sheets of aluminium valley flashing available at the local building centre.
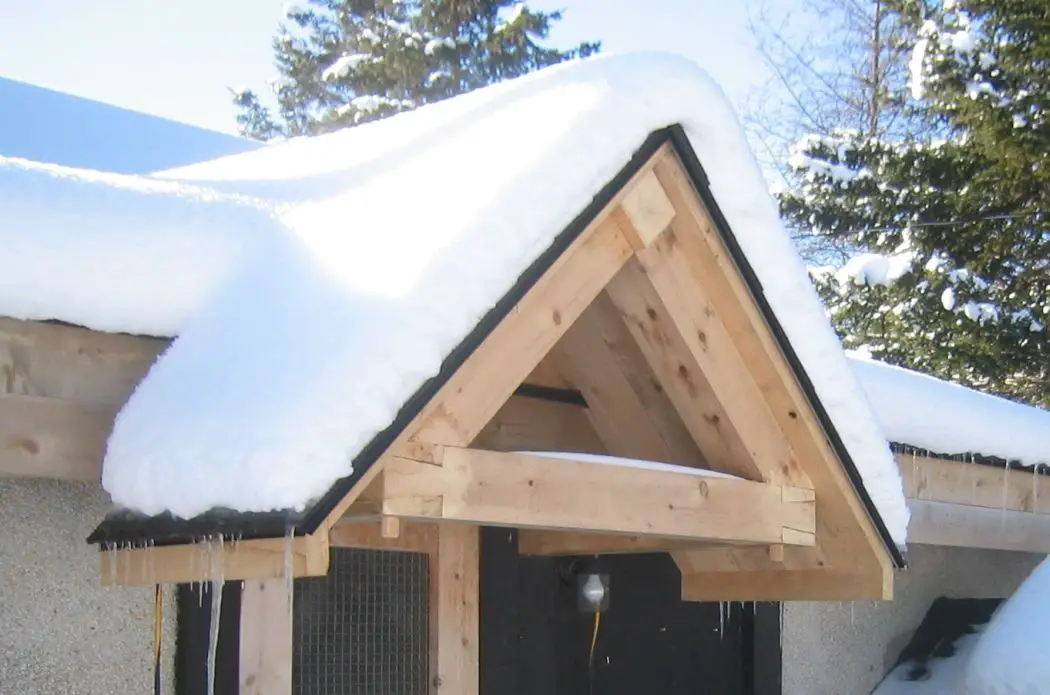
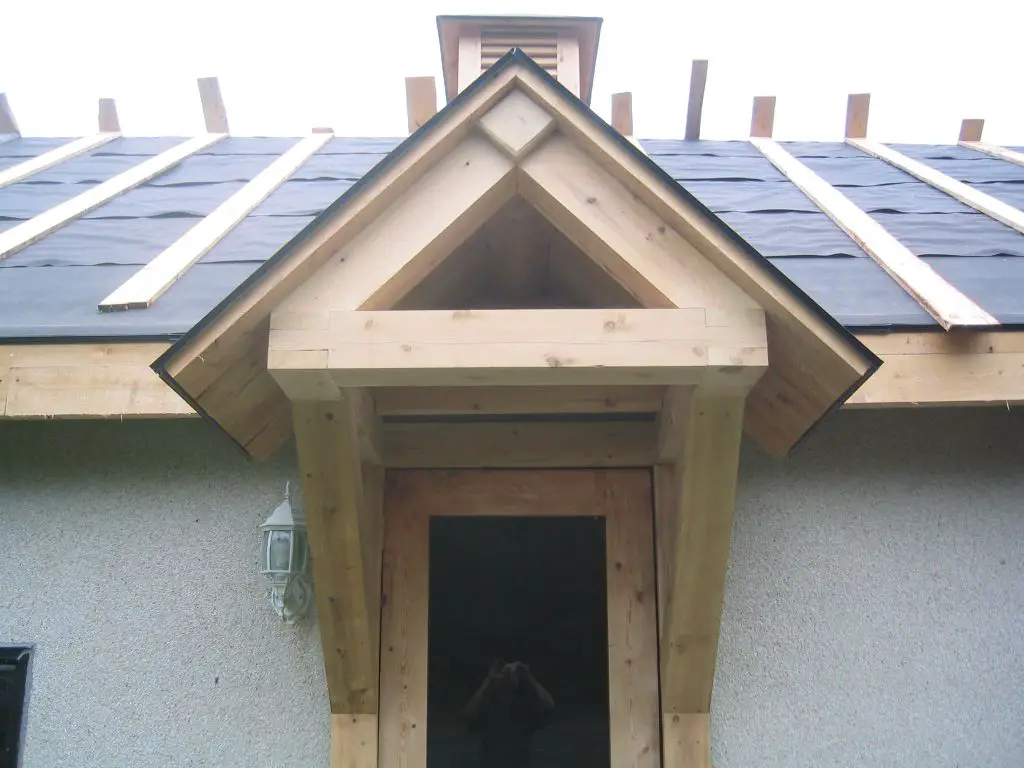
With the overhang for the back door, I mustered up the courage to do dove tail joints with pegs holding the joints together. The first snow came shortly after I finished the roof – very gratifying.
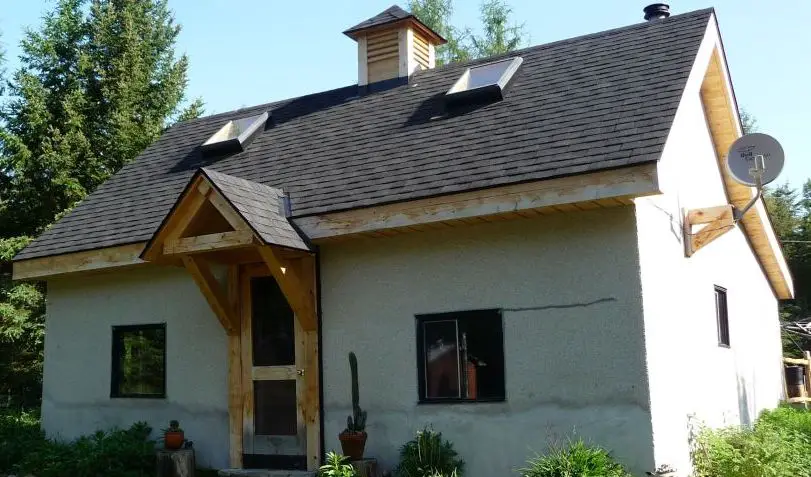
This is the finished roof. The soffits are made from 3/4 inch cedar with 1/2 inch gaps at the front and back for air flow. There is black screening under the soffit wood to stop insects from getting in. The next summer I got up on the roof on a sunny day to check the air flow. The air flow through the roof and out the cupola was fantastic, and a relief. Click here for before pictures of roof.
Share:


Why does this site have ads?
Originally the content in this site was a book that was sold through Amazon worldwide. However, I wanted this story available to everyone free of charge, so I made this website. The ads on the site help cover the cost of maintaining the site and keeping it available.
Google + profile
![]()
Wild Foods Home Garden Logo Copyright © 2017 David G. Mills.
Text Copyright © 2014, 2015, 2016, 2017, 2018 David G. Mills.
All Photographs Copyright © 2014, 2015, 2016, 2017, 2018 David G. Mills except where noted.*
All Drawings Copyright © 2014, 2015, 2016, 2017, 2018 David G. Mills except where noted.
All Rights Reserved.
This may not be reproduced in any form, in whole or in part, without written permission from the author.